Next.js
This guide will teach you to implement SCIM Provisioning in your Next.js app.
Quickstart
Directory sync helps organizations automate the provisioning and de-provisioning of their users in the Enterprise SaaS app. As a result, it streamlines the user lifecycle management process by saving valuable organizational hours, creating a single truth source of the user identity data.
Install SAML Jackson
Let’s start by installing SAML Jackson to your Next.js app.
npm i --save @boxyhq/saml-jackson
Initialize SAML Jackson
Create a new file, jackson.ts that holds the Jackson initialization.
import type { JacksonOption, IDirectorySyncController } from '@boxyhq/saml-jackson';
import jackson from '@boxyhq/saml-jackson';

let directorySyncController: IDirectorySyncController;

const g = global as any;

const opts = {
  externalUrl: `http://localhost:3000/`,
  samlPath: '/',
  scimPath: '/api/scim',
  db: {
    engine: 'sql',
    type: 'postgres',
    url: "postgres://username:password@localhost:5432/your-database-name",
  },
} as JacksonOption;

export default async function init() {
  if (!g.directorySyncController) {
    const ret = await jackson(opts);

    directorySyncController = ret.directorySyncController;
    g.directorySyncController = directorySyncController;
  } else {
    directorySyncController = g.directorySyncController;
  }

  return {
    directorySyncController,
  };
}
Create the Directory
The first step towards the integration is creating a directory for a tenant.
Directory Sync providers (Identity Providers) require you to provide a SCIM Base URL and SCIM Auth token. Both are unique for each directory your app users create.
const { data, error } = await directorySyncController.directories.create({
  name: 'any-name',
  type: 'okta-scim-v2',
  tenant: "tenant-identifier"
  product: "product-identifier"
});
The response will looks like as below:
{
  "data": {
    "id": "58b5cd9dfaa39d47eb8f5f88631f9a629a232016",
    "name": "any-name",
    "tenant": "tenant-identifier",
    "product": "product-identifier",
    "type": "okta-scim-v2",
    "log_webhook_events": false,
    "scim": {
      "path": "/api/scim/58b5cd9dfaa39d47eb8f5f88631f9a629a232016",
      "secret": "IJzAoevjD_liiiy-VkDtXg",
      "endpoint": "http://localhost:5225/api/scim/58b5cd9dfaa39d47eb8f5f88631f9a629a232016"
    },
    "webhook": {
      "endpoint": "",
      "secret": ""
    }
  },
  "error": null
}
Note the keys scim.endpoint and scim.secret from the above JSON. Your users need these values while configuring SCIM app on their Identity Provider.
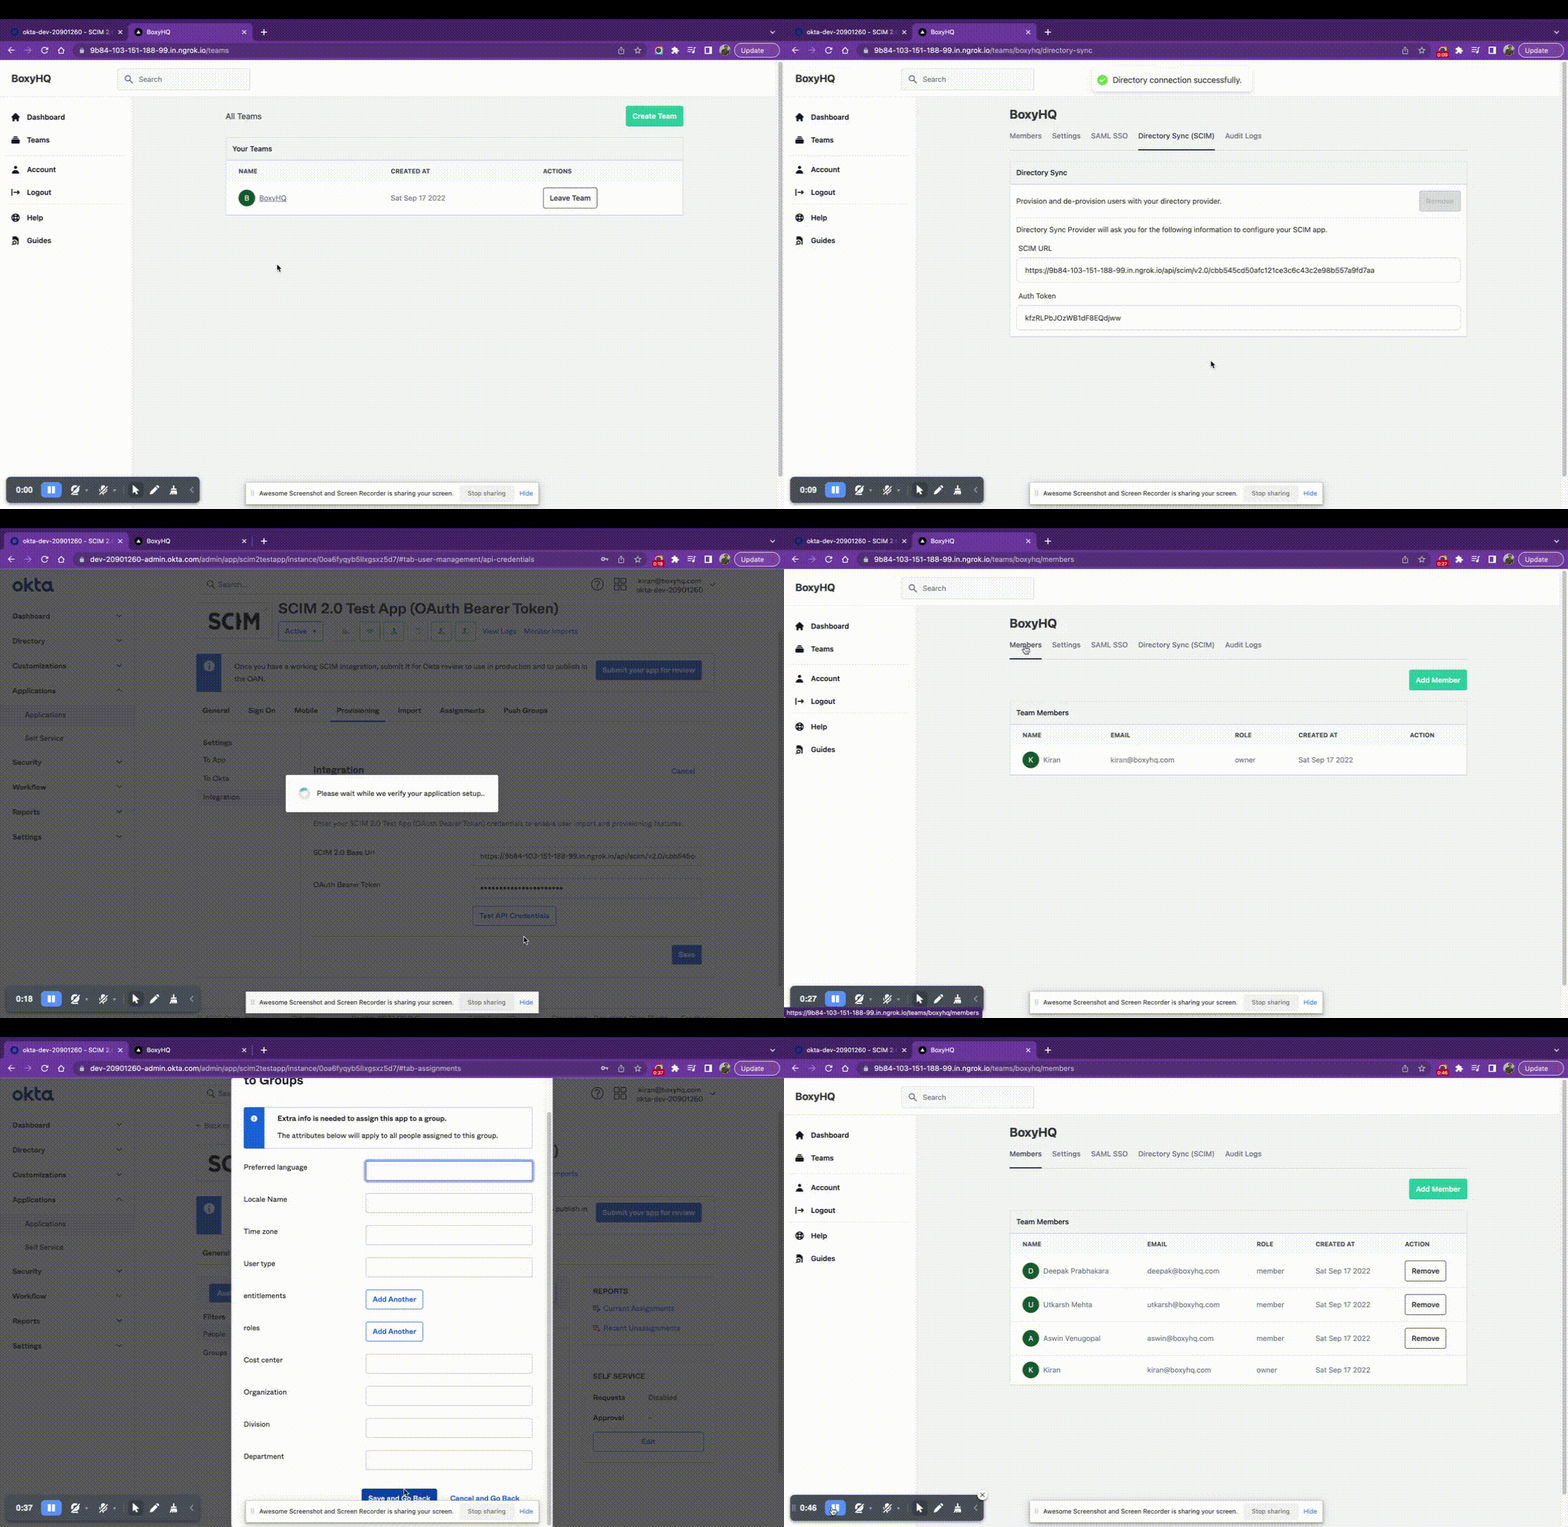
Typically you'll have to provide some UI where the users can create the directory for their providers and display SCIM Base URL and SCIM Auth Token for the directory the user created. Usually, this UI comes under organization settings or team settings.
For example, see the demo below.

You can retrieve the supported list of Directory Sync providers by calling the method directorySyncController.providers().
Understand SCIM API Requests
A key piece to implementing SCIM is building a RESTful API that IdP's SCIM provisioning can call to provision users and groups to your app. The requests will come to the SCIM Base URL (scim.endpoint).
Here are the calls your API should be able to receive from IdP SCIM provisioning for a given SCIM Base URL (scim.endpoint).
Users Provisioning
| Route | Methods |
|---|---|
| /Users | POST |
| /Users/:id | GET |
| /Users/:id | PUT, PATCH |
| /Users/:id | DELETE |
Push Groups and Group Memberships
| Route | Methods |
|---|---|
| /Groups | POST |
| /Groups/:id | GET |
| /Groups/:id | PUT, PATCH |
| /Groups/:id | DELETE |
Handle SCIM API Requests
Now let's add the route to handle the incoming requests from the Directory Sync providers.
import type { NextApiRequest, NextApiResponse } from 'next';
import type { DirectorySyncRequest, HTTPMethod, DirectorySyncEvent } from '@boxyhq/saml-jackson';

import jackson from '../../../lib/jackson';

export default async function handler(req: NextApiRequest, res: NextApiResponse) {
  const { directorySyncController } = await jackson();

  const { method, query, body } = req;

  const directory = query.directory as string[];
  const [directoryId, path, resourceId] = directory; // Extract the params

  // Construct the event
  const request: DirectorySyncRequest = {
    method: method as HTTPMethod,
    body: body ? JSON.parse(body) : undefined,
    directoryId: directoryId,
    resourceId: resourceId,
    resourceType: path === 'Users' ? 'users' : 'groups',
    apiSecret: extractAuthToken(req),
    query: {
      count: req.query.count ? parseInt(req.query.count as string) : undefined,
      startIndex: req.query.startIndex ? parseInt(req.query.startIndex as string) : undefined,
      filter: req.query.filter as string,
    },
  };

  // Handle the requests
  const { status, data } = await directorySyncController.requests.handle(request, async (event: DirectorySyncEvent) => {
    console.log(event); // Do something with the event
  });

  // Send the response back
  return res.status(status).json(data);
}

// Fetch the auth token from the request headers
const extractAuthToken = (req: NextApiRequest): string | null => {
  const authHeader = req.headers.authorization || null;

  return authHeader ? authHeader.split(' ')[1] : null;
};
pages/api/scim/[...directory].ts is a catch all paths route. Matched parameters will be sent as a query parameter to the page, and it will always be an array.
Look at the highlighted lines, and you can pass an async callback method to the directorySyncController.requests.handle as a second argument. This method will be called with SCIM event as the first argument.
Checkout the documentation for SCIM events and Types to understand more about the events.
Use these events to trigger actions in your application, such as creating a new user in your application, or updating a user in your application based on the changes made in the directory.
Configure the Identity Provider
Your users should typically do this step at their end. We've detailed documentation for each Directory Sync provider.