Manage SSO Connections
On the Admin Portal Enterprise SSO menu, you can see the SSO Connections details.
Add SAML Connections
Once you've set up the SAML app on your Identity Provider, the Identity Provider will generate a SAML Metadata file.
The SAML metadata file contains information about the various SAML Authorities that can be used in SAML 2.0 protocol message exchanges.
Download the SAML Metadata file from your IdP and follow the below steps for adding the SAML connection.
- Click the button New Connection.
- Choose SAML as the type.
- Give your new connection a name.
- Add your Tenant (Eg: boxyhq.com) and Product (Eg: flex).
- Add Allowed redirect URLs.
- Add Default redirect URL.
- Paste the Raw IdP XML.
- If ForceAuthn is checked, it means that the user will be forced to re-authenticate at SAML IdP, even if they have an active session.
- Click the button Save Changes.
Now you've successfully added your first SAML connection.
Add OIDC Connections
Once you've registered the OIDC app on your Identity Provider, the Identity Provider will generate a clientId and clientSecret.
The clientSecret will be used to authenticate the oidc client (in this case jackson) and obtain the access_token.
Also get the OpenID provider discovery endpoint (usually ending in /.well-known/openid-configuration) and follow the below steps for adding the OIDC connection.
- Click the button New Connection.
- Choose OIDC as the type.
- Give your new connection a name.
- Add your Tenant (Eg: boxyhq.com) and Product (Eg: flex).
- Add Allowed redirect URLs.
- Add Default redirect URL.
- Enter the URL for OpenID Provider discovery which exposes the Provider Metadata.
- Paste the clientId and clientSecret values into Client ID [OIDC Provider]/Client Secret [OIDC Provider] fields in the UI.
- Click the button Save Changes.
Now you've successfully added your first OIDC connection.
SAML Federation
SAML Federation is an enterprise feature and you need to have an enterprise license to use this feature.
From the Admin Portal go to Enterprise SSO > SAML Federation.
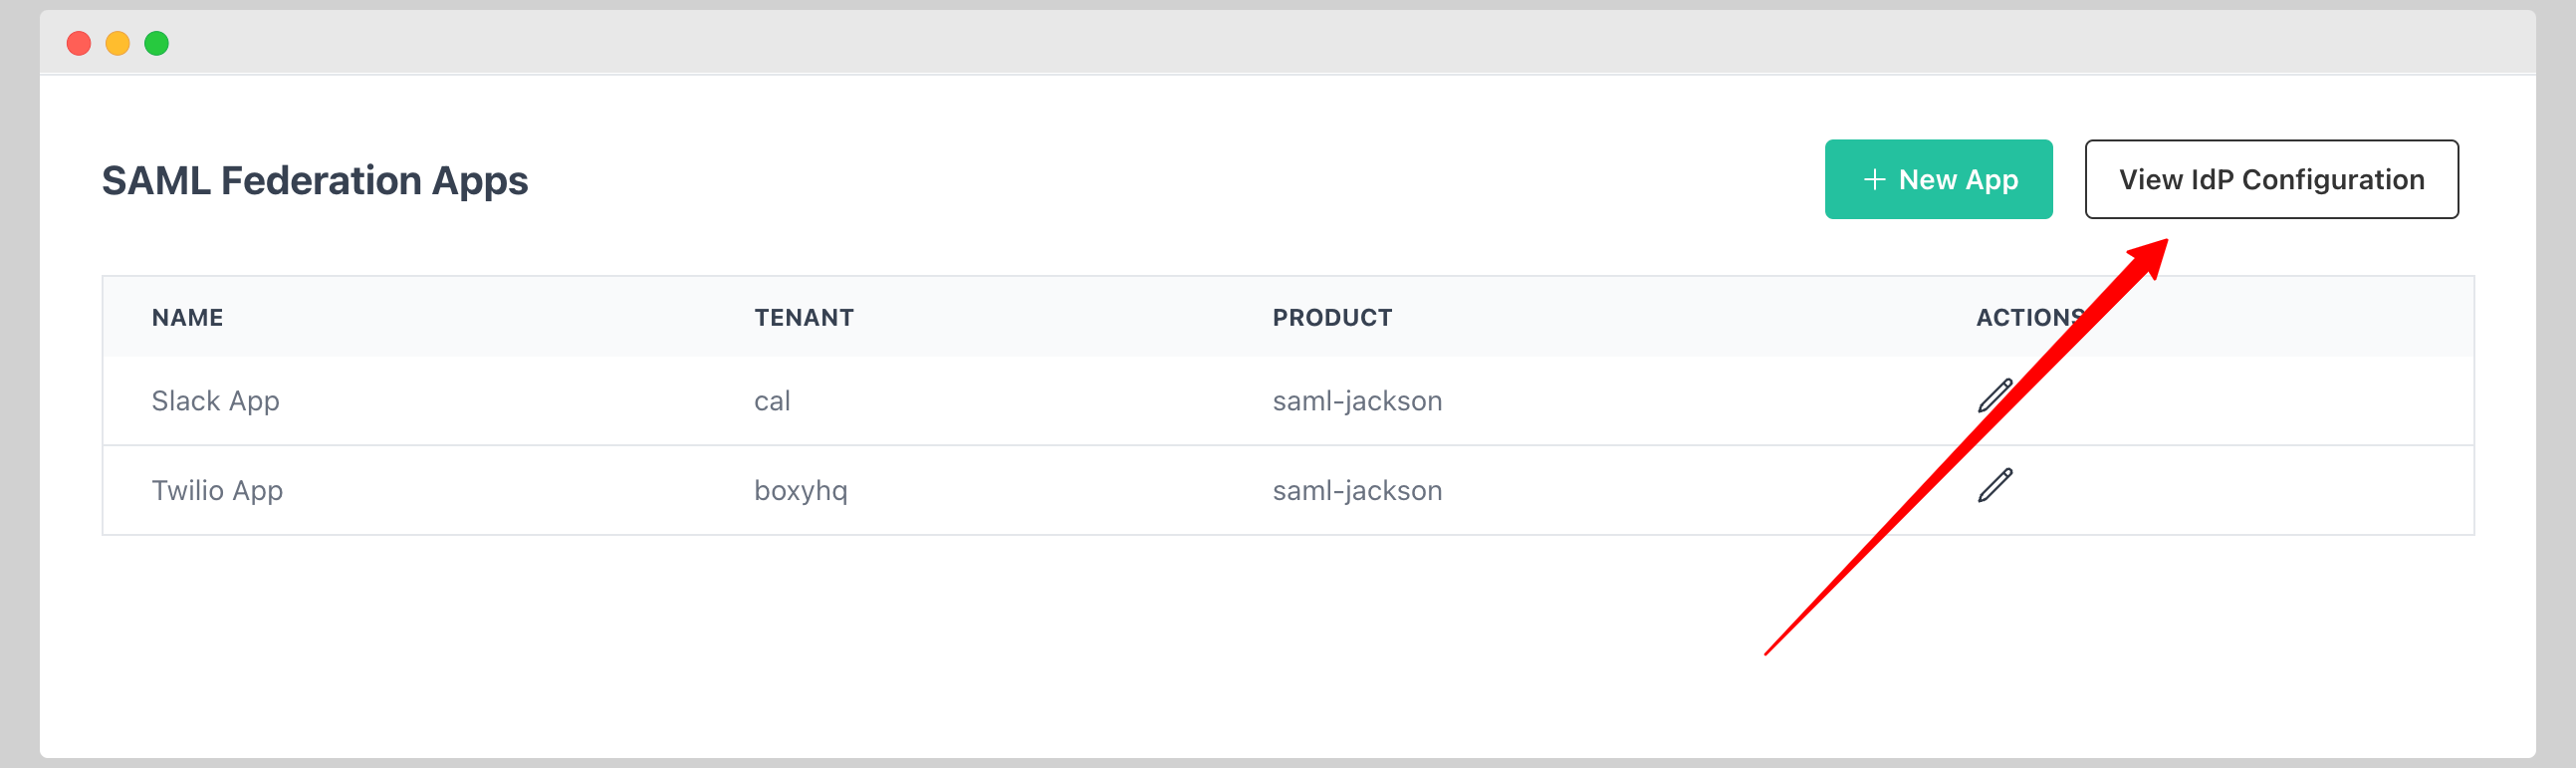
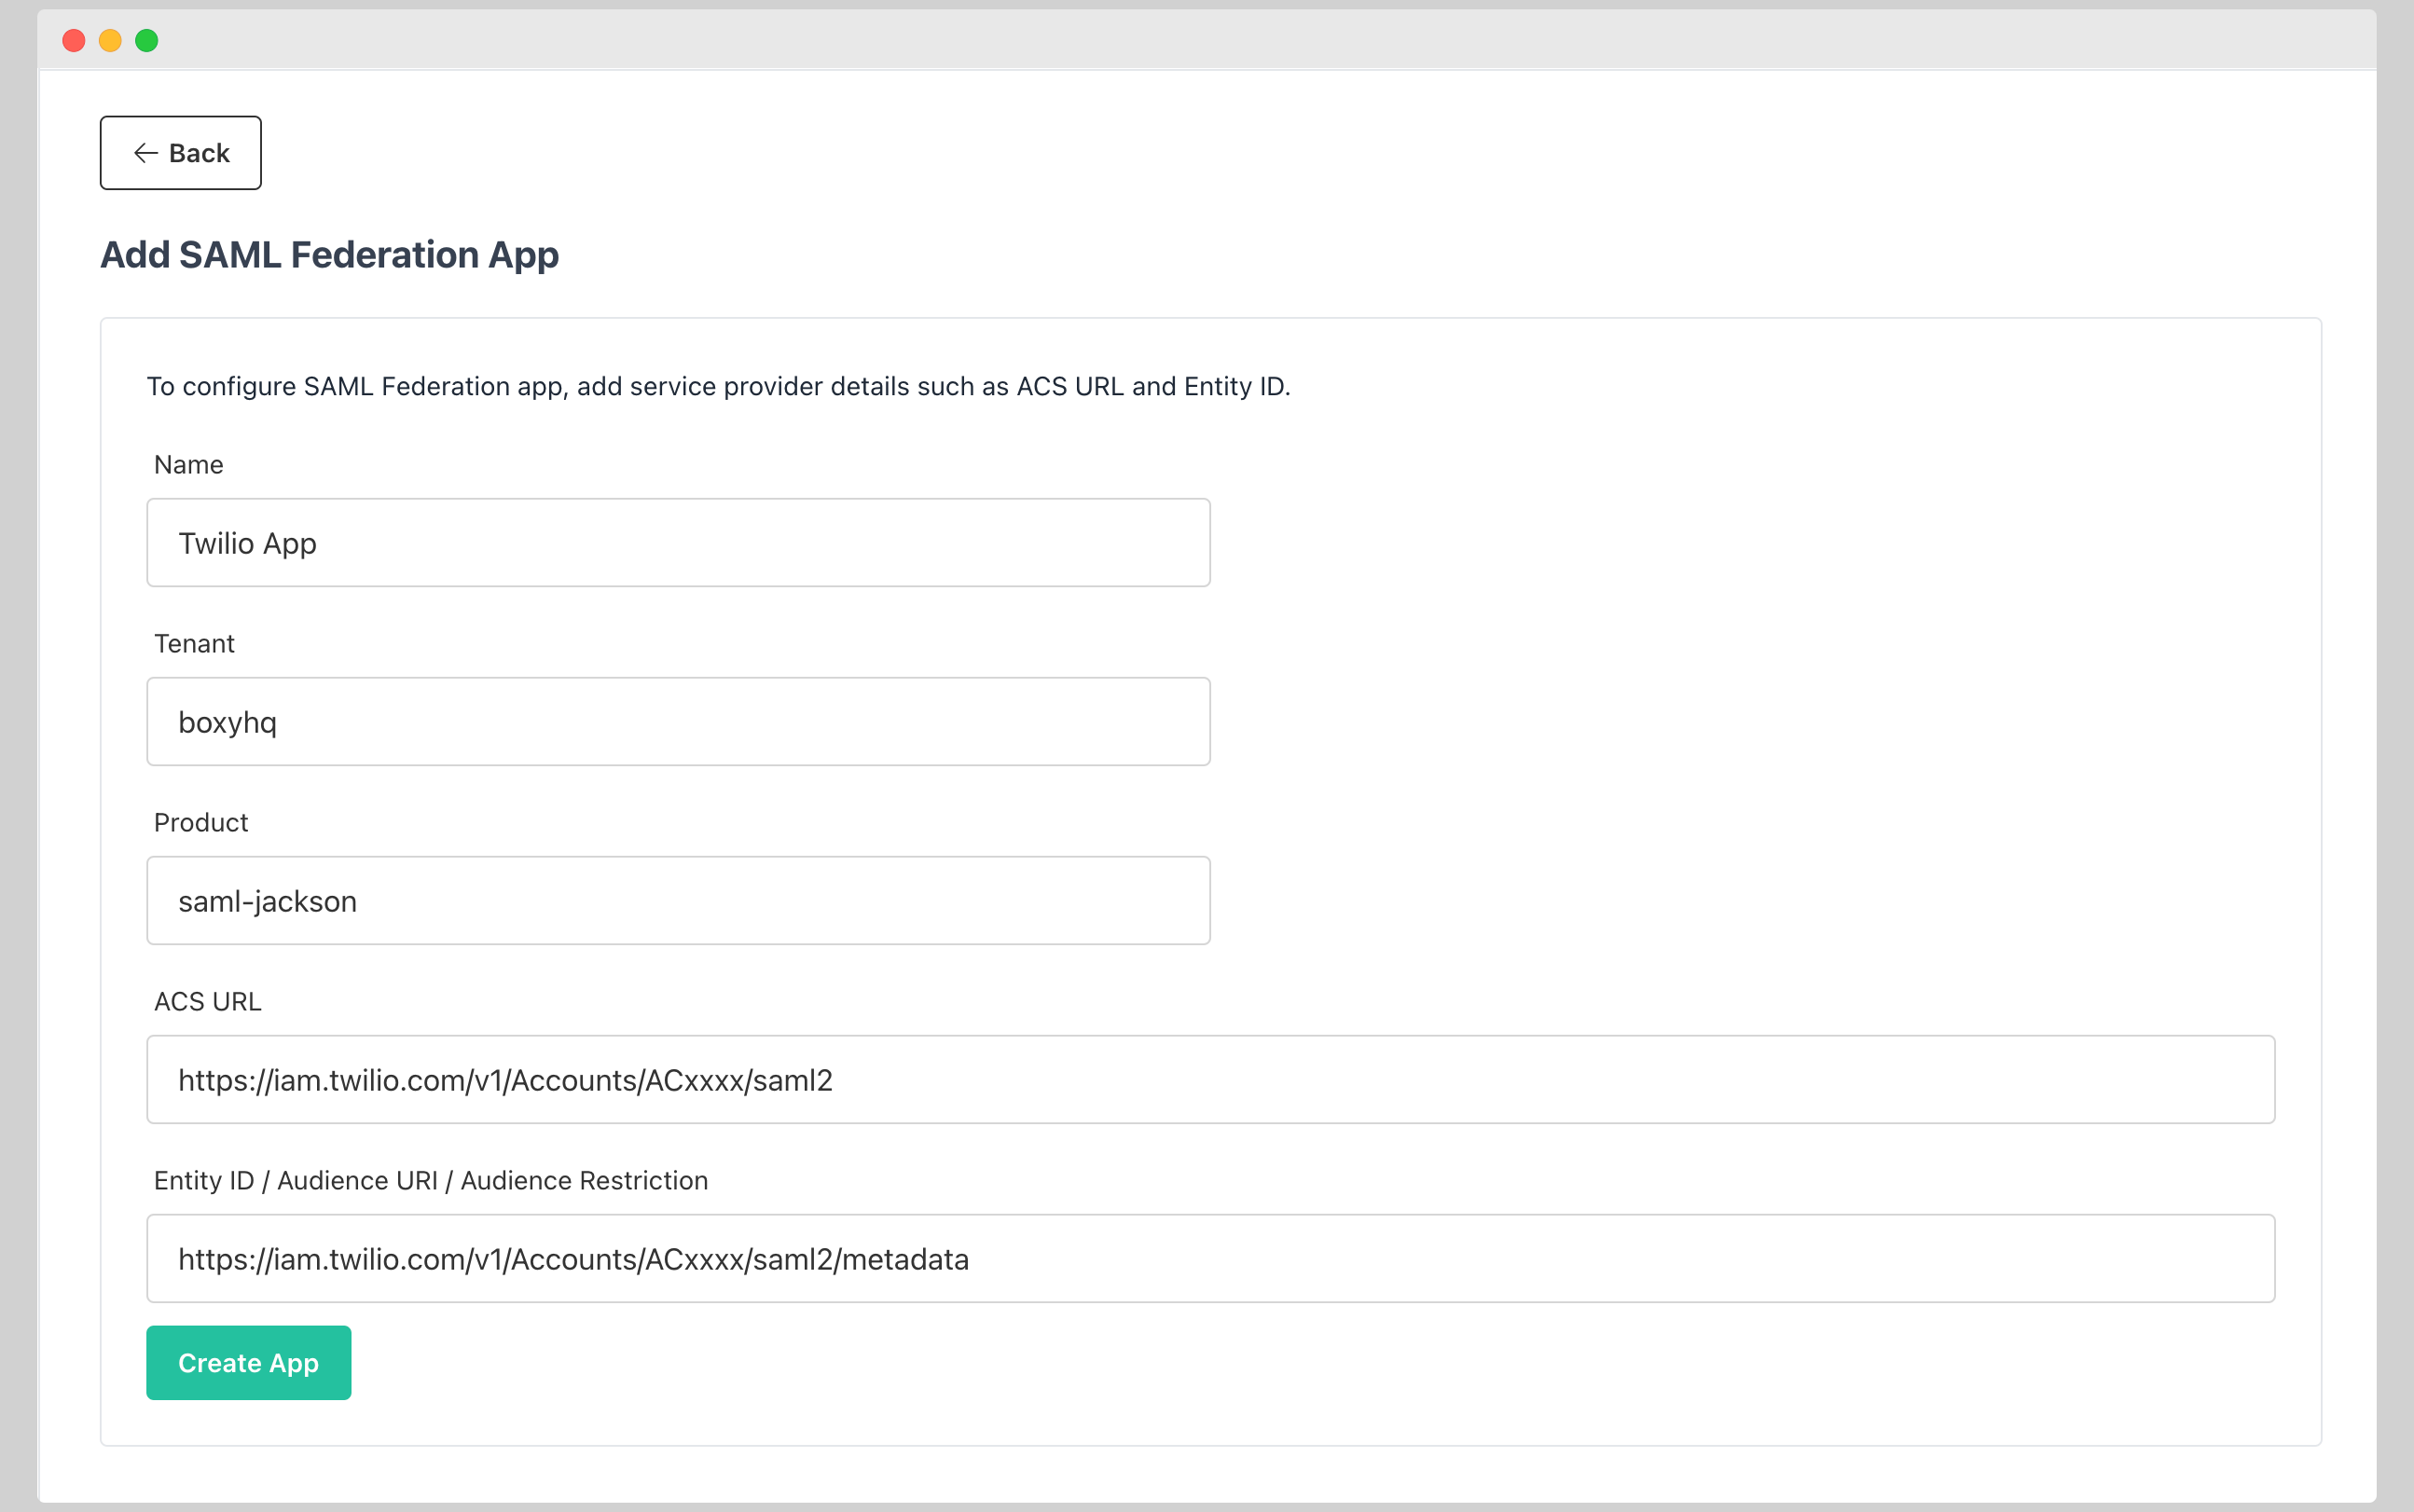
Create SAML Federation App
- Click New App.
- Enter the following information:
- Name
- Tenant
- Product
- ACS URL (ACS URL of the SP)
- Entity ID (Entity ID of the SP)
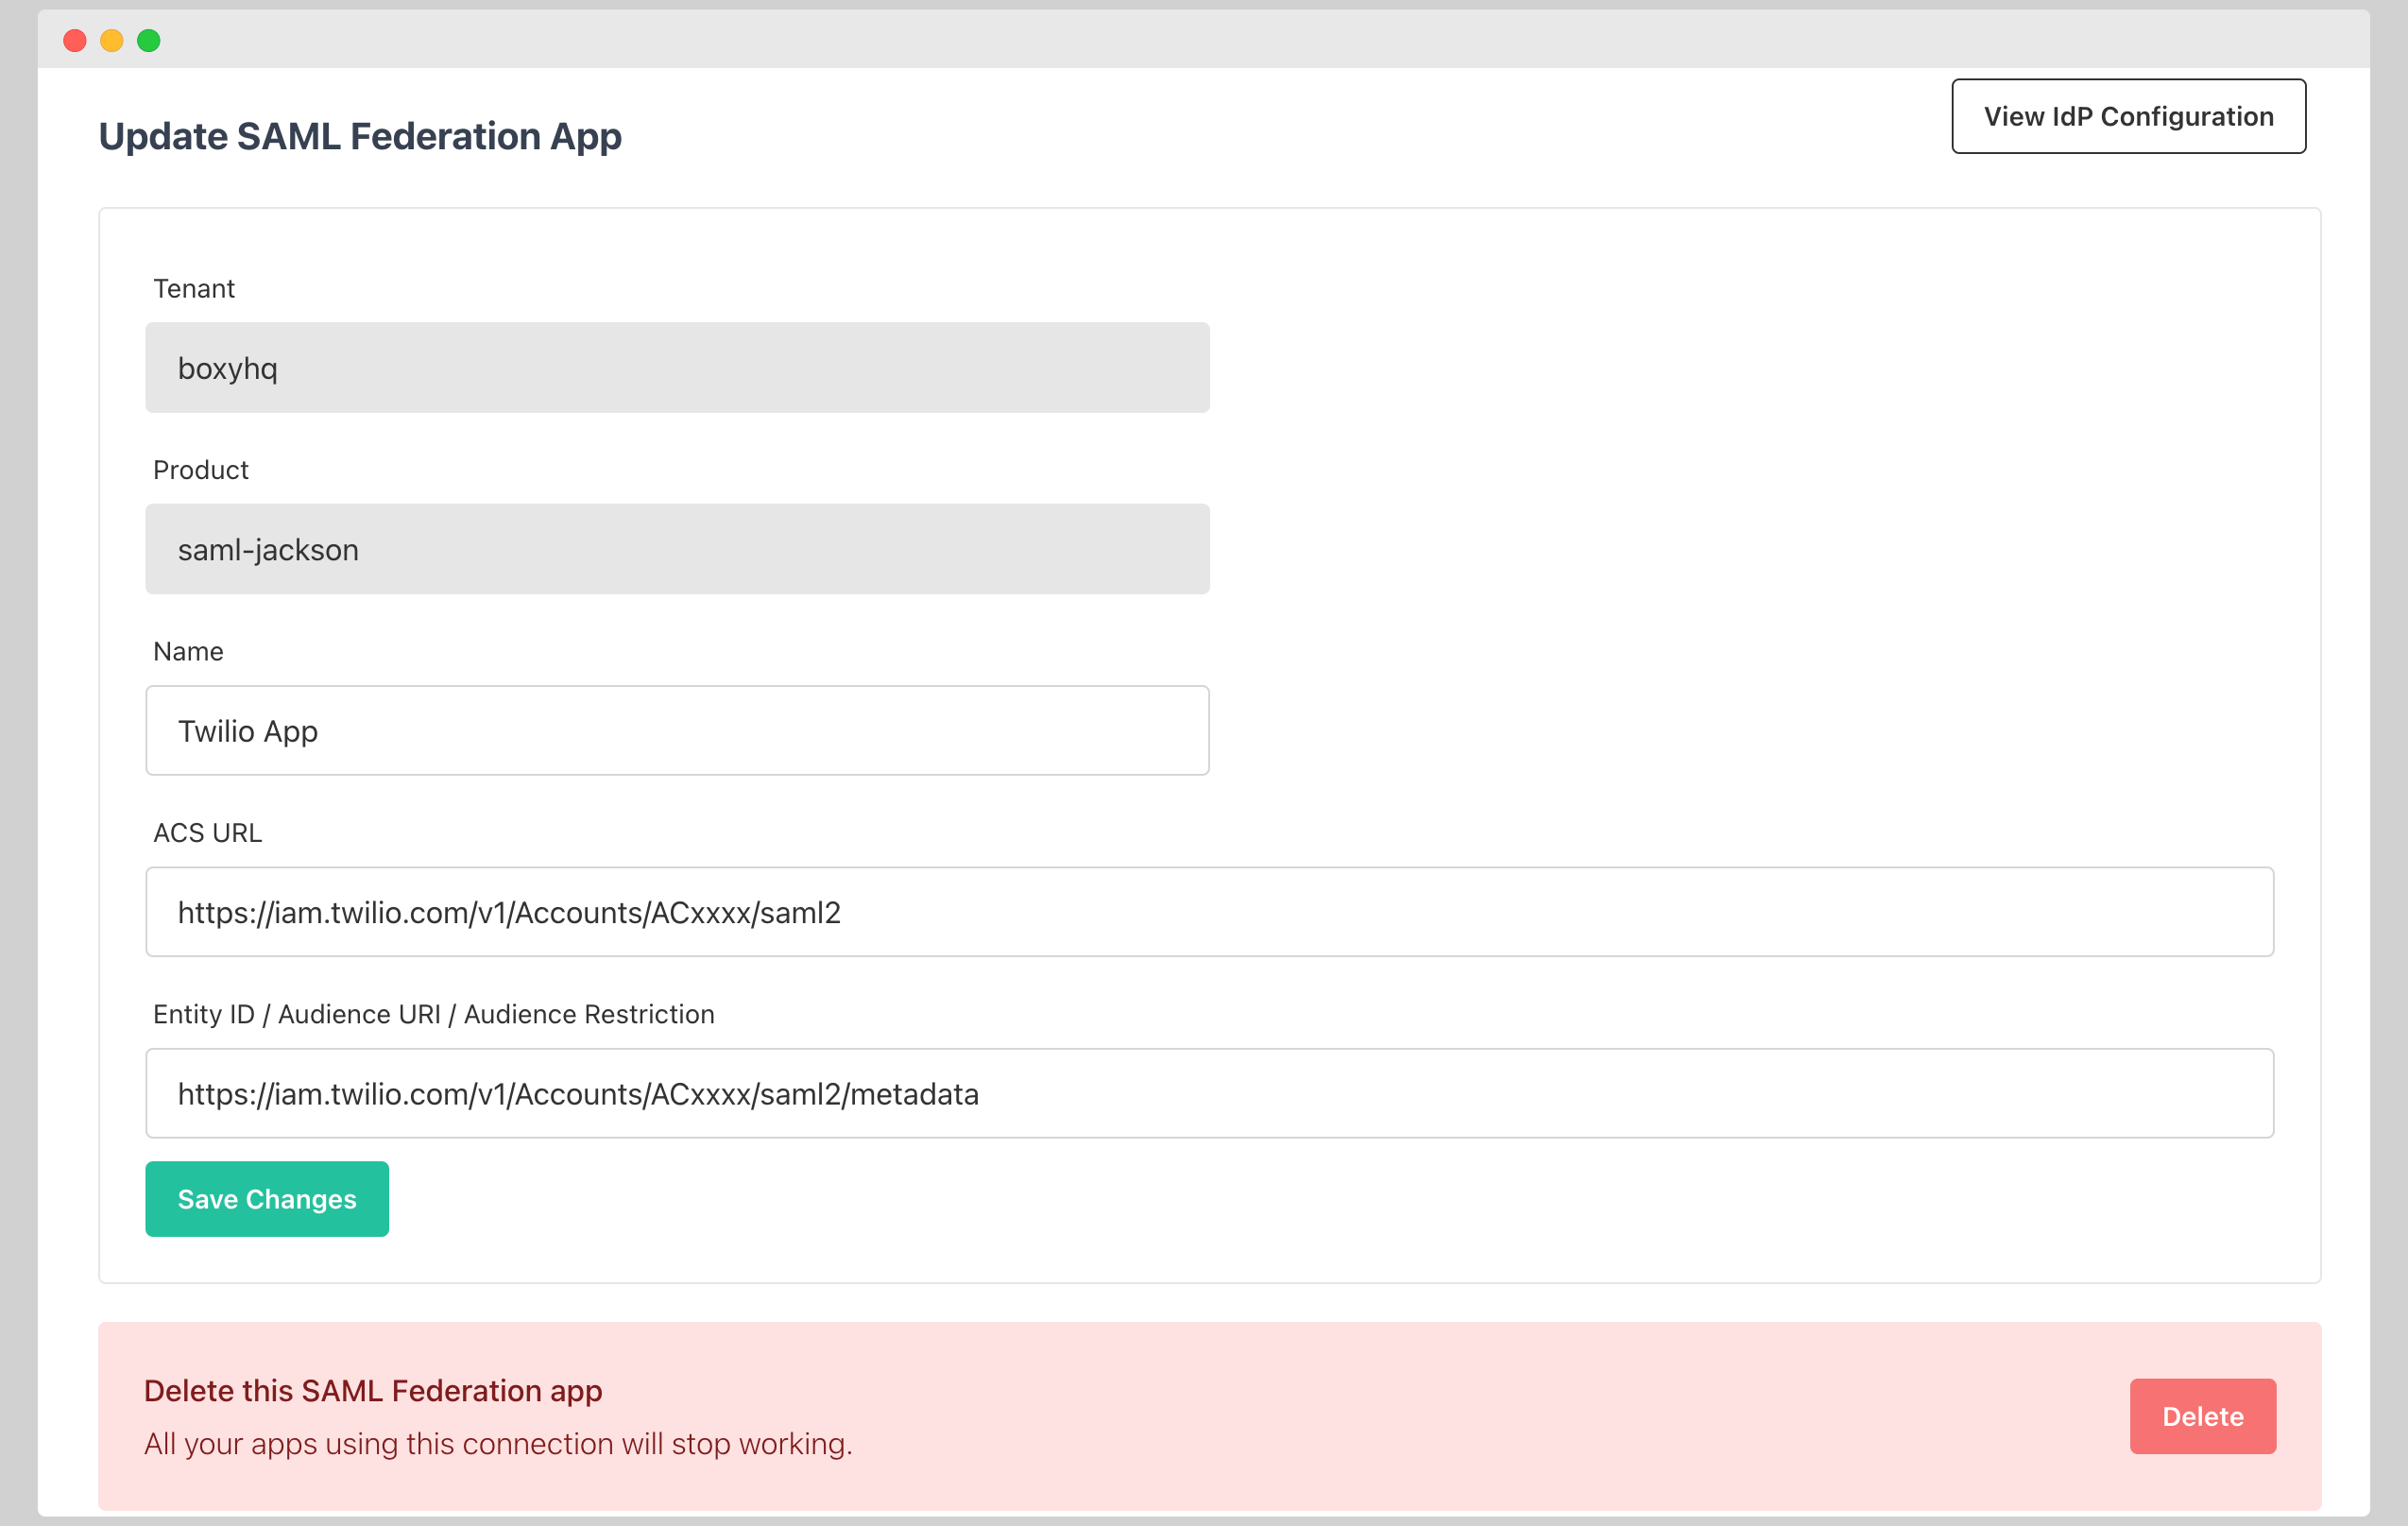
Update SAML Federation App
- From the list of SAML Federation Apps, click on the Edit icon of the app you want to update.
- You can update the following information:
- Name
- ACS URL (ACS URL of the SP)
- Entity ID (Entity ID of the SP)
View IdP Configuration
Click View IdP Configuration button to view the IdP configuration for the SAML Federation App. You need to provide the SP with the following information:
- SSO URL
- Entity ID / Audience URI / Audience Restriction
- X.509 Certificate