JumpCloud SCIM v2.0
The following guide will walk you through the process of configuring SAML Jackson to use the JumpCloud SCIM v2.0 directory provider.
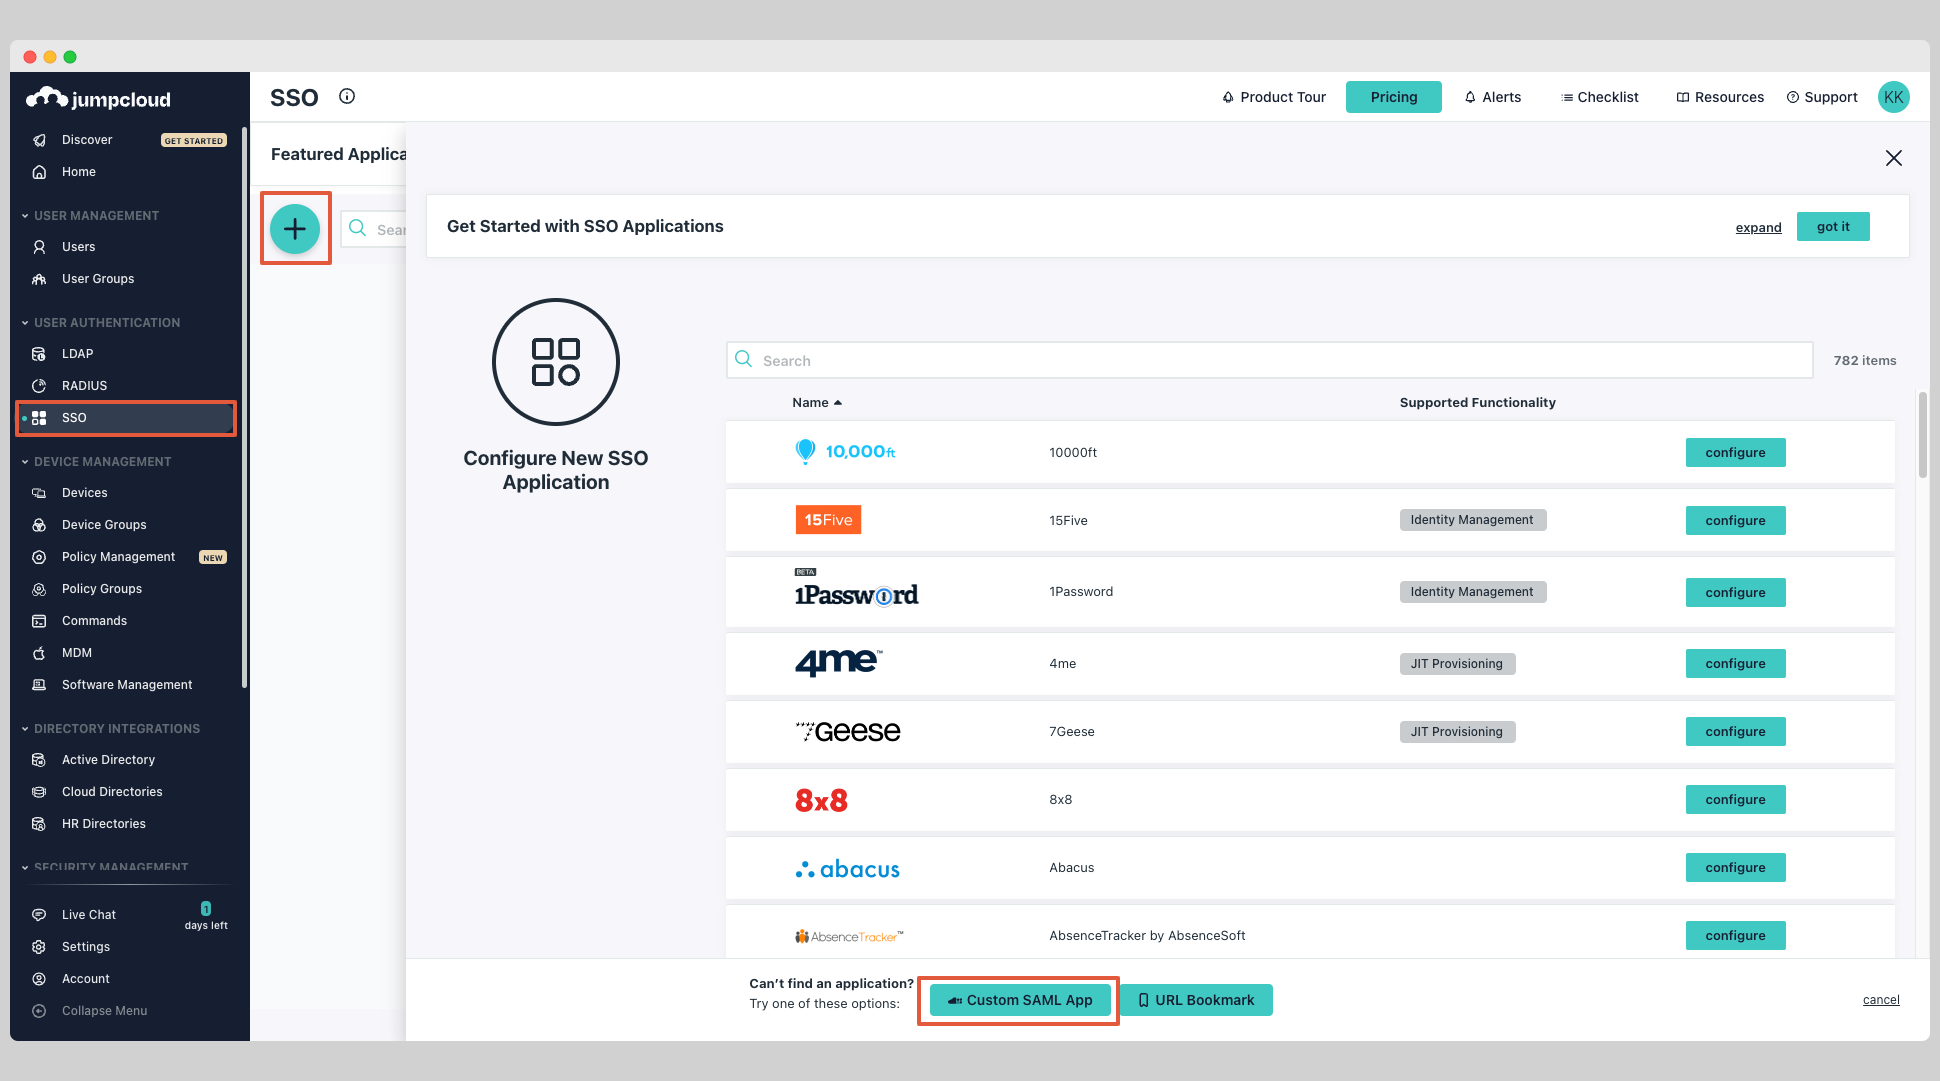
Create JumpCloud SAML Application
JumpCloud only support configuring SCIM provisioning in an existing SAML application.
Choose an existing SAML application or create a new one. Click SSO from the left navigation menu and select your custom SAML application.
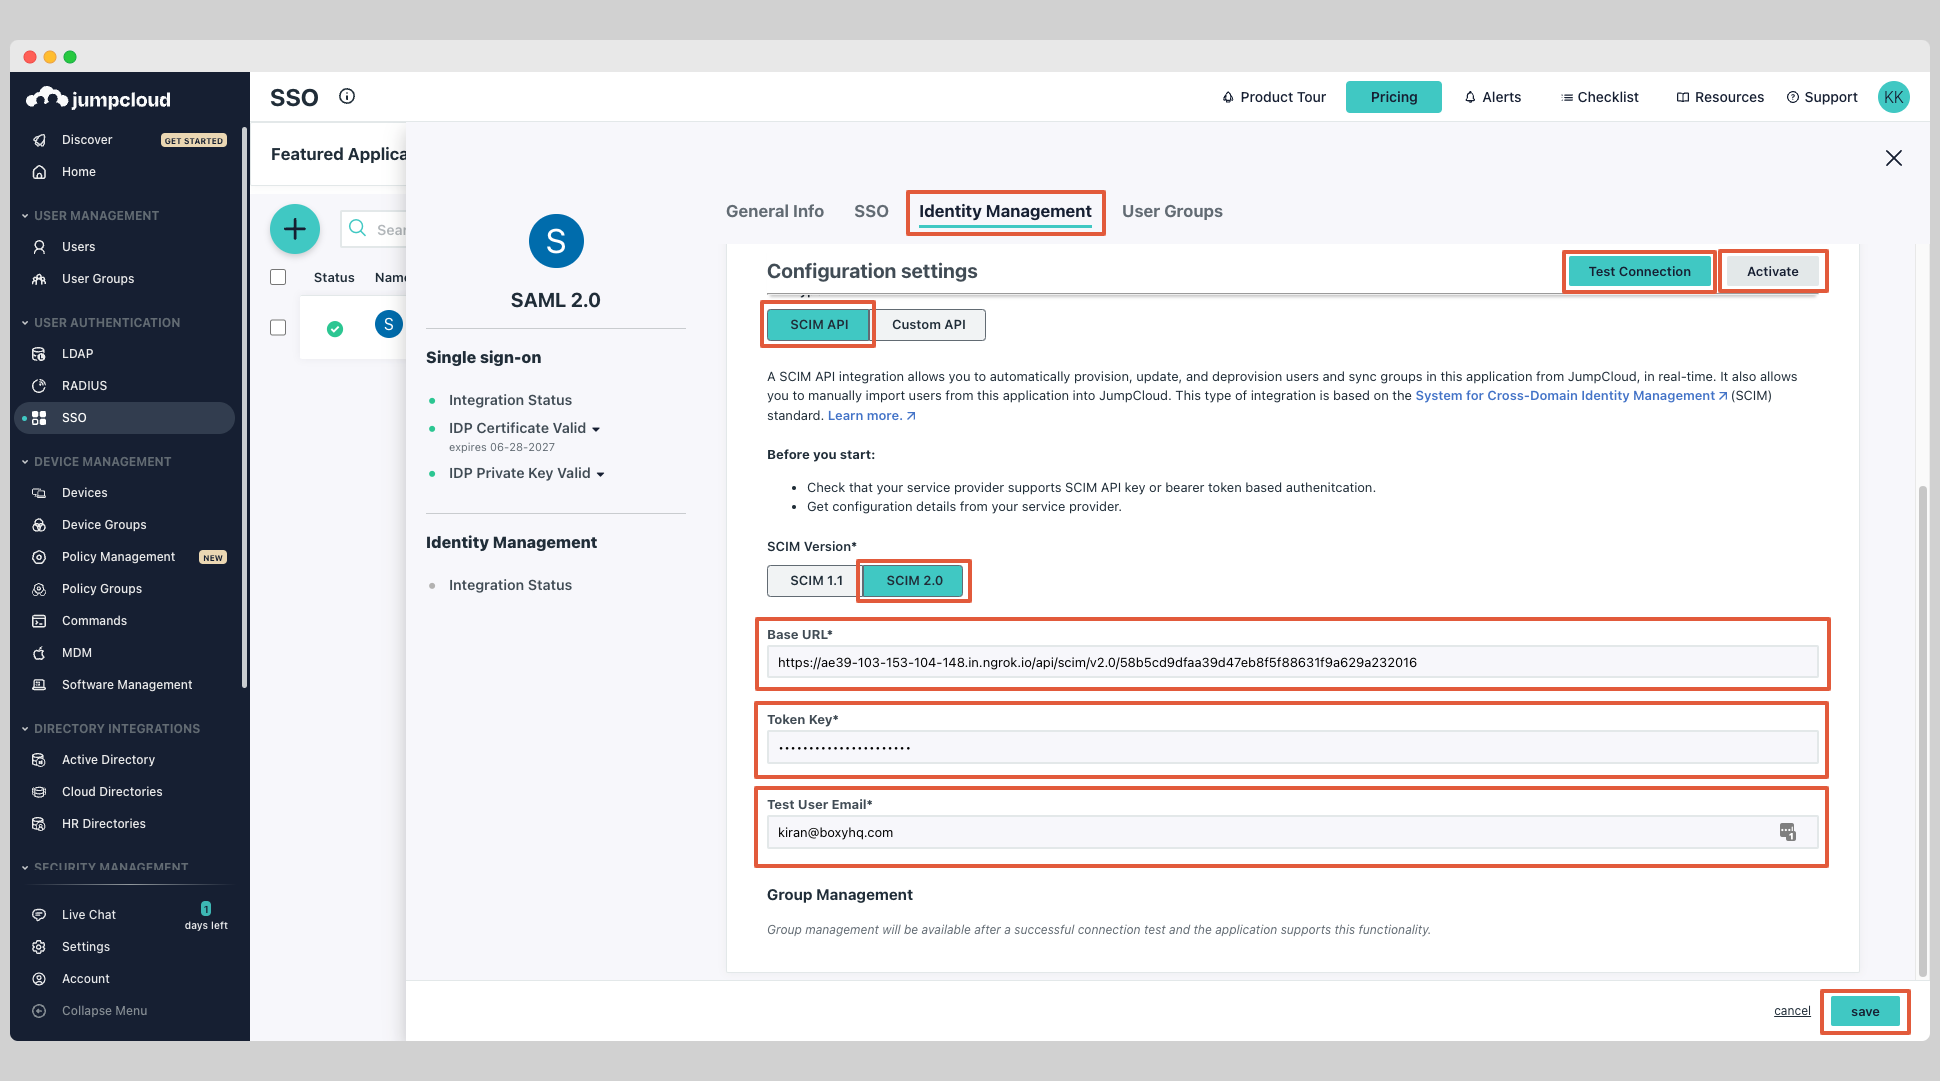
Click the tab Identity Management within your SAML application.
Under the SCIM Version, choose SCIM 2.0 and enter the following information:
- Base URL
- Token Key
- Test User Email
Click Test Connection to test the connection to see if the credentials are correct then click Activate.
Next click Save to save the settings.
At this stage, you've successfully configured the JumpCloud SCIM app.
Assign Users & Push Groups
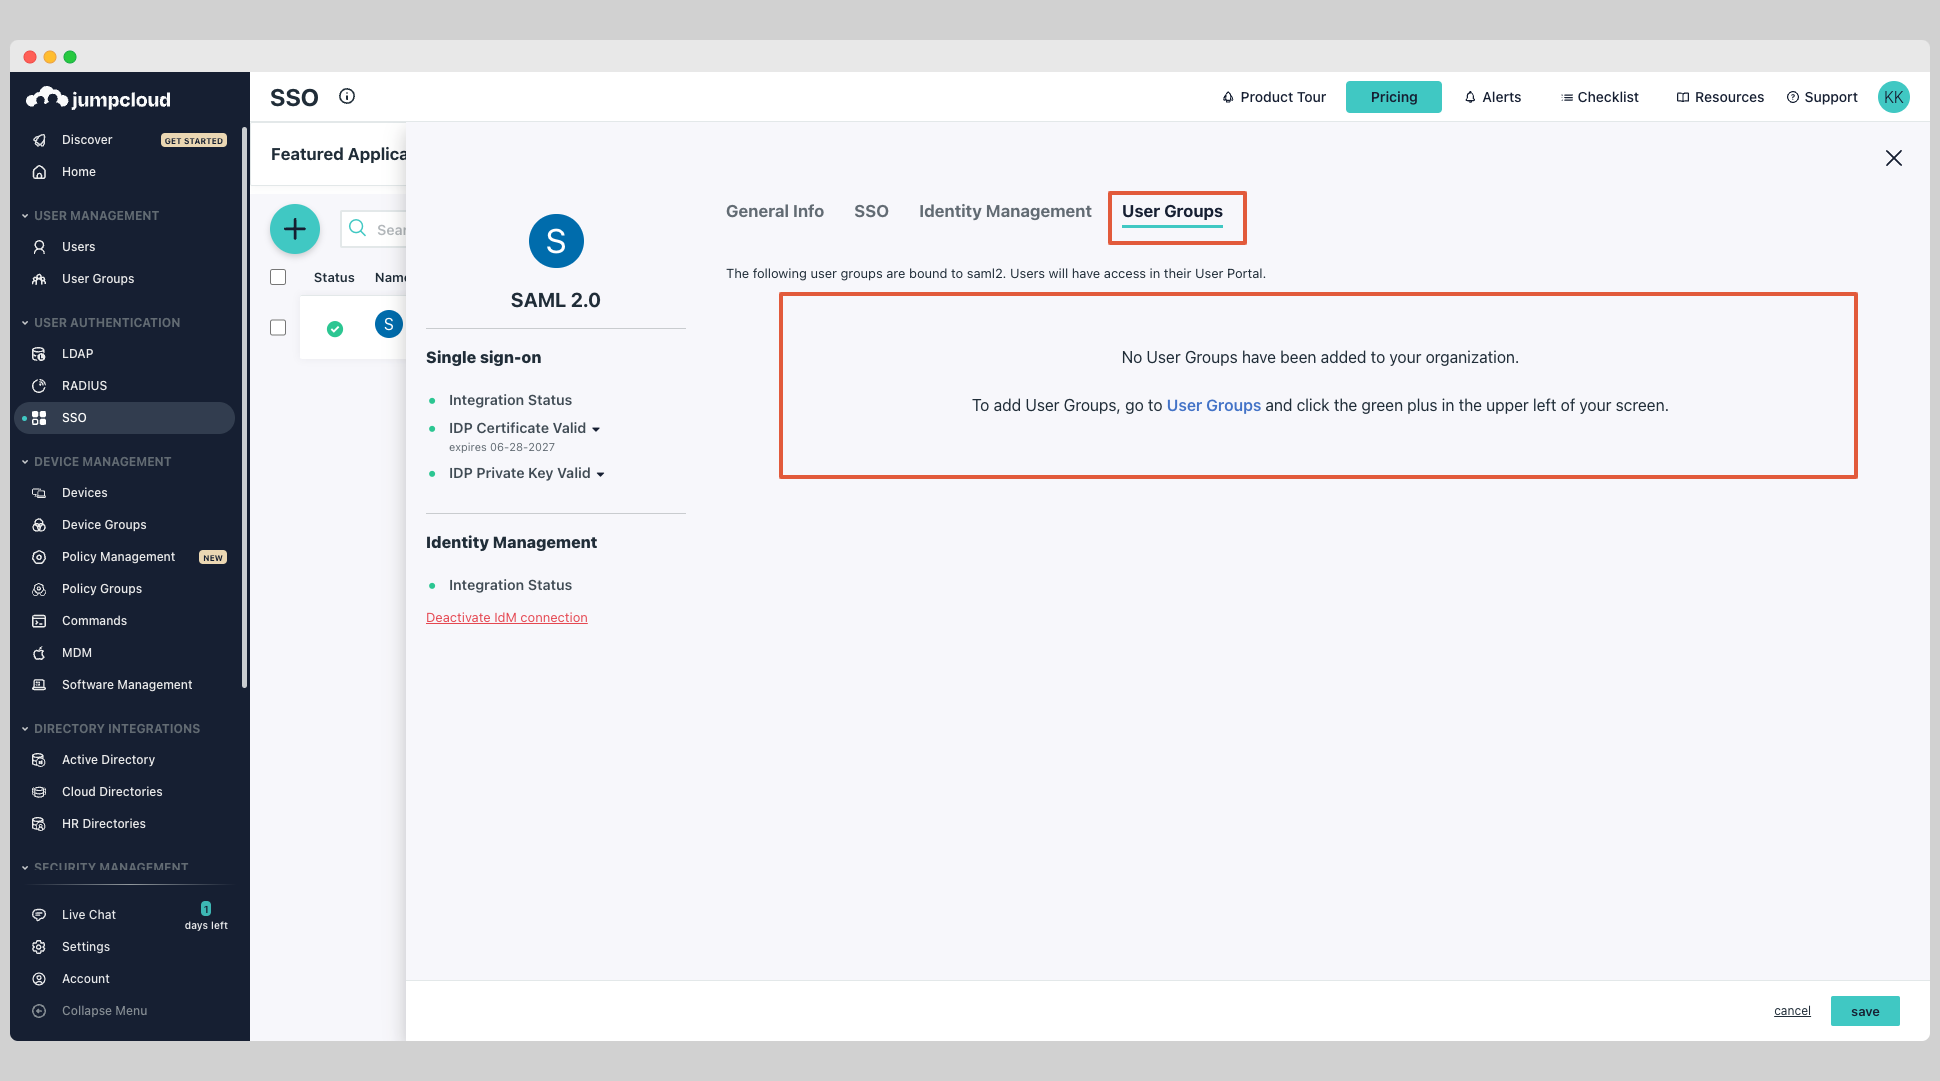
Click the tab User Groups within your SAML application.
You can see the all the groups that are available, select the groups you want to sync and click Save.
If no existing groups are available, click User Groups from the left navigation menu and click plus icon to create a new group.
Give the group a name.
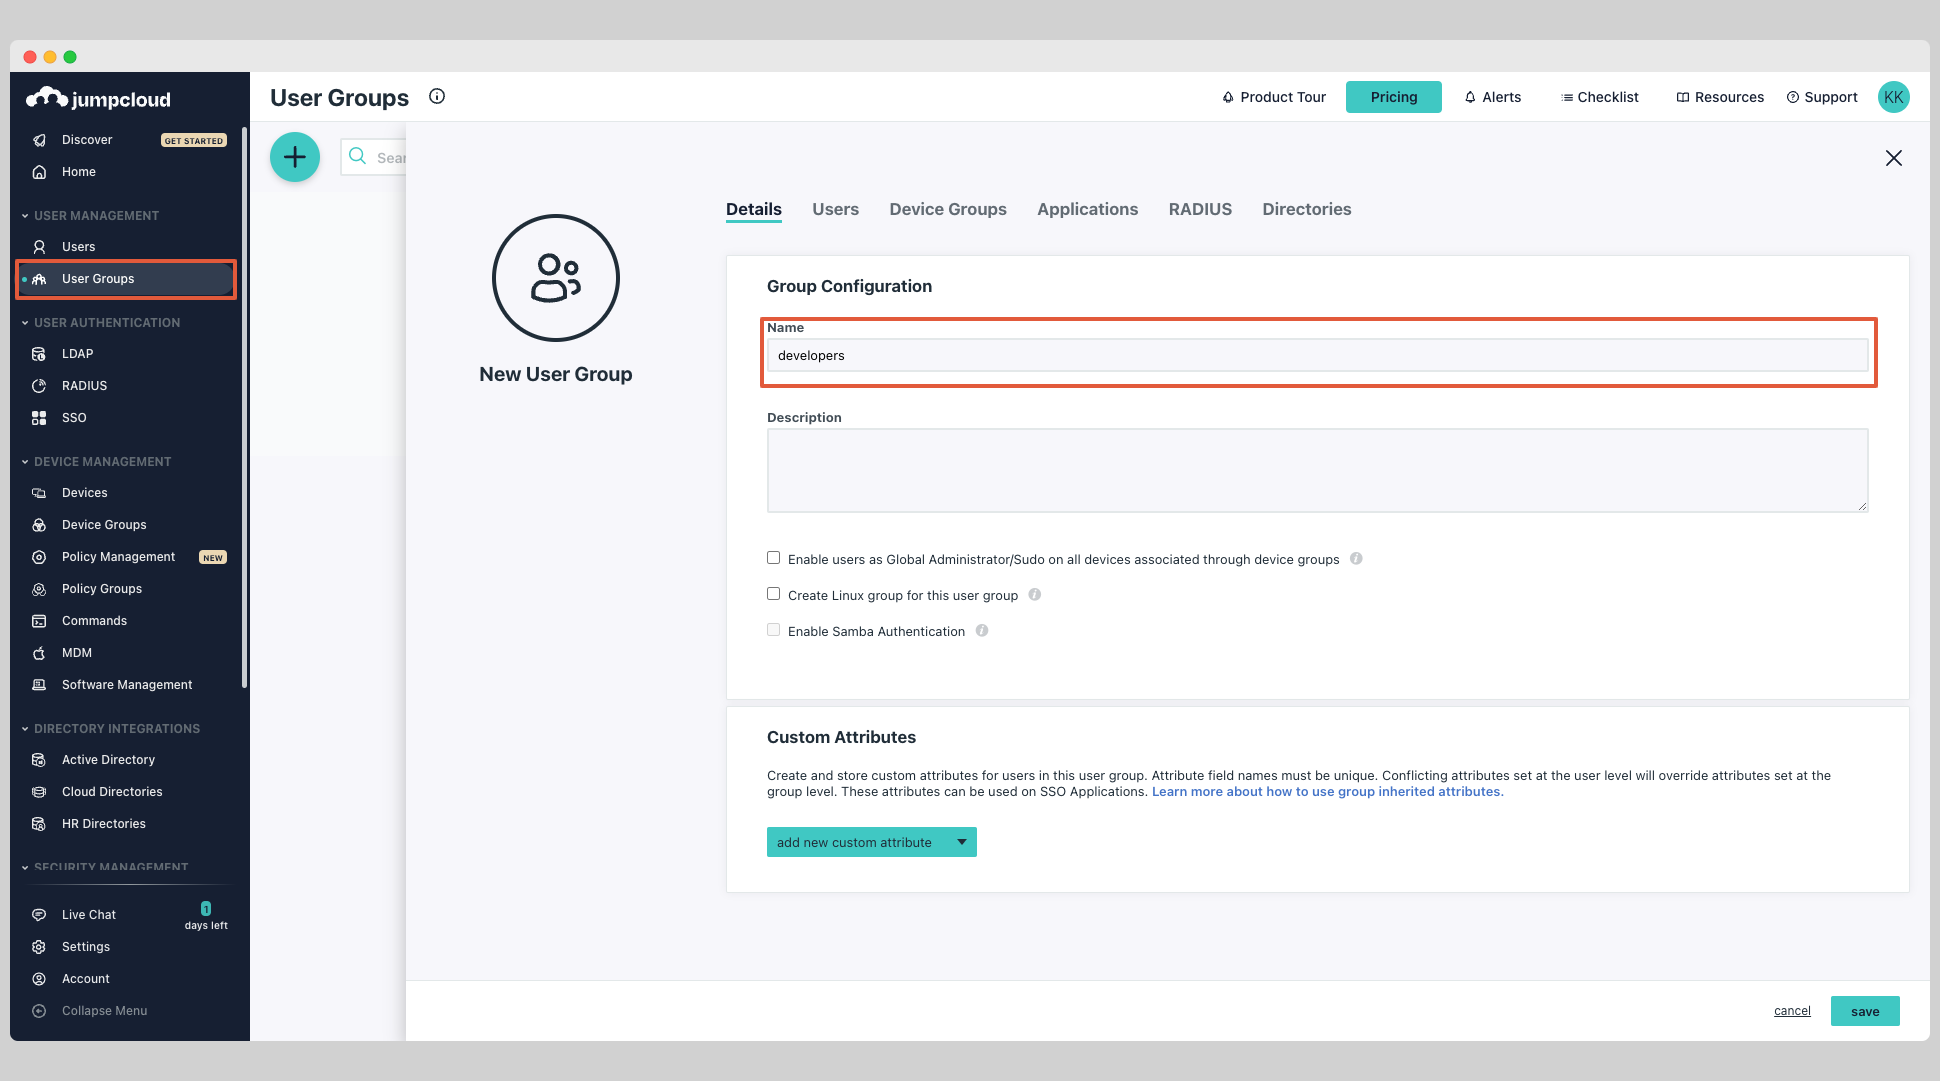
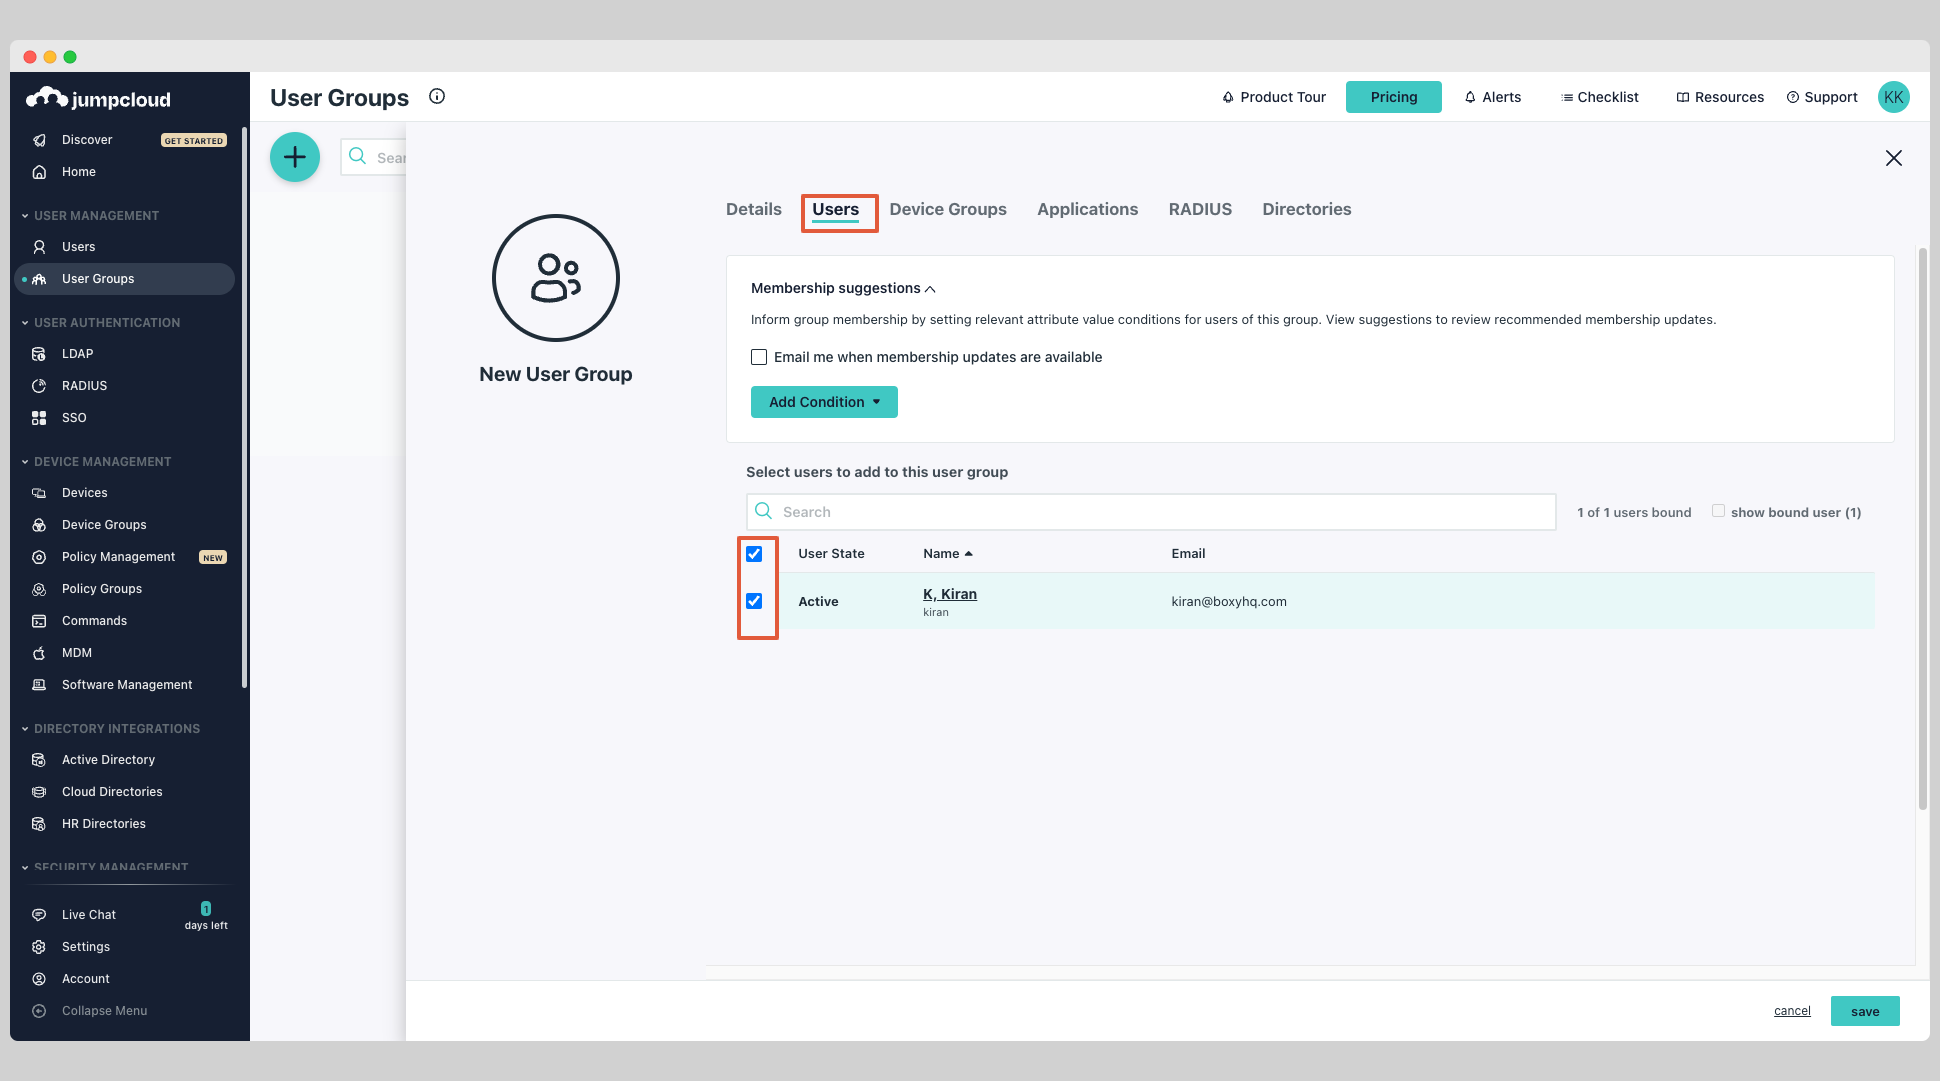
Select the Users tab and choose the users you want to assign to the group.
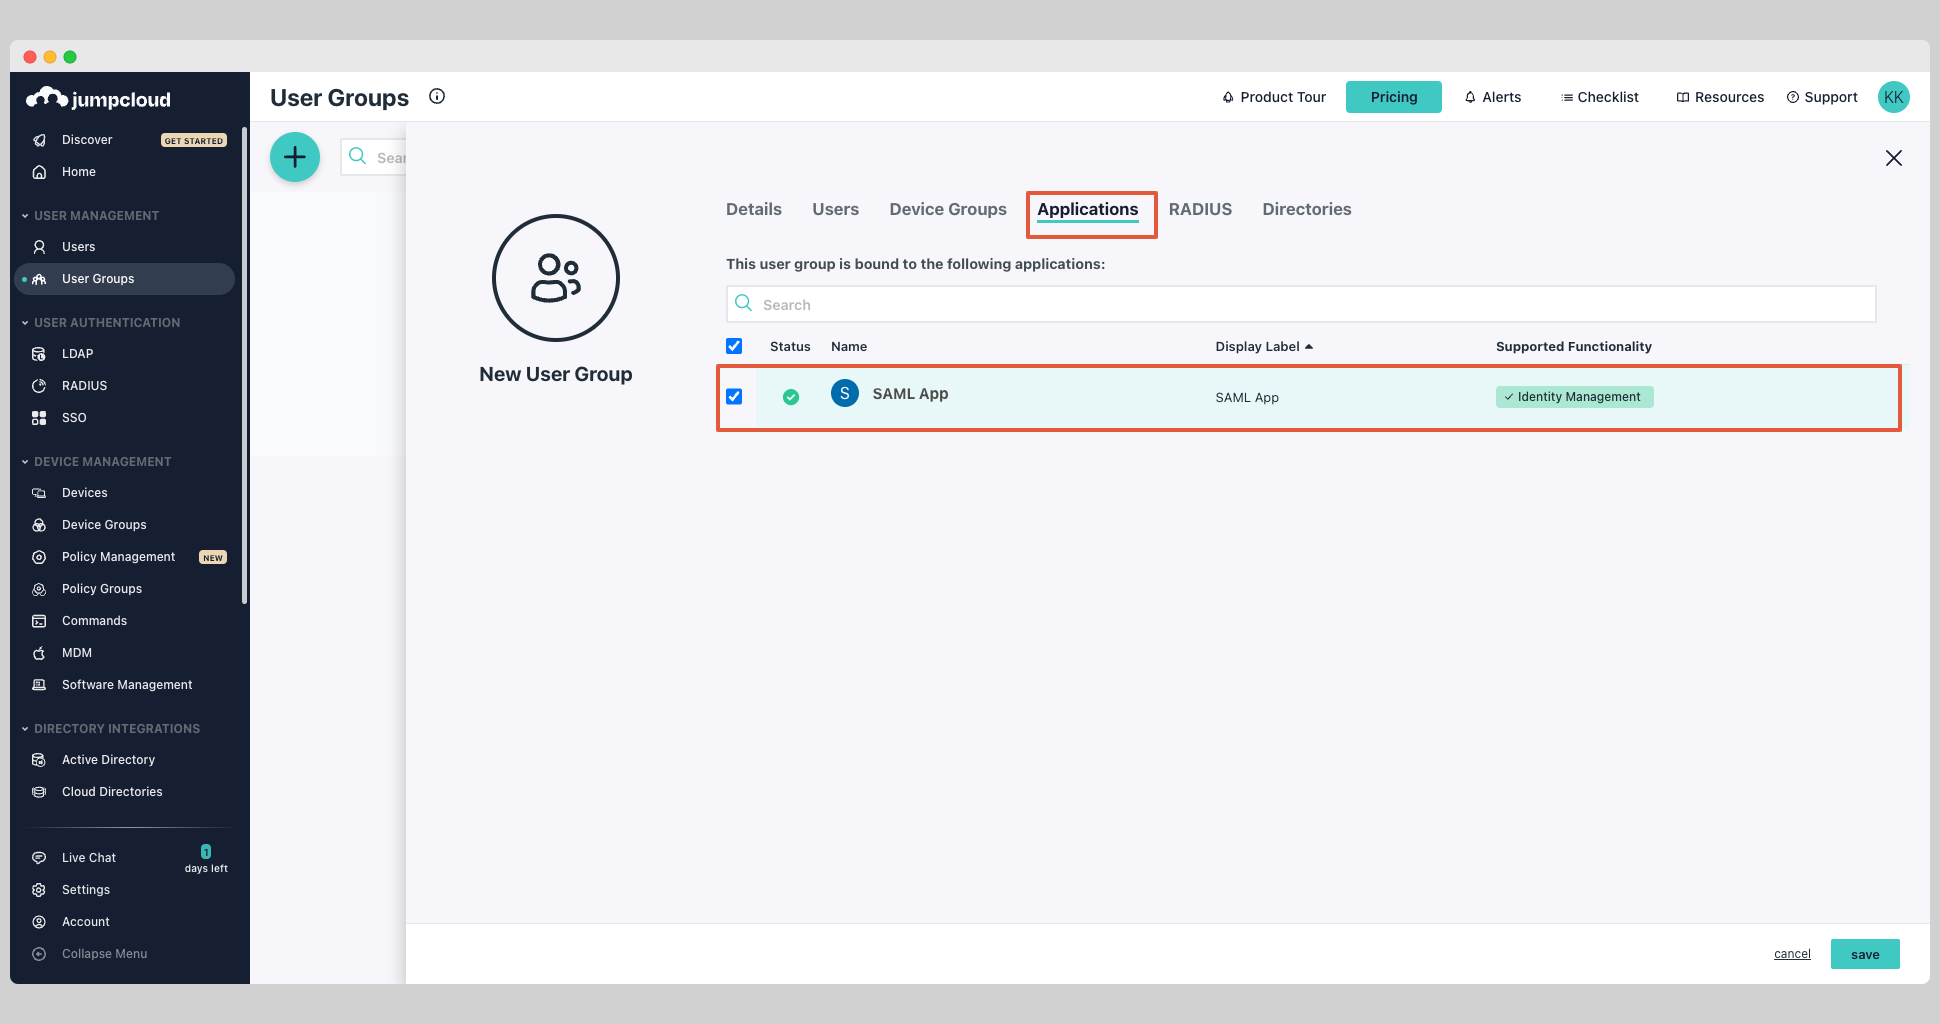
Next select the Applications tab and choose the app you want to assign the group to.
At this stage, you've successfully assigned users and pushed the groups.