OneLogin SCIM v2.0
The following guide will walk you through the process of configuring SAML Jackson to use the OneLogin SCIM v2.0 directory provider.
Create OneLogin Application
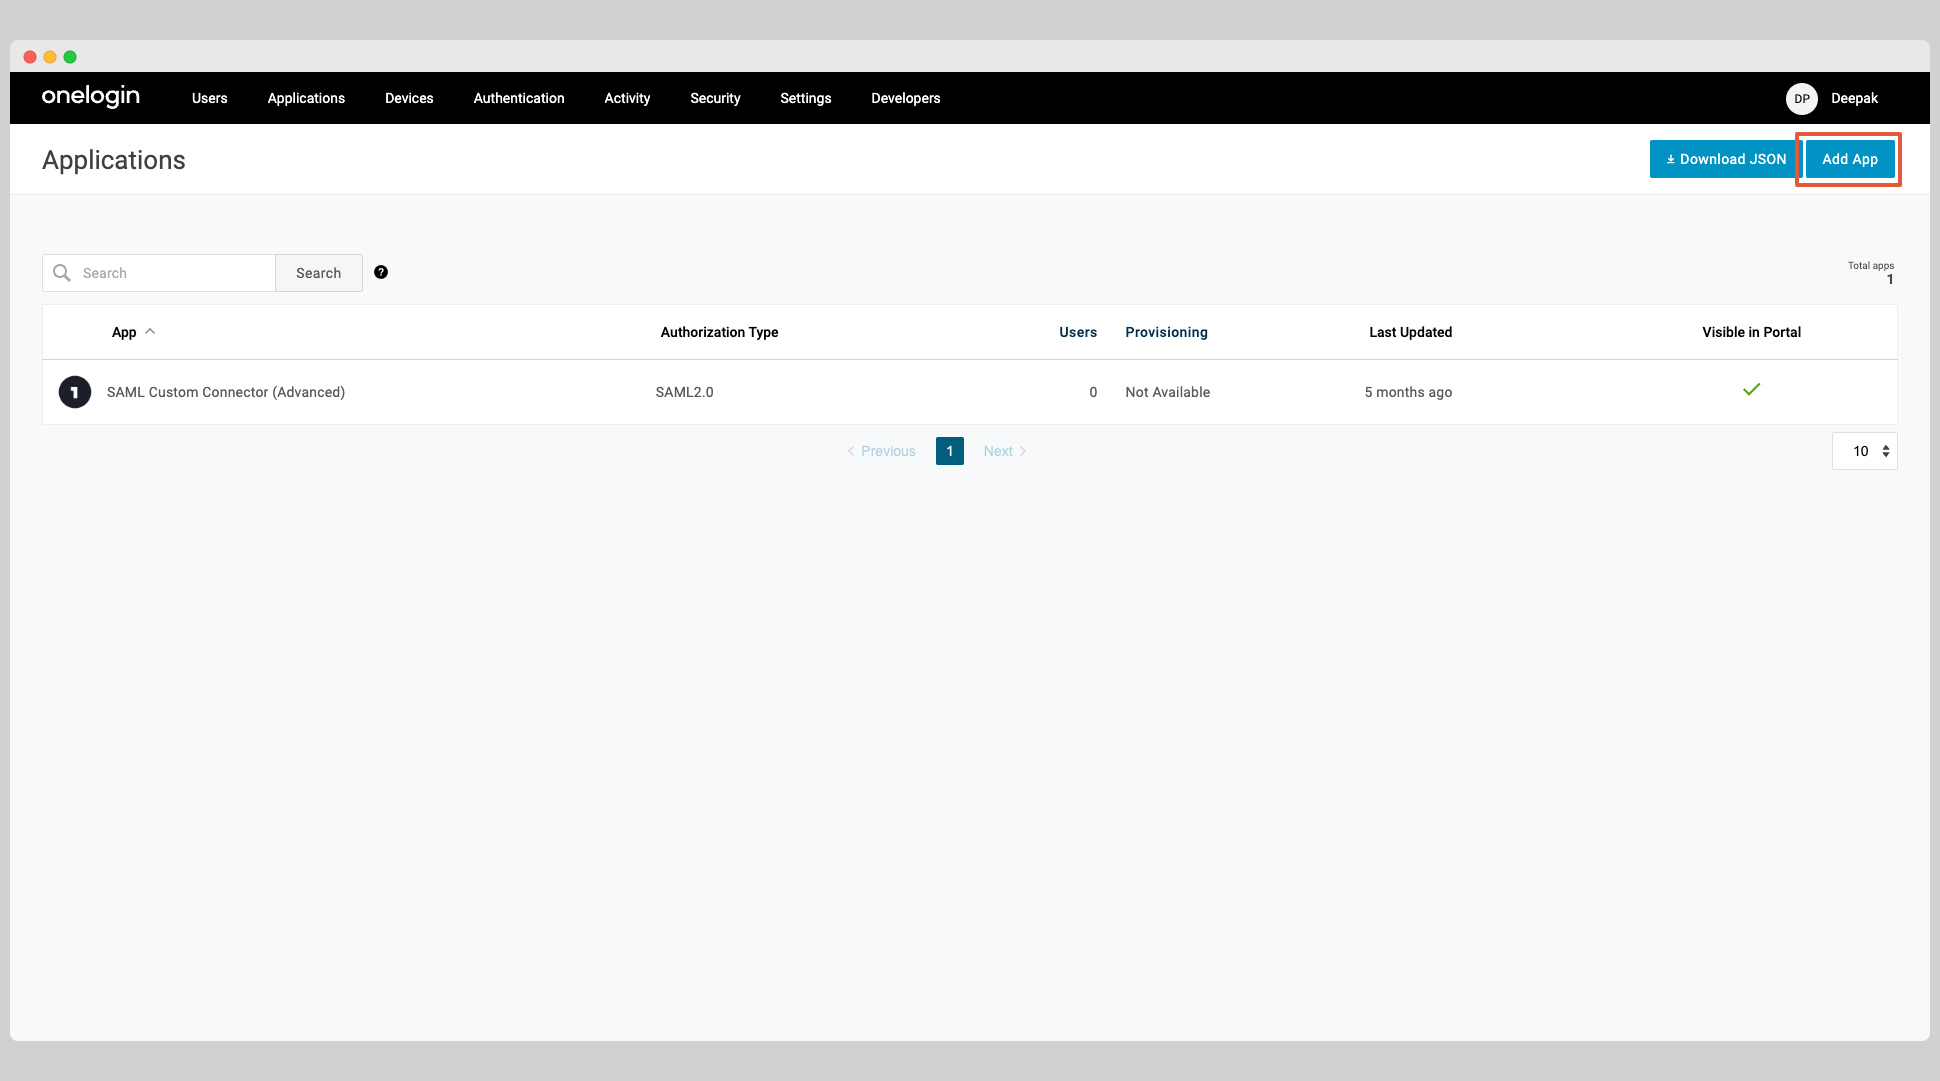
Click Applications from the top navigation menu and click Add App button.
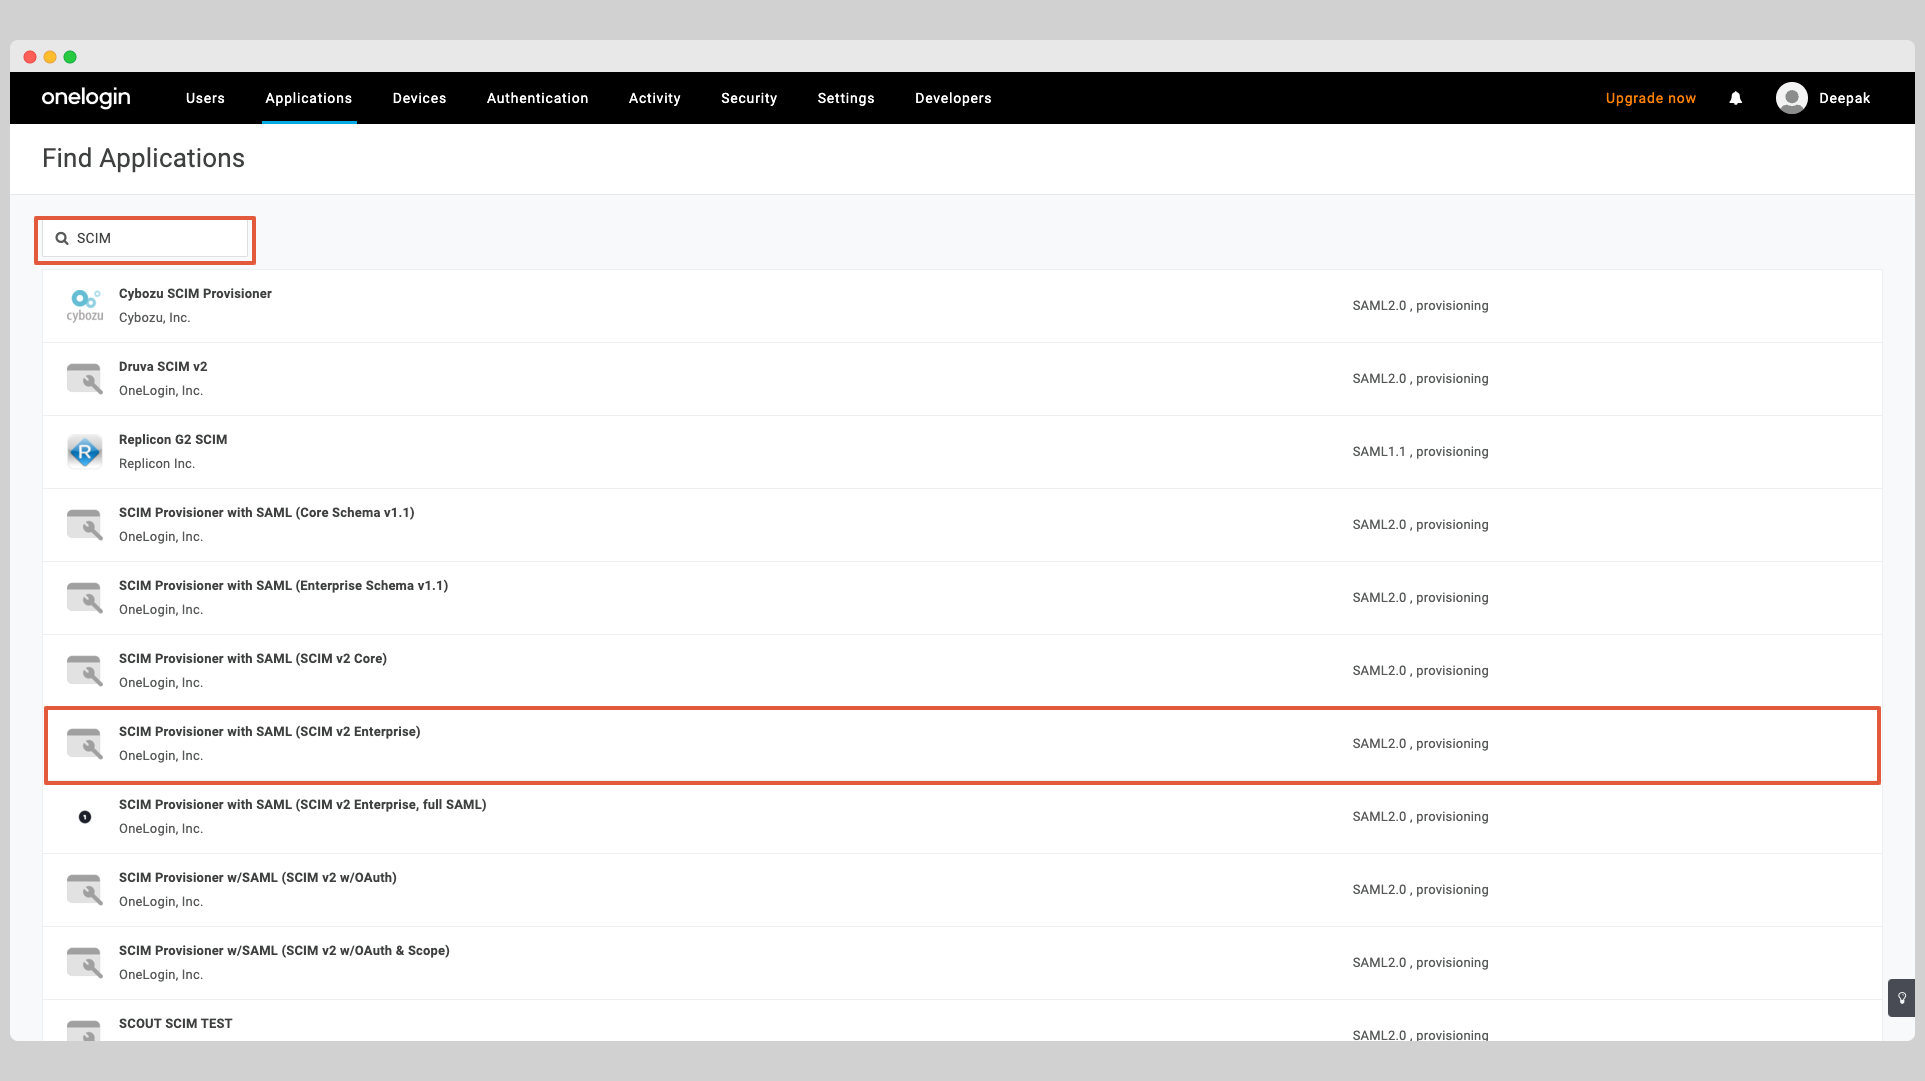
Search for SCIM from the search box and choose the app called SCIM Provisioner with SAML (SCIM V2 Enterprise) from the list of apps.
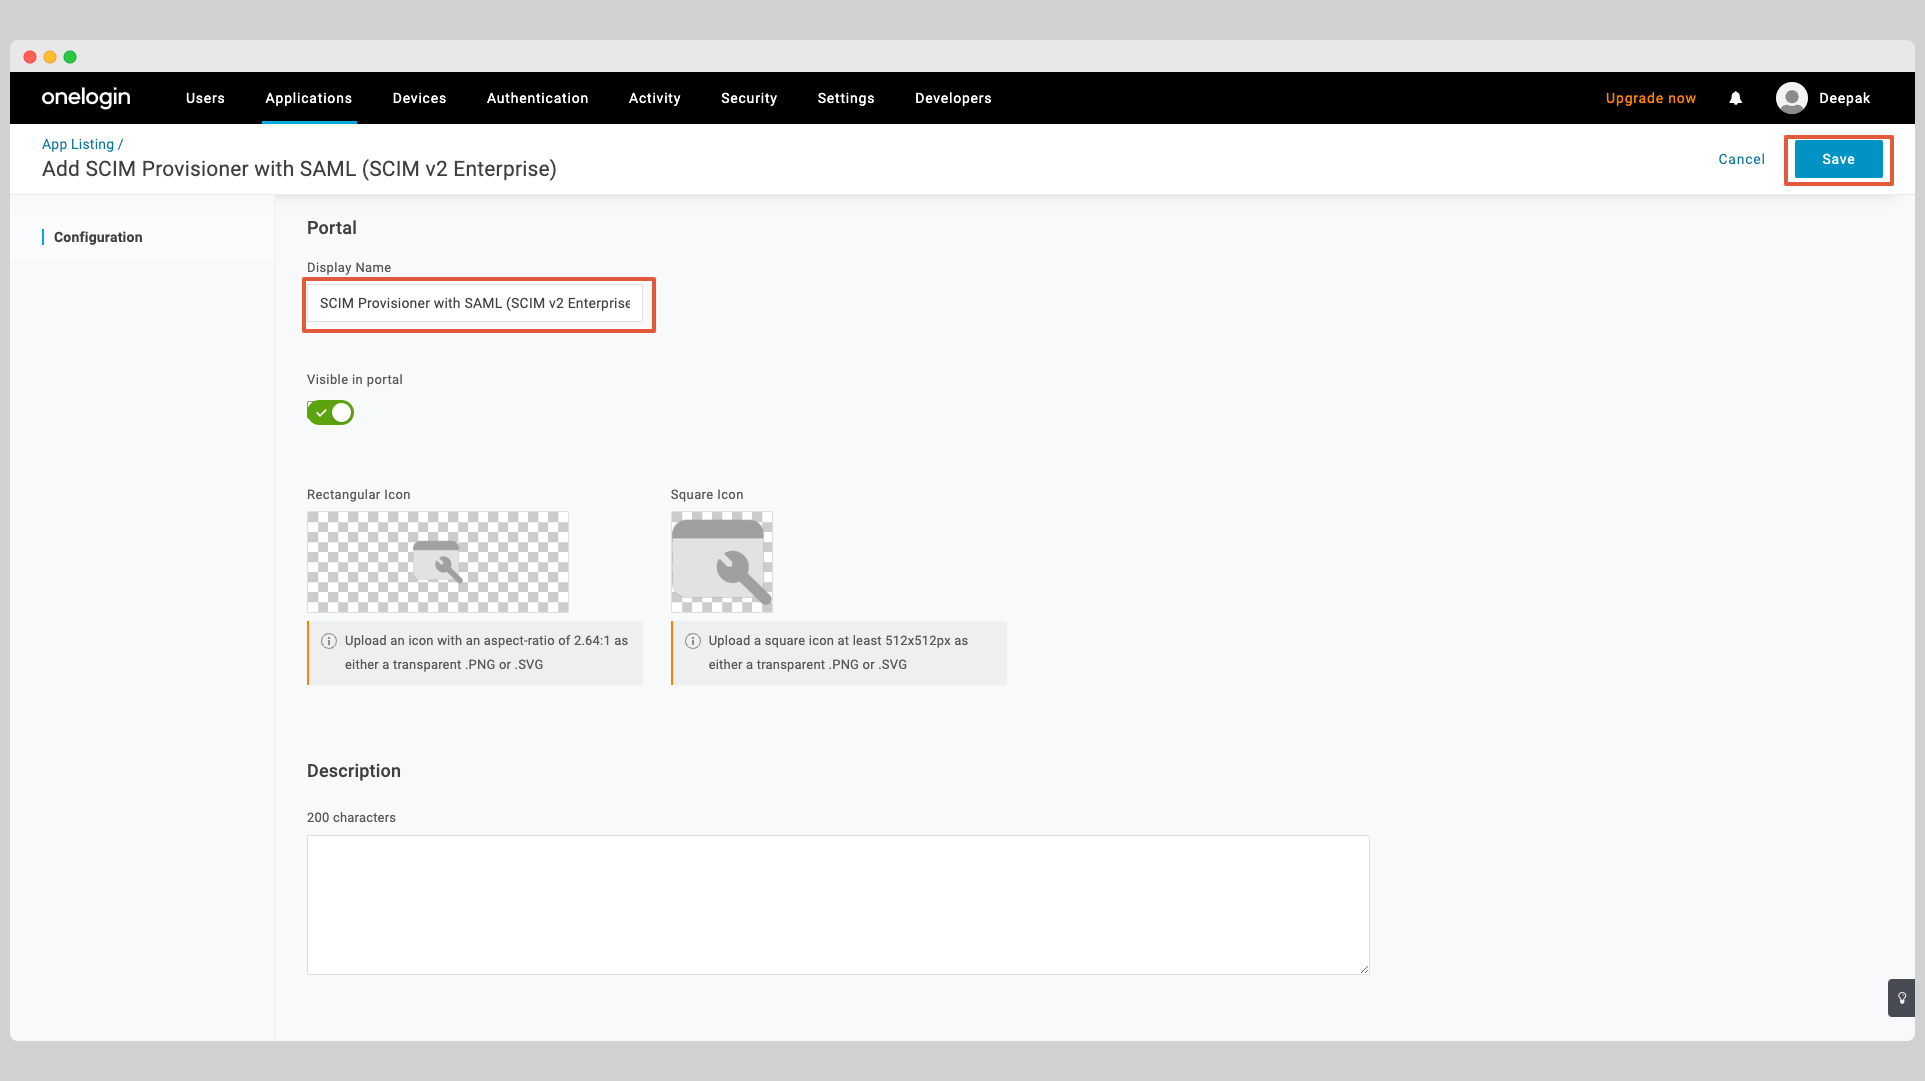
Give the app a name and click the Save button.
At this stage, you've successfully created the OneLogin SCIM app.
Enable OneLogin SCIM Provisioning
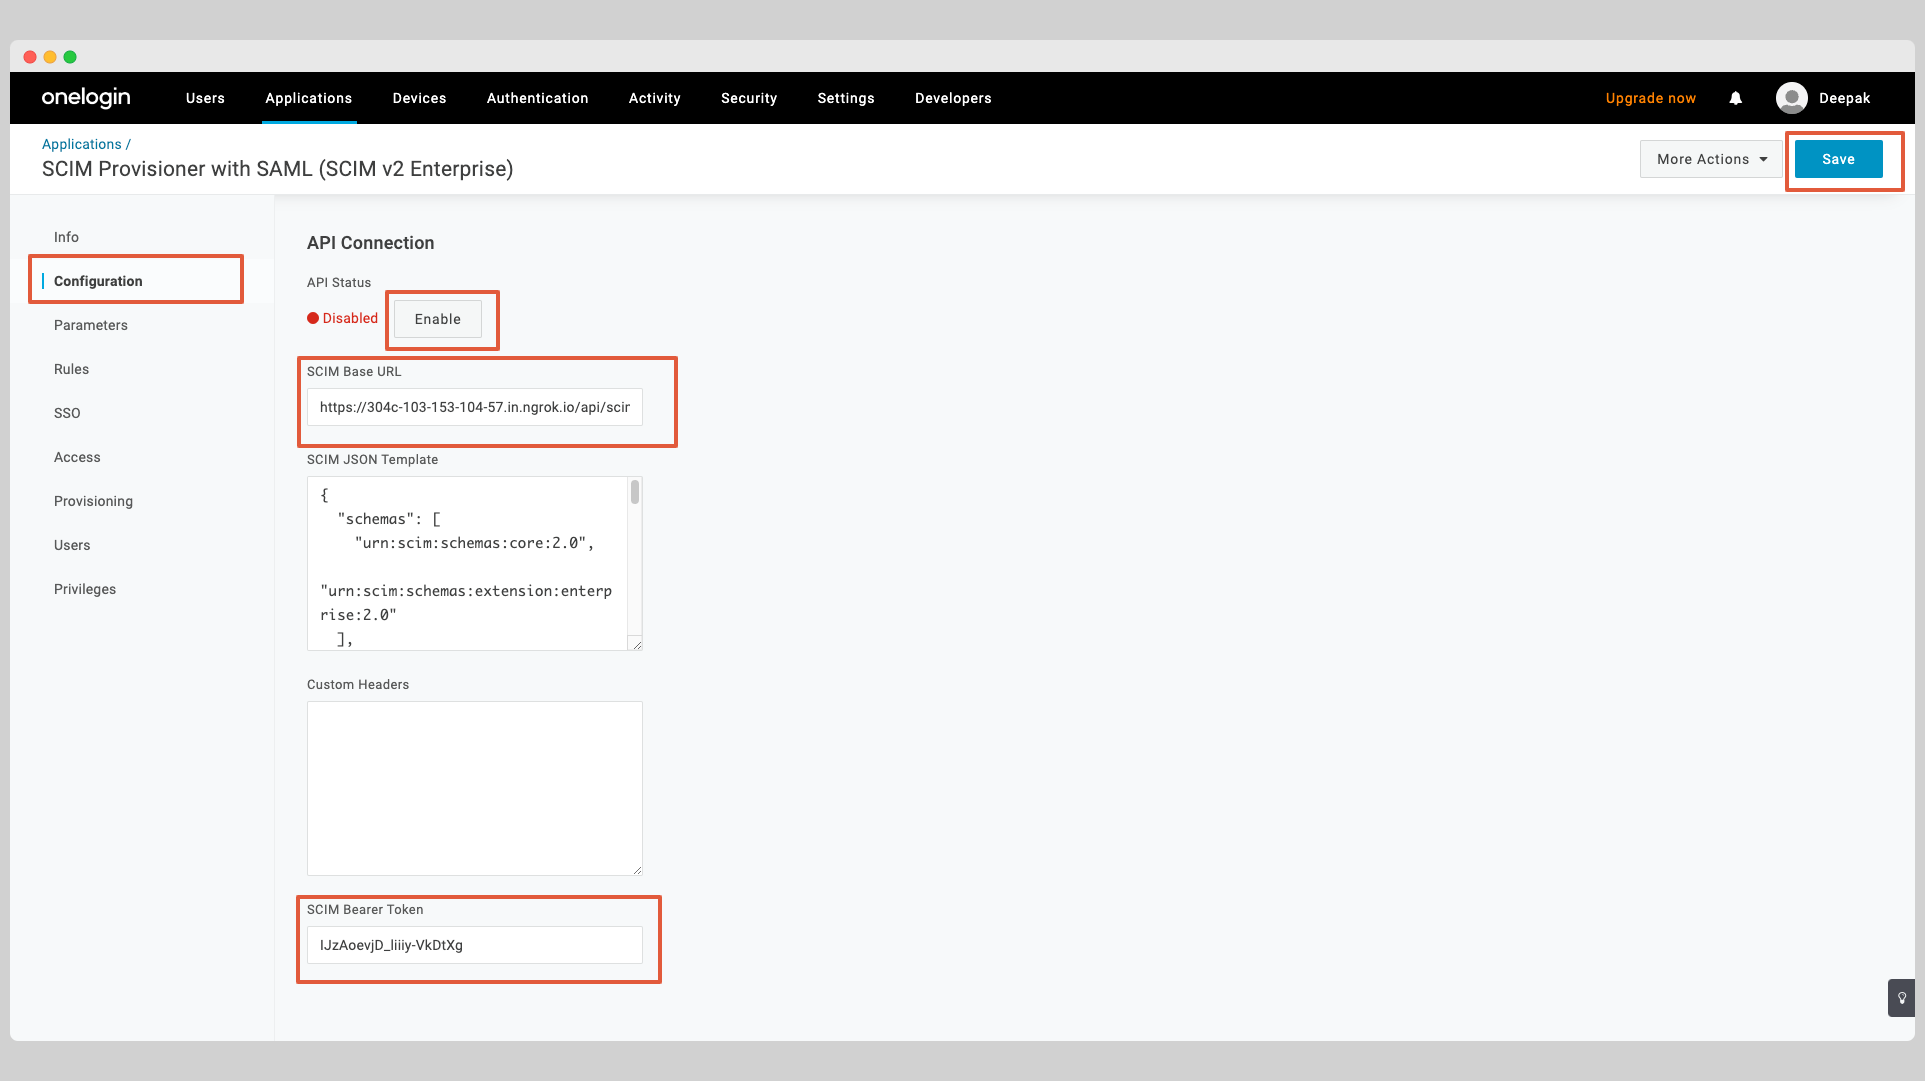
In your application, click the Configuration tab on the left.
Enter the following information:
- SCIM Base URL
- SCIM Bearer Token
You'll receive these information from Jackson when you create the directory sync connection either via the API or the Admin Portal.
Click the button Enable to test the connection to see if the credentials are correct and click the button to Save to save the credentials.
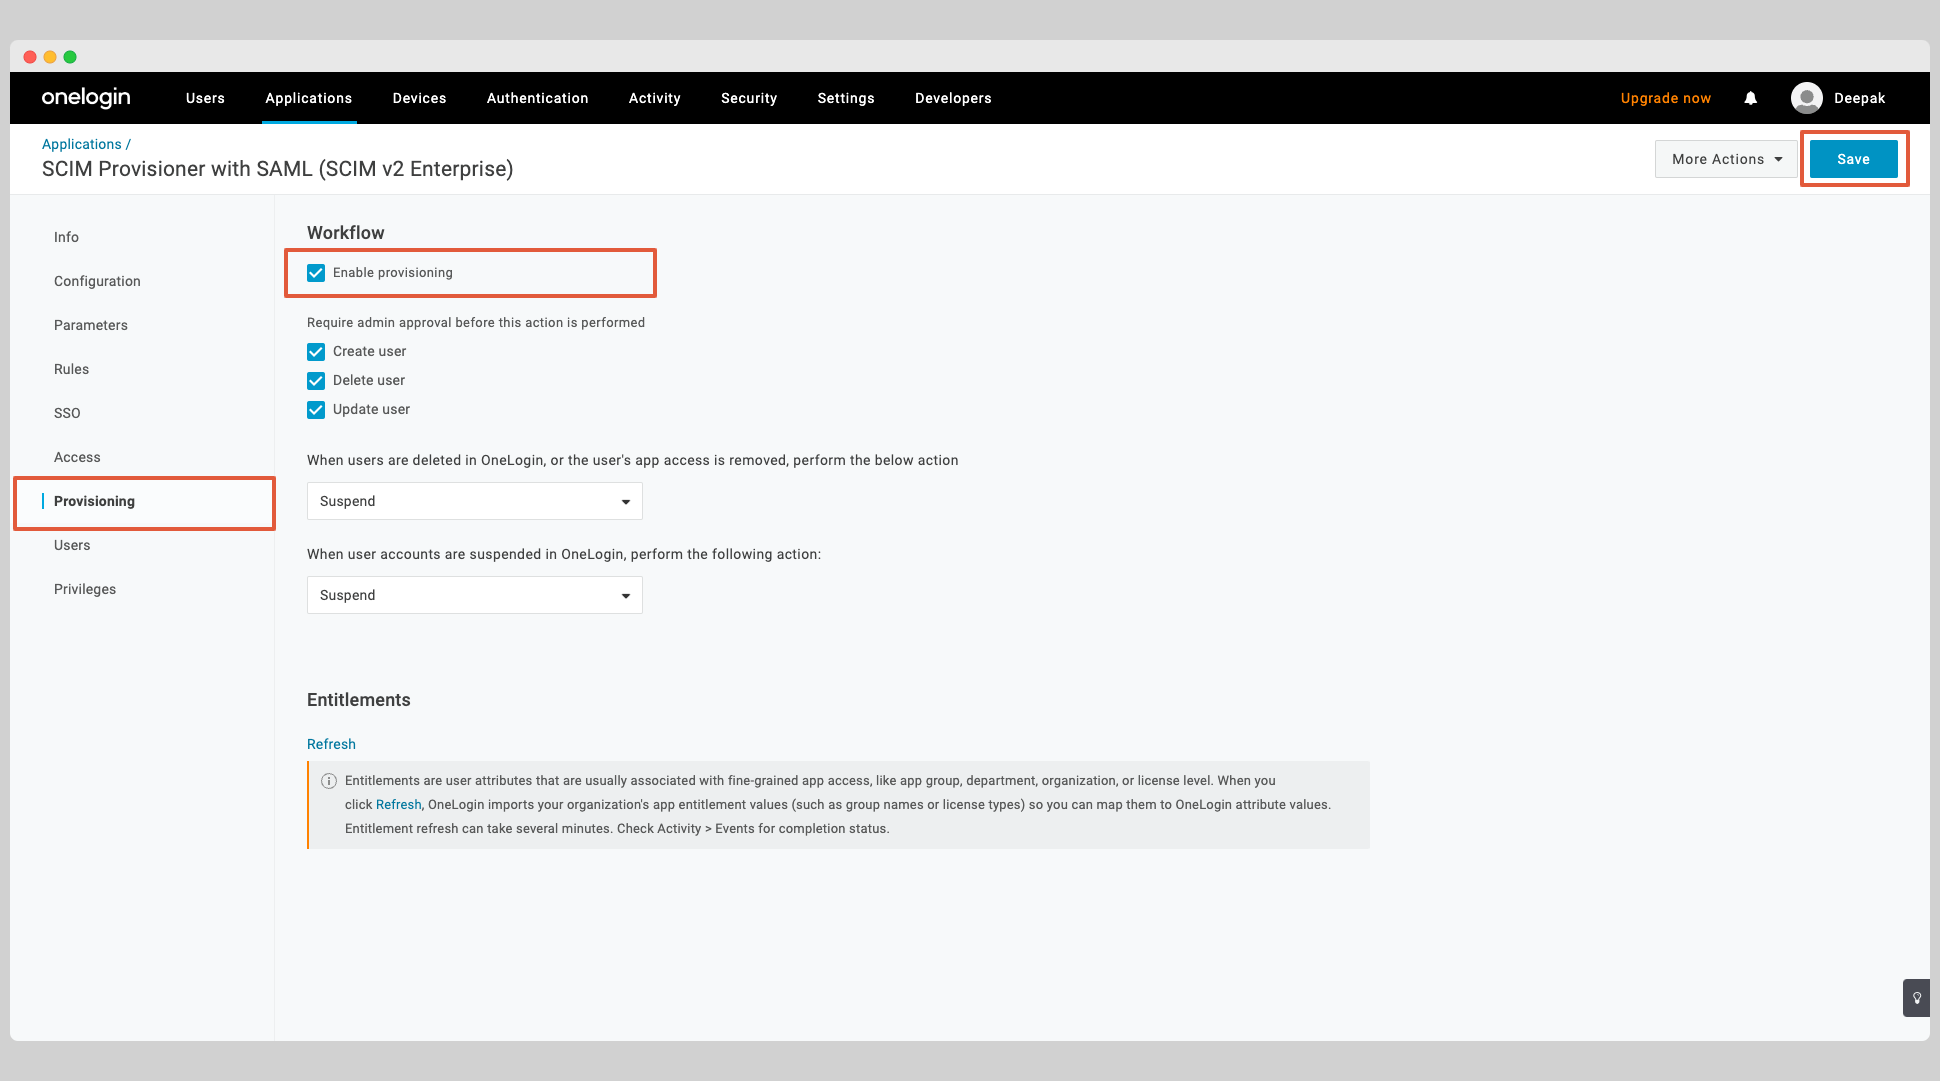
Next click the Provisioning tab and check the Enable provisioning checkbox. Click the Save button to save the changes.
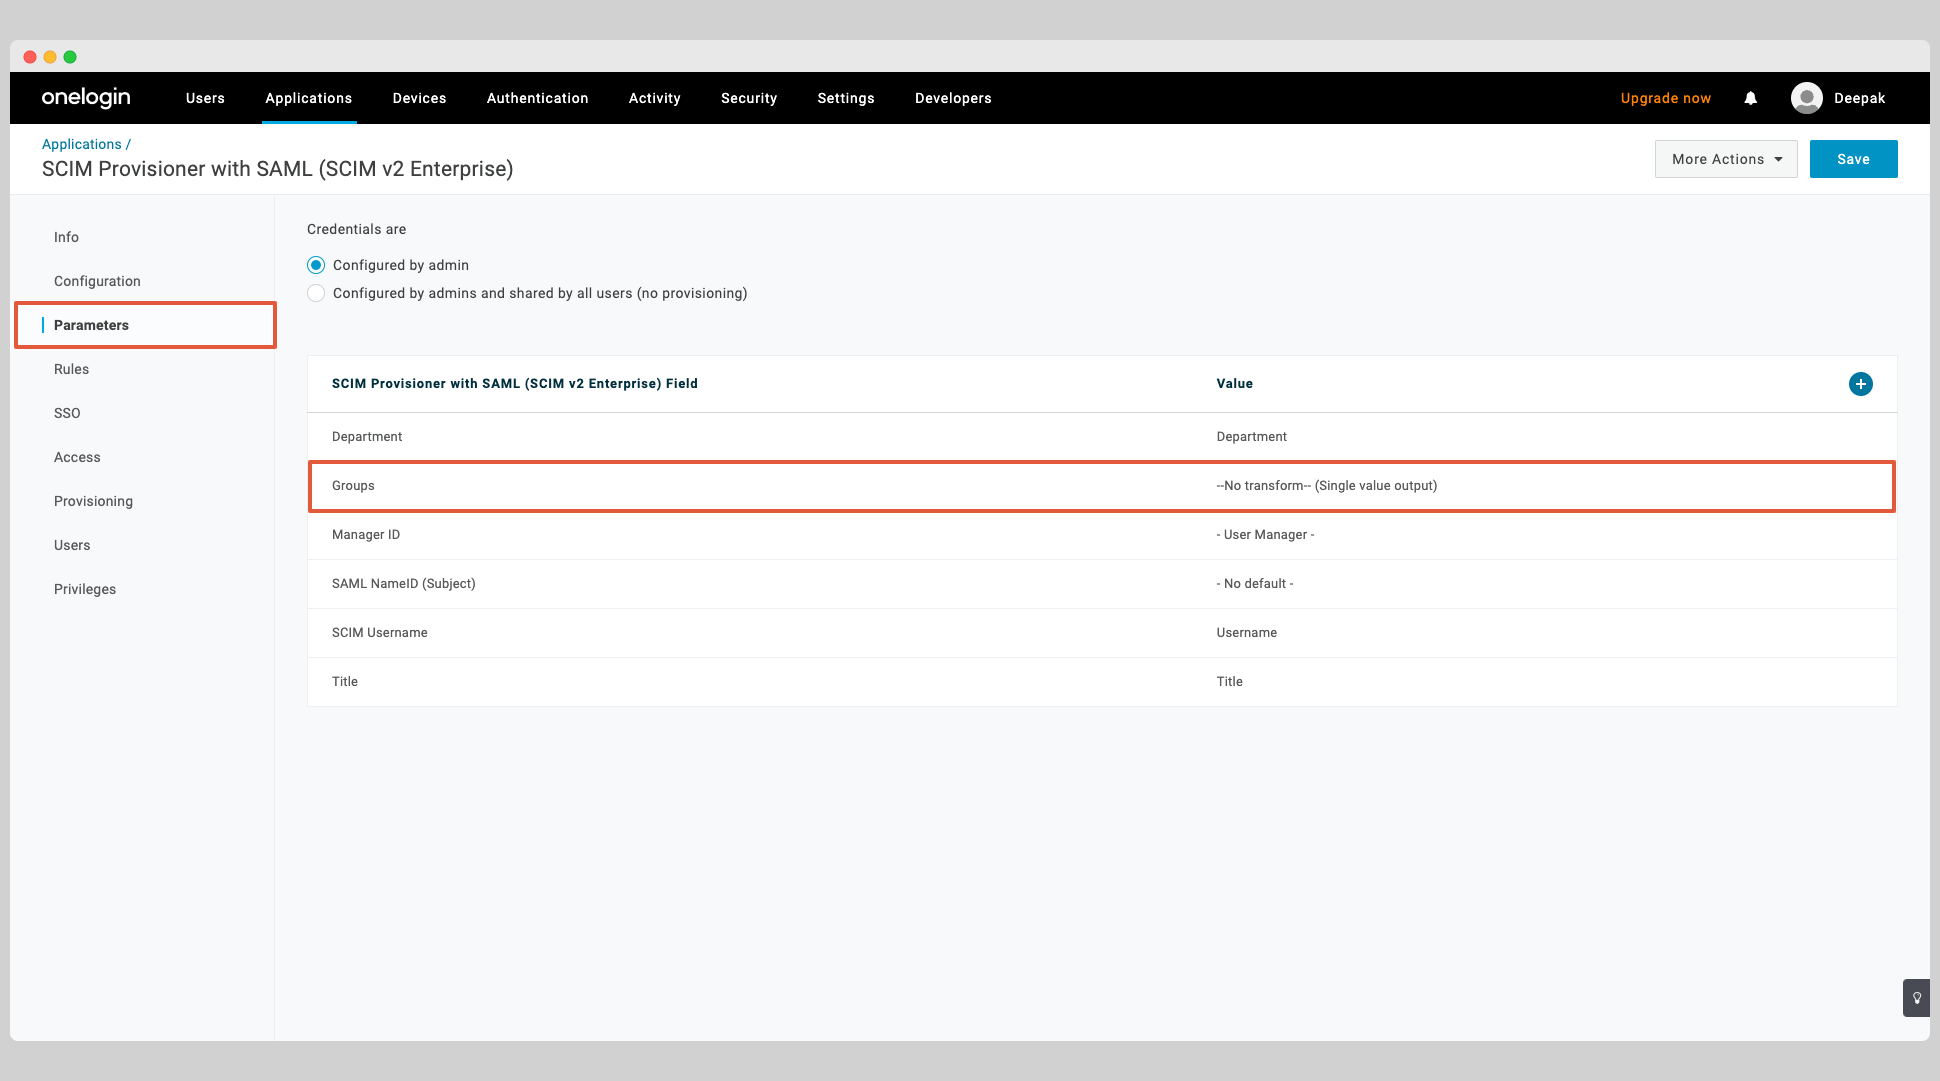
Next click the Parameters tab and select the row Groups from the table.
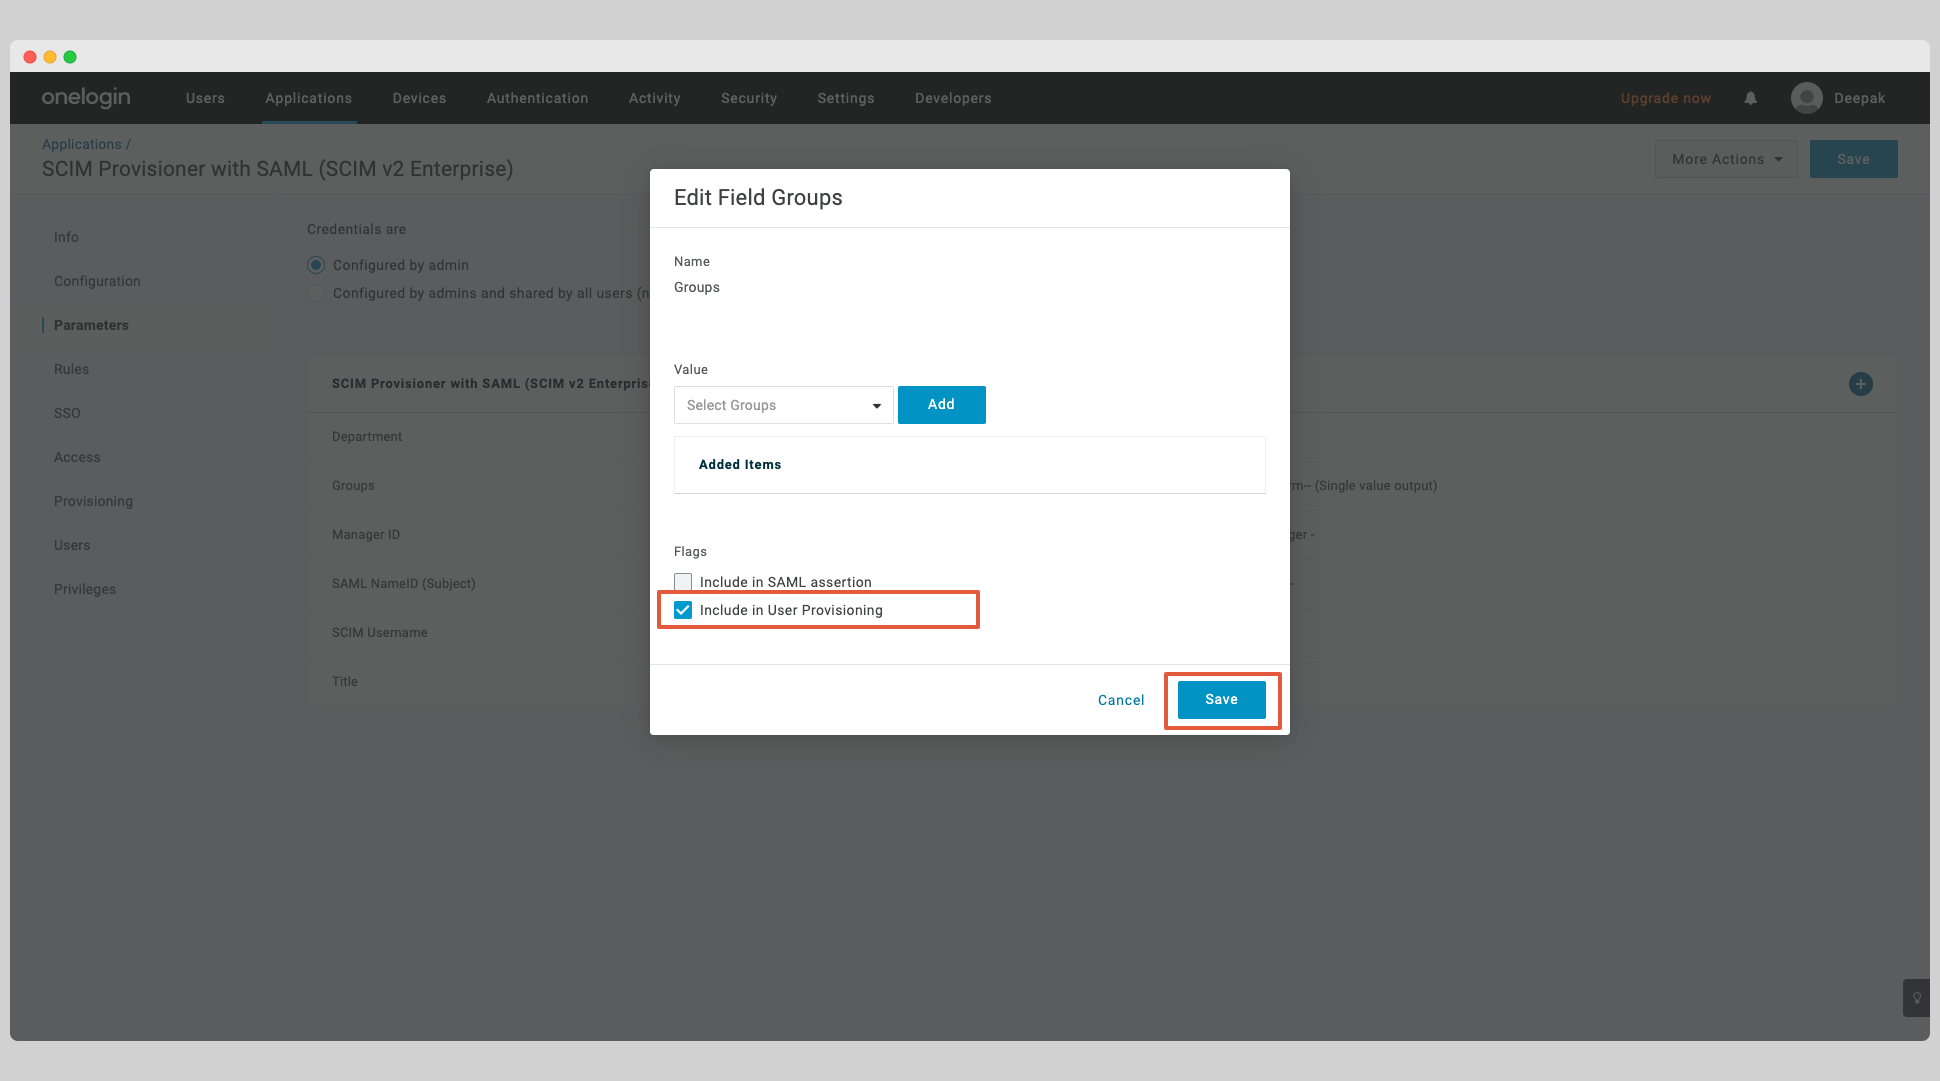
In the popup window, check the box Include in User Provisioning and click the Save button.
Assign Users
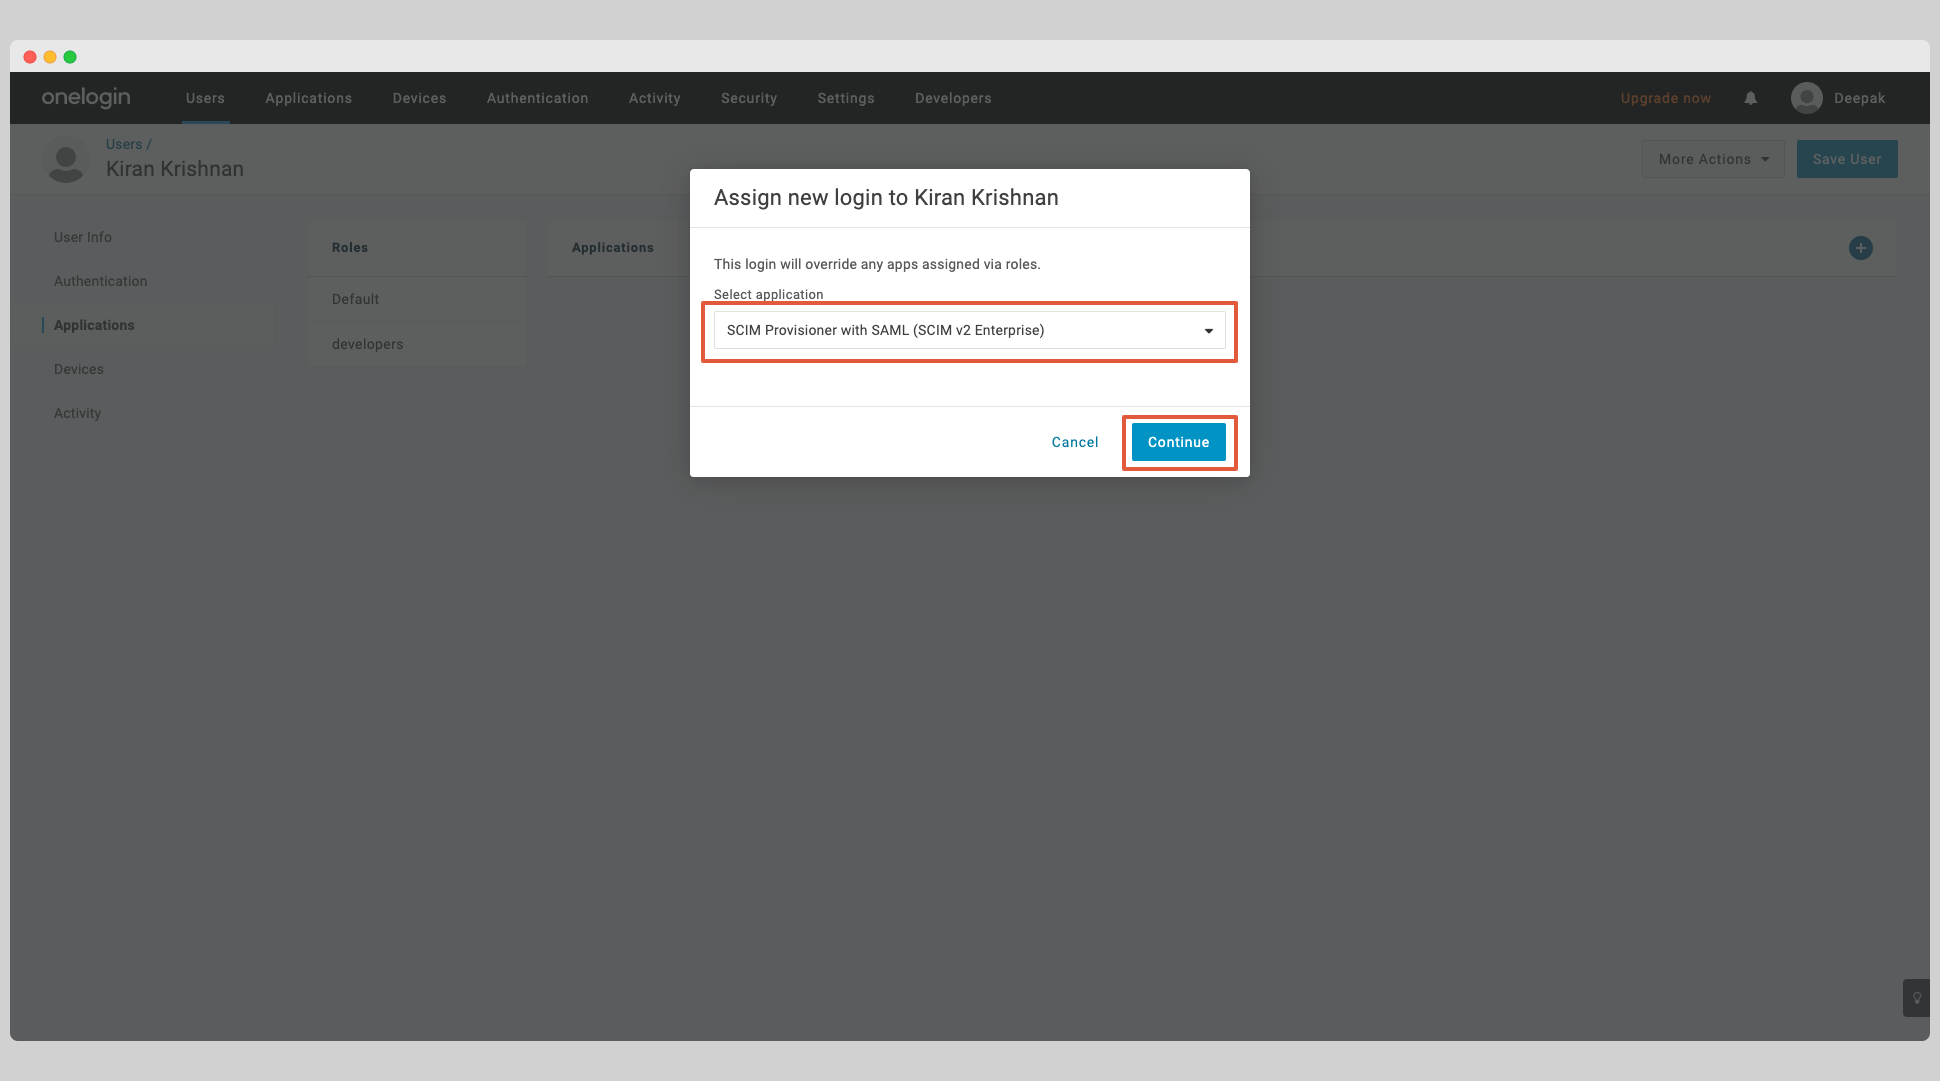
In order to assign users to your app, select Users from the top navigation menu and choose the user you want to assign to the app.
From the user page, click the Application tab on the left and click the plus sign.
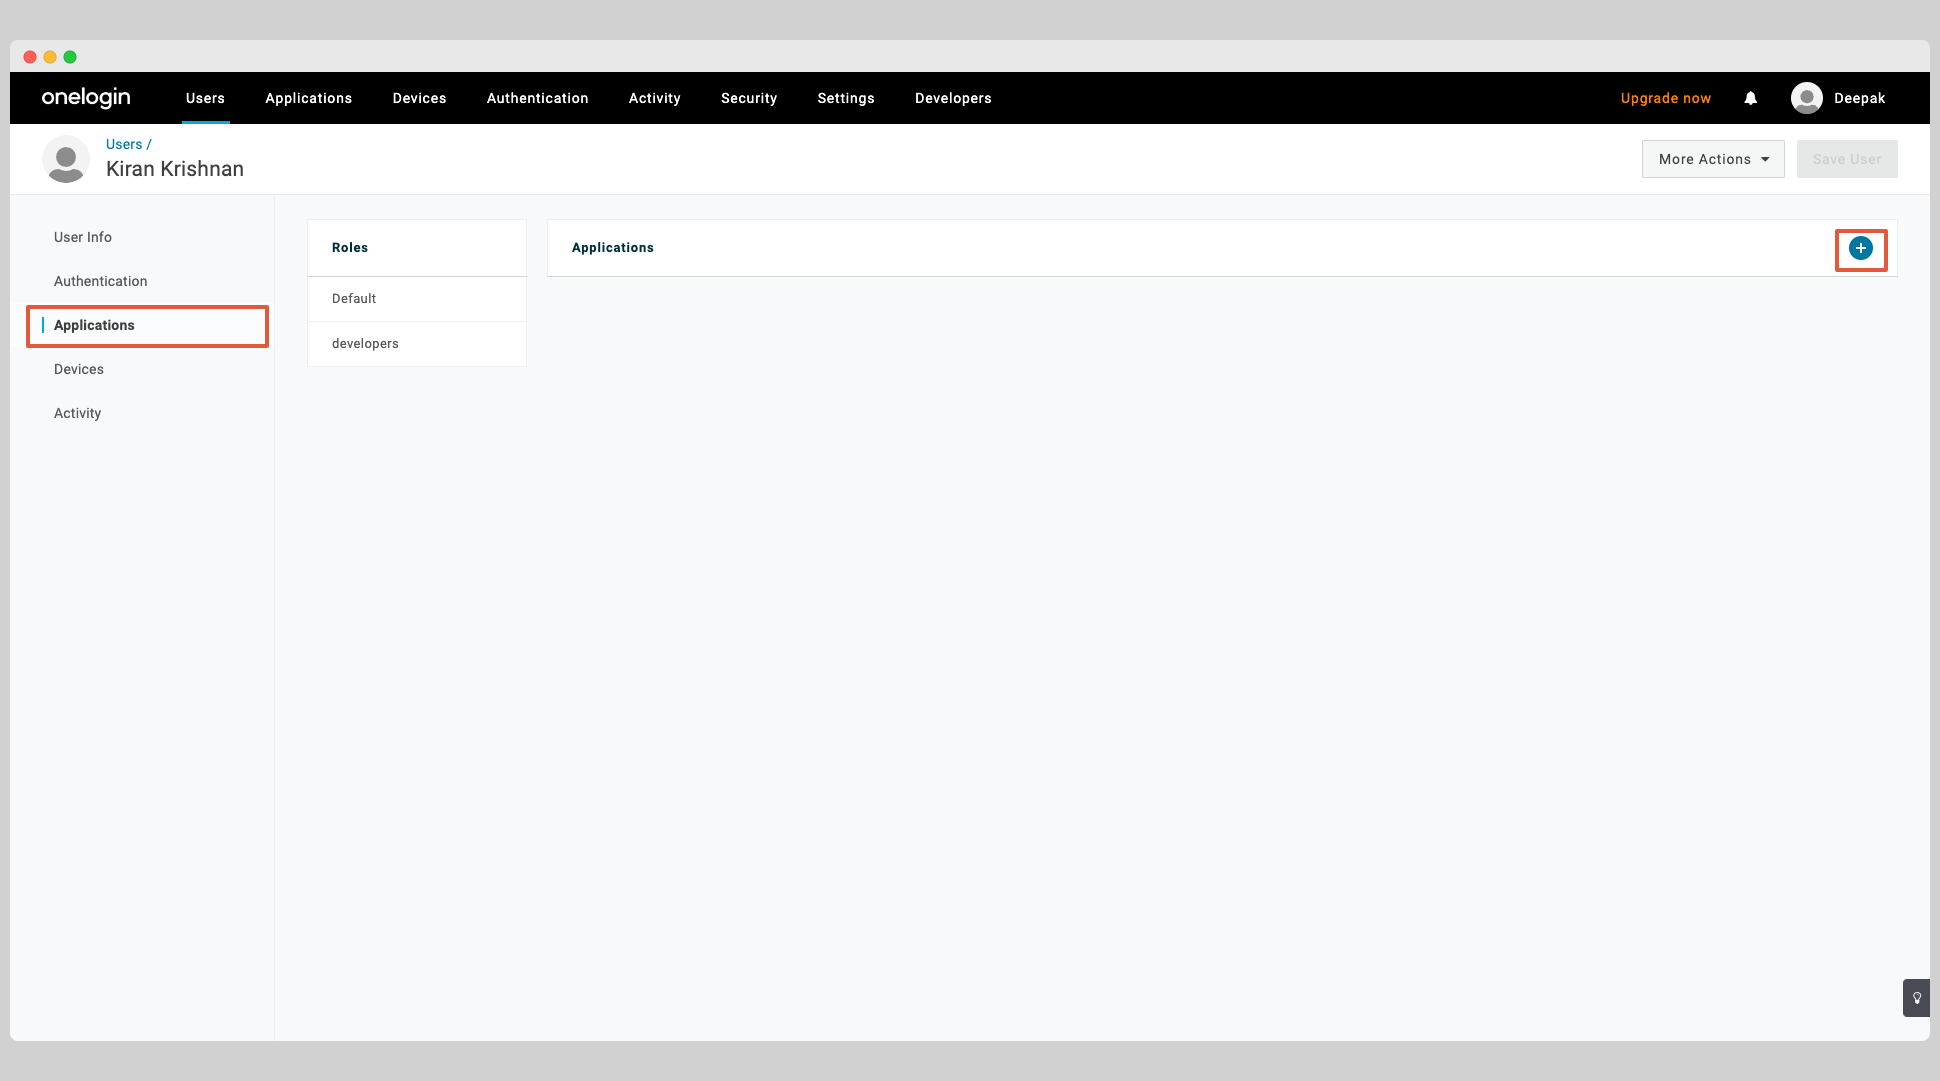
A popup window will show you the list of apps that you can assign the user to. Select the app you created earlier and click the Continue button.
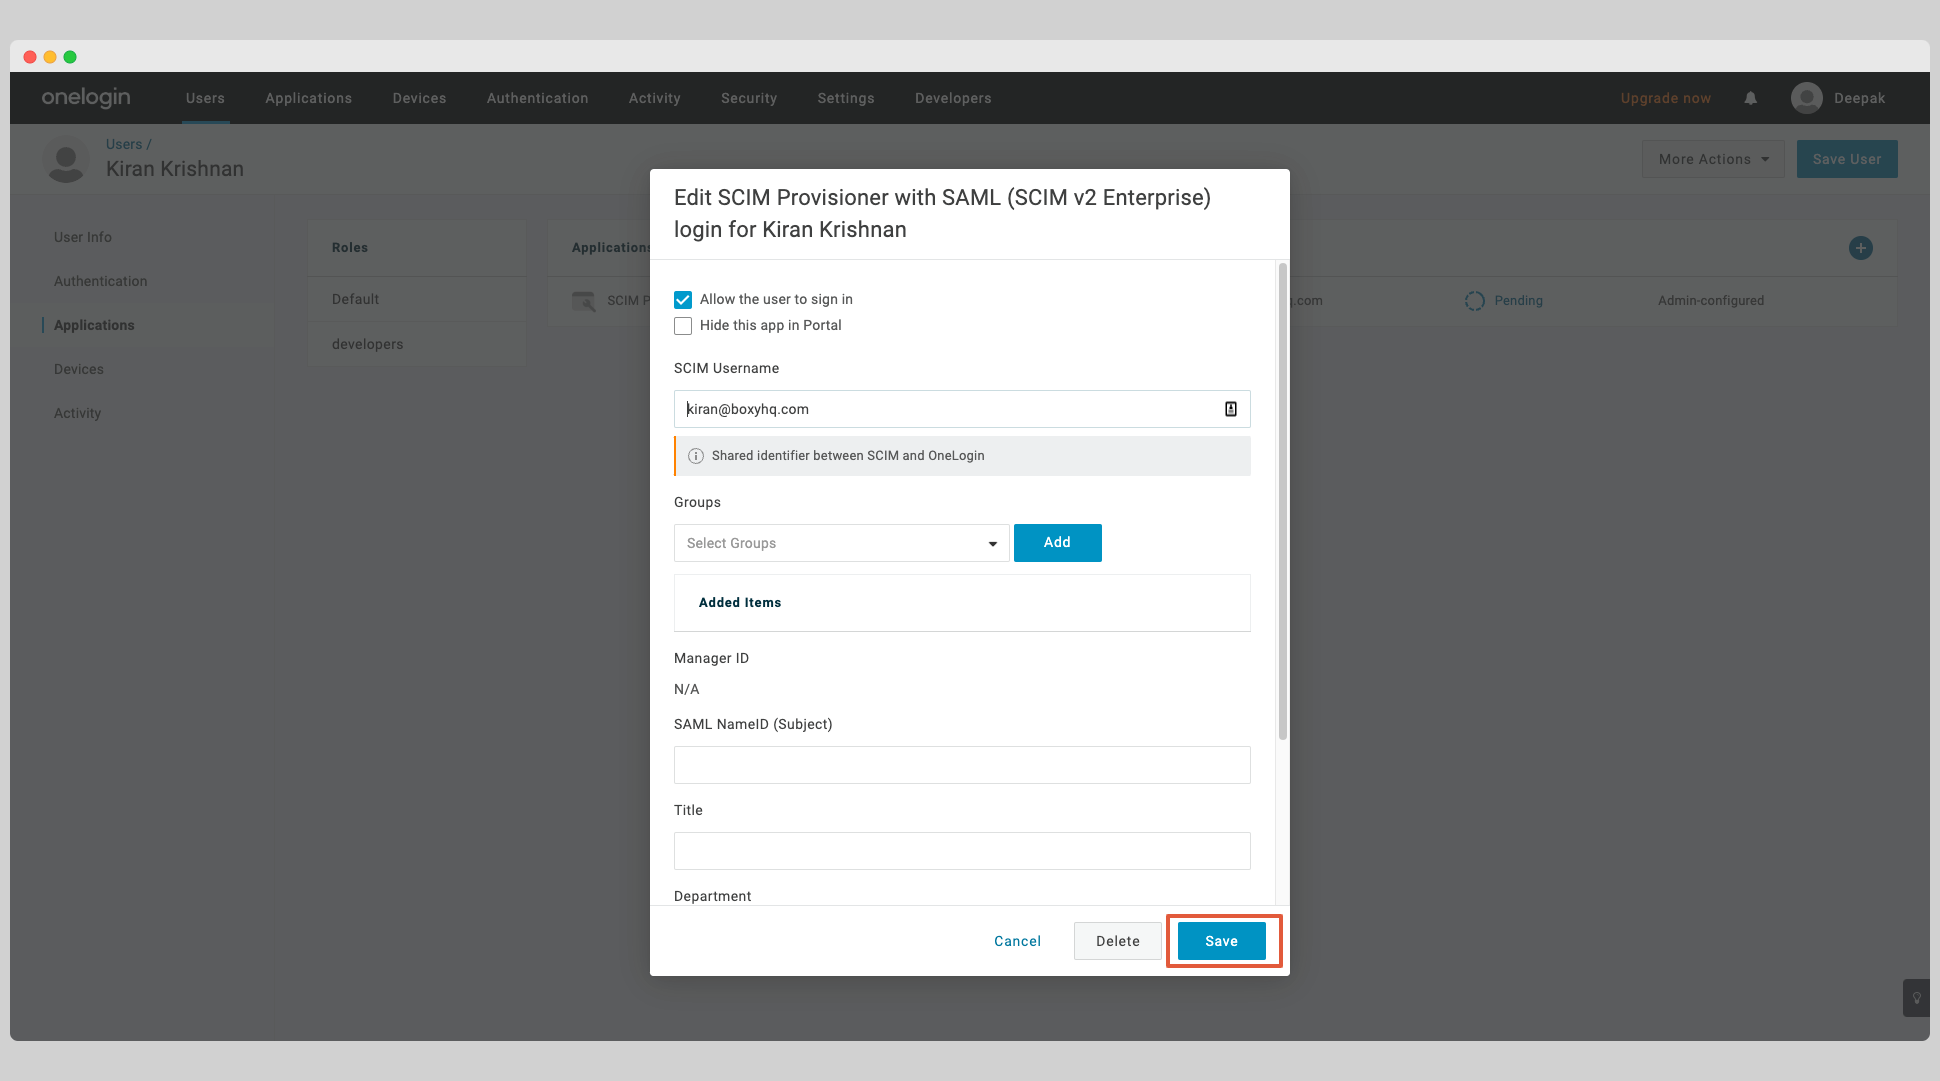
Click Save on the next modal window to confirm the assignment.
Depending on your configuration, You may have to approve the assignment.
If you see a text Pending in the table, click that text. That'll bring up a modal window, click the button Approve to approve the assignment.
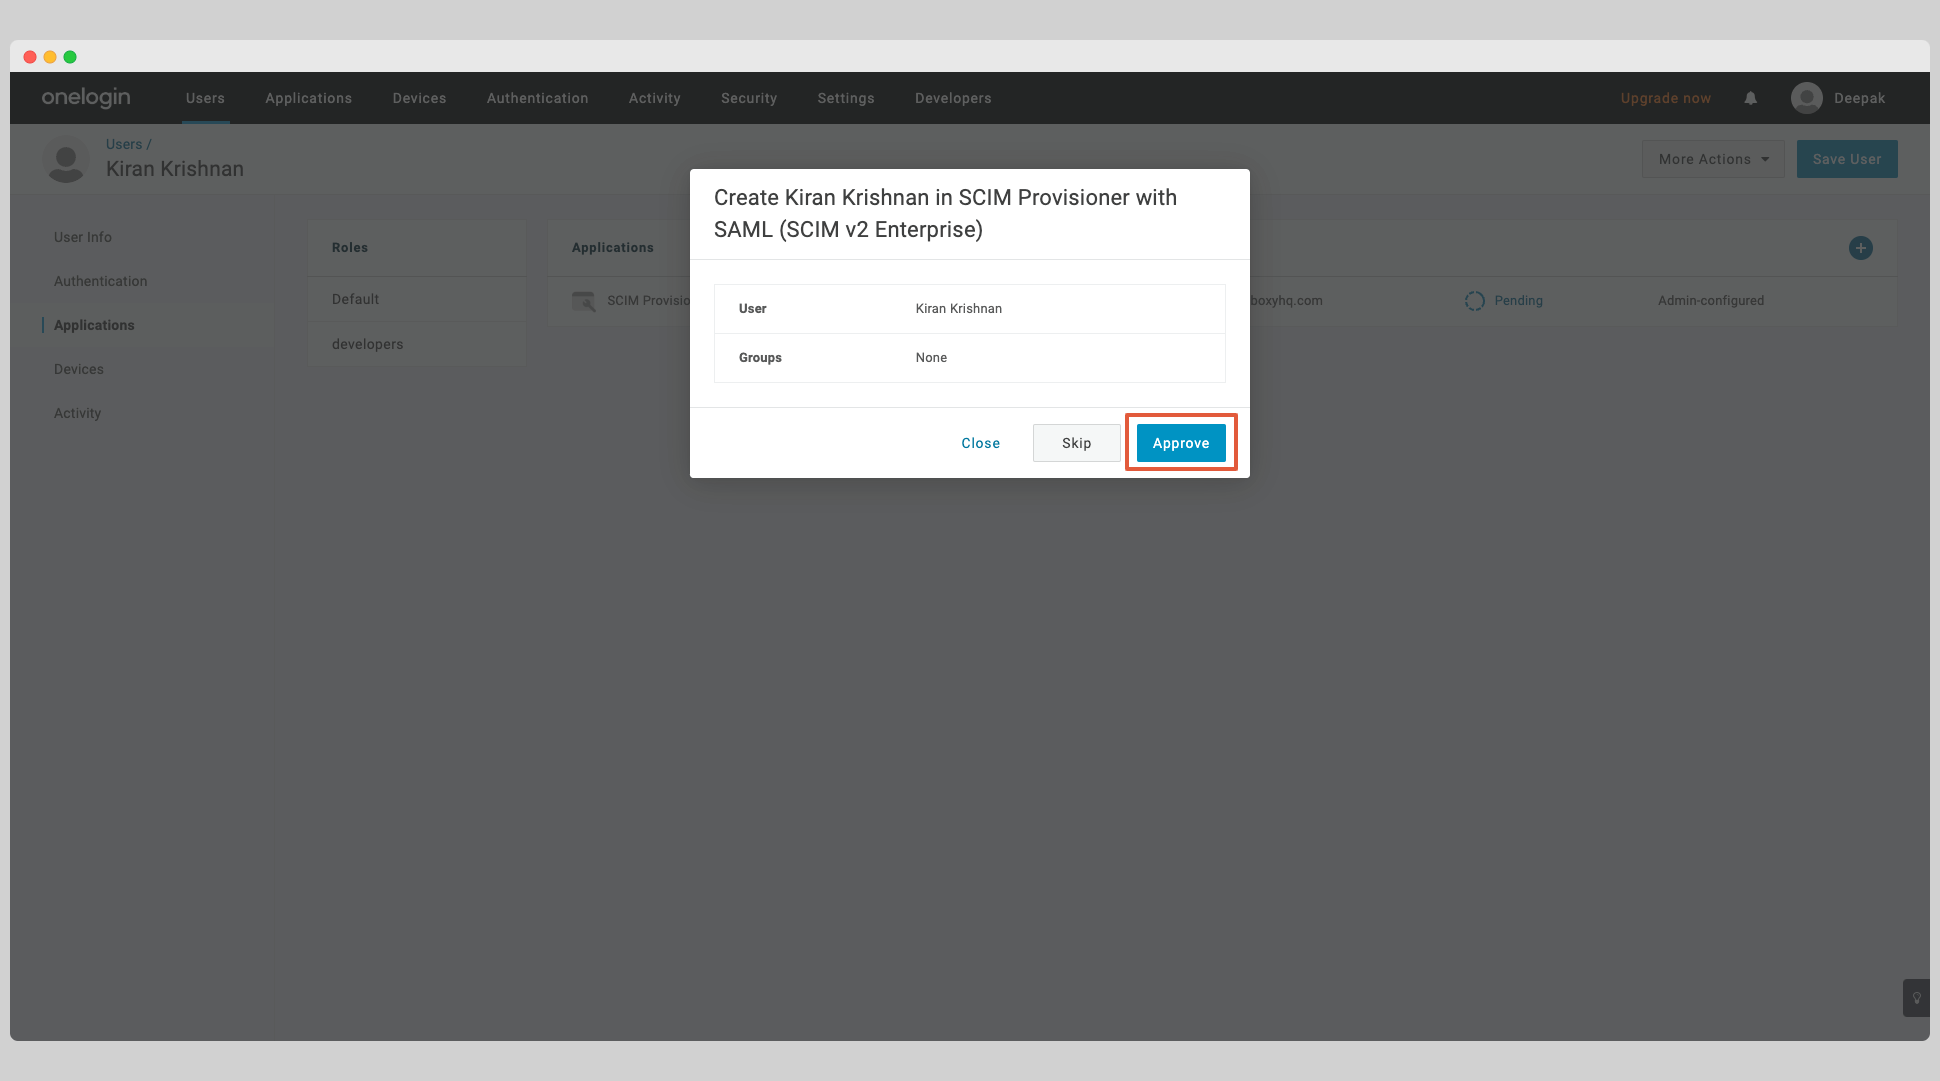
At this point, the user will be assigned to the app.
Push Groups
In order to push groups to your app, you've to create a new Role in your app.
In the top navigation, select Users and then Roles from the dropdown.
Click New Role to create a new role.

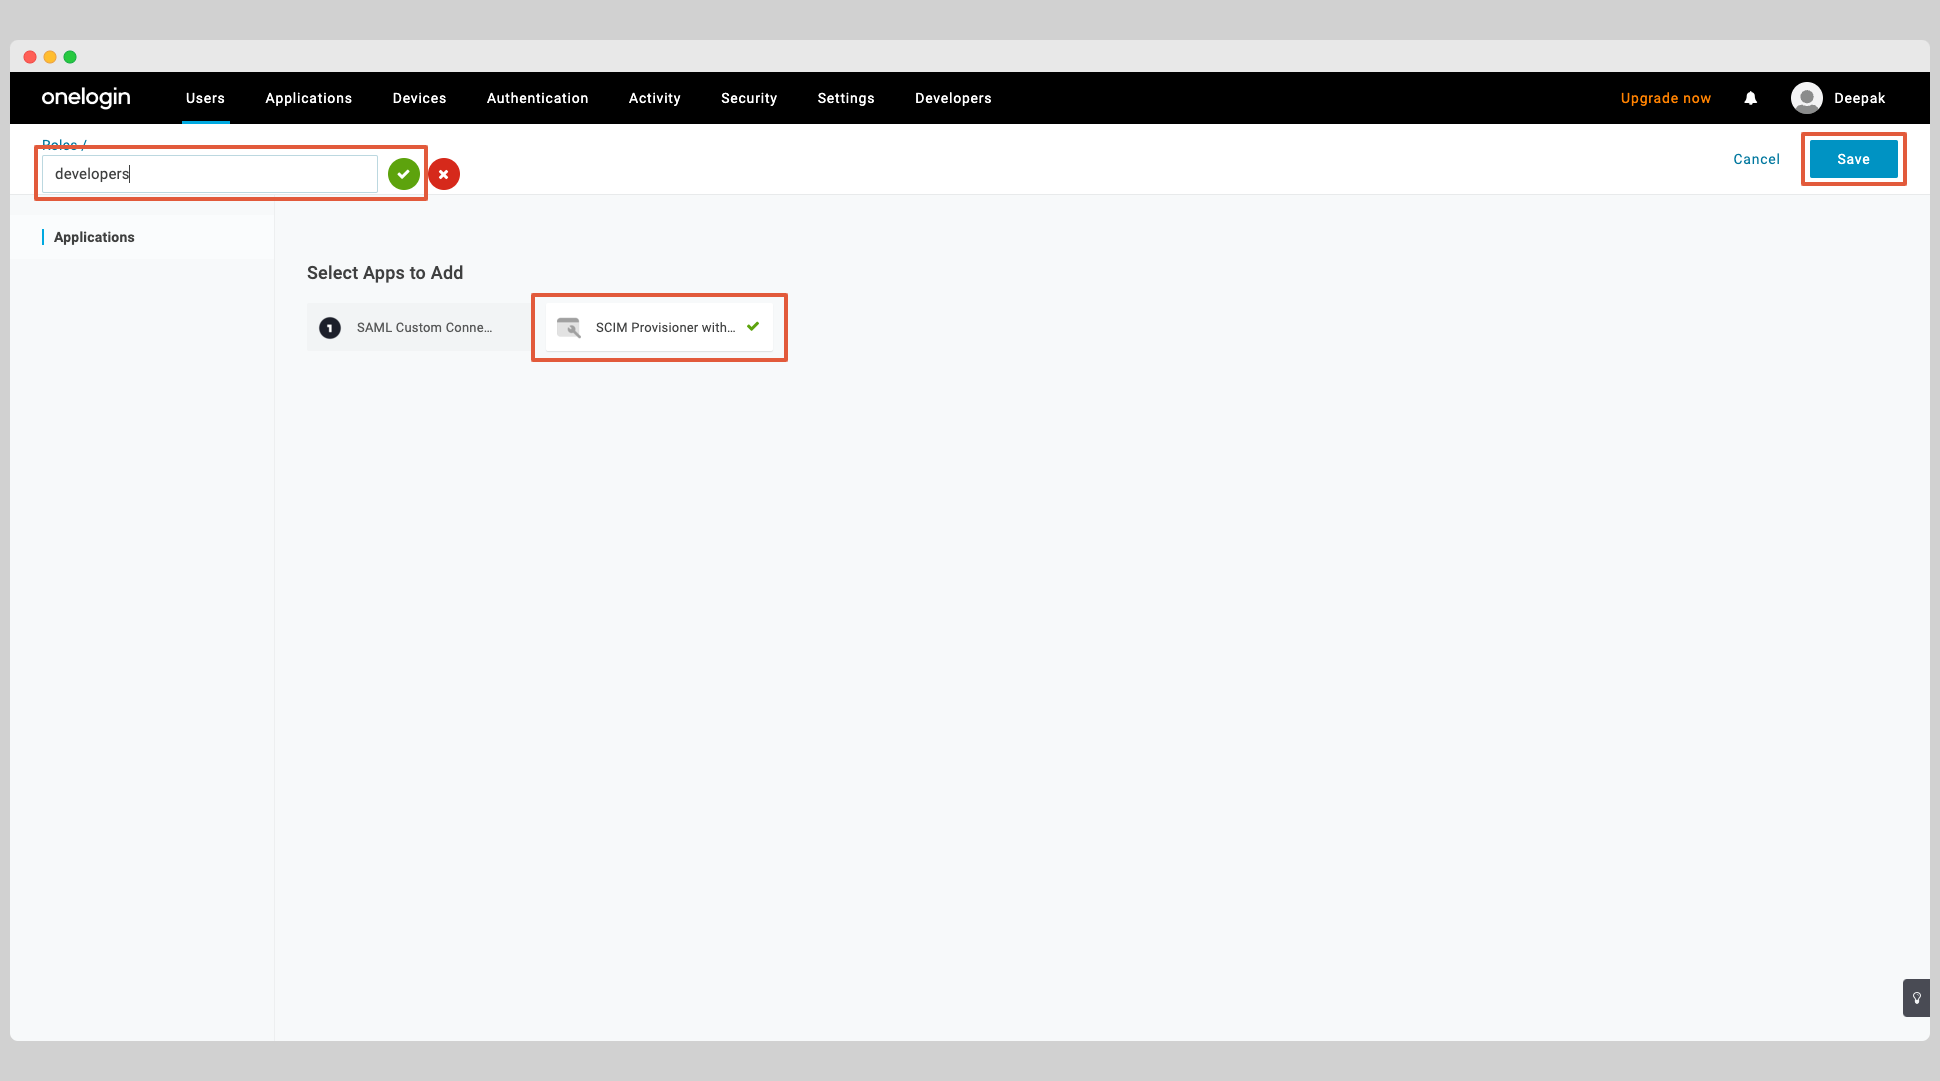
Enter a name for the role, select the app you created earlier and click the Save button.
Click the Users tab for the role and search for the user you want to assign the role to.
Click the button Add To Role to assign the user to the role and click the Save button.
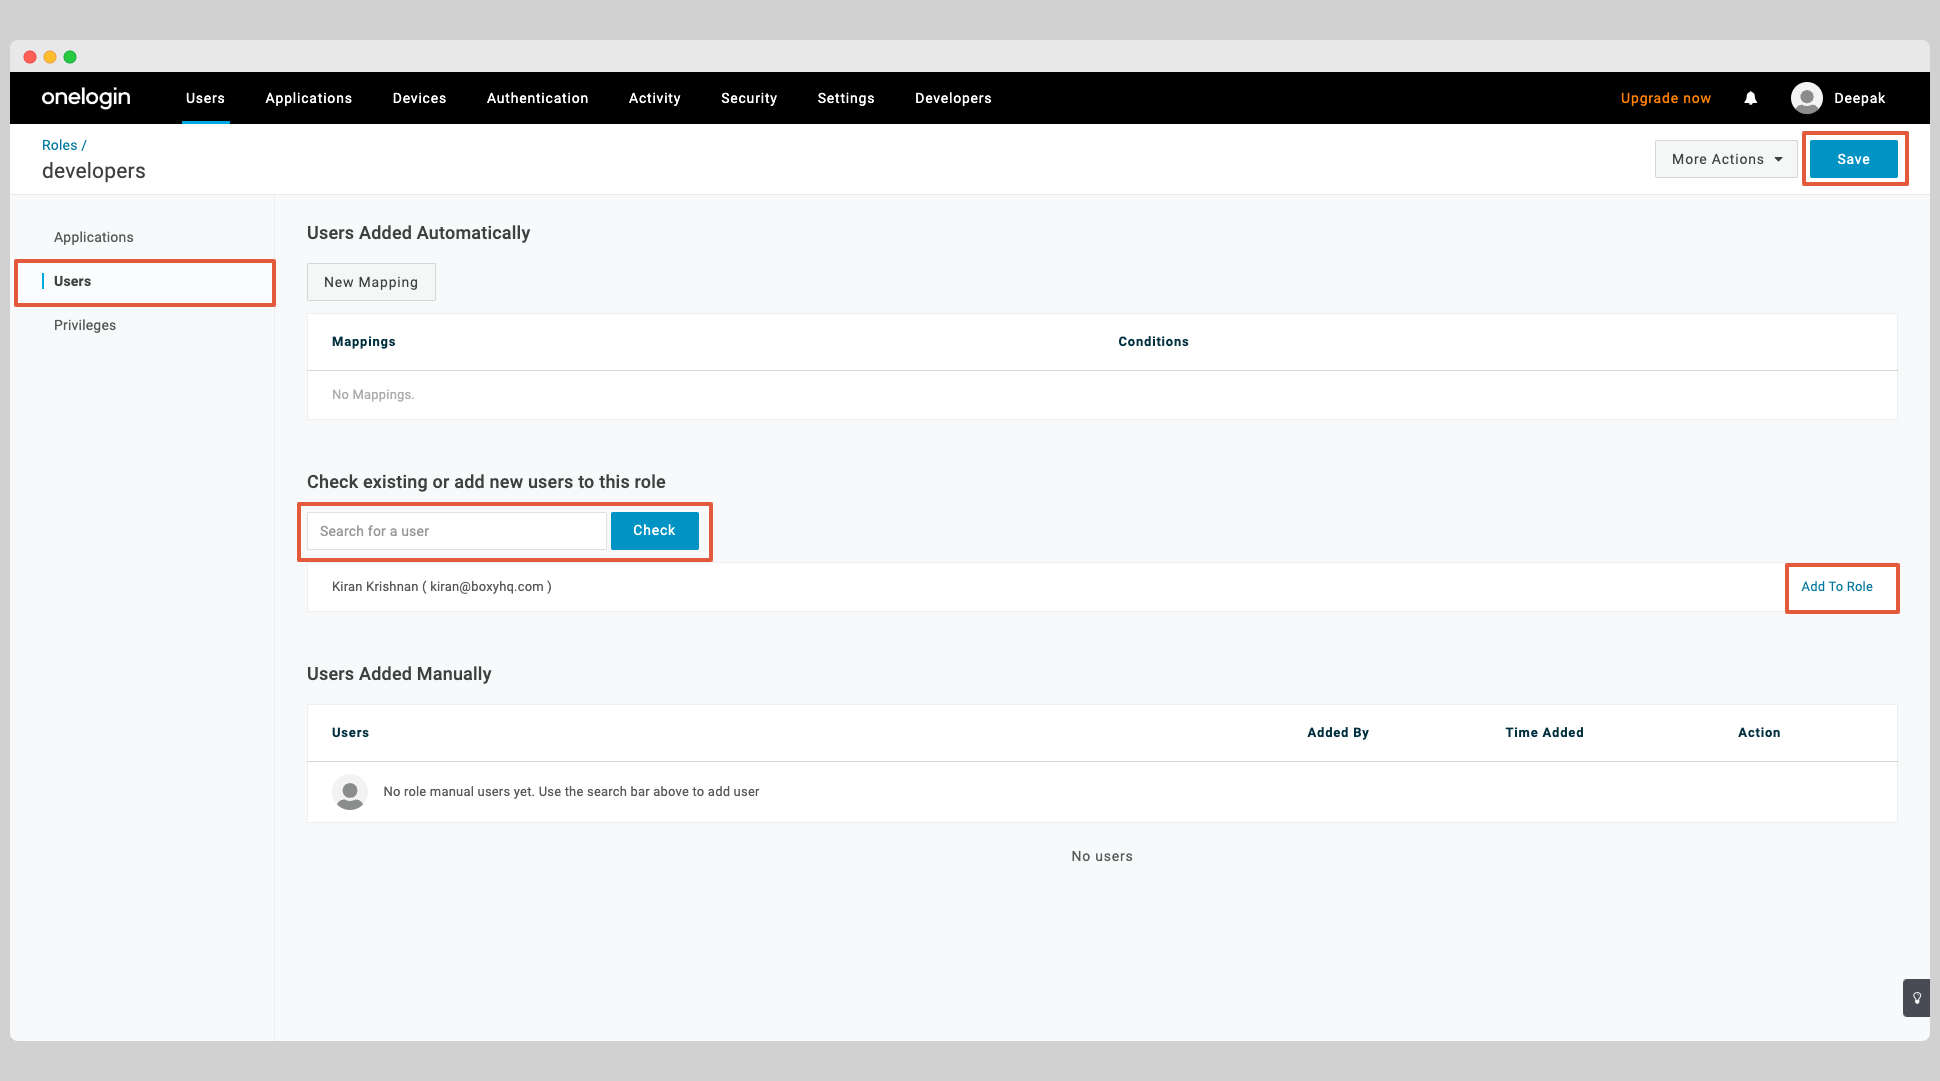
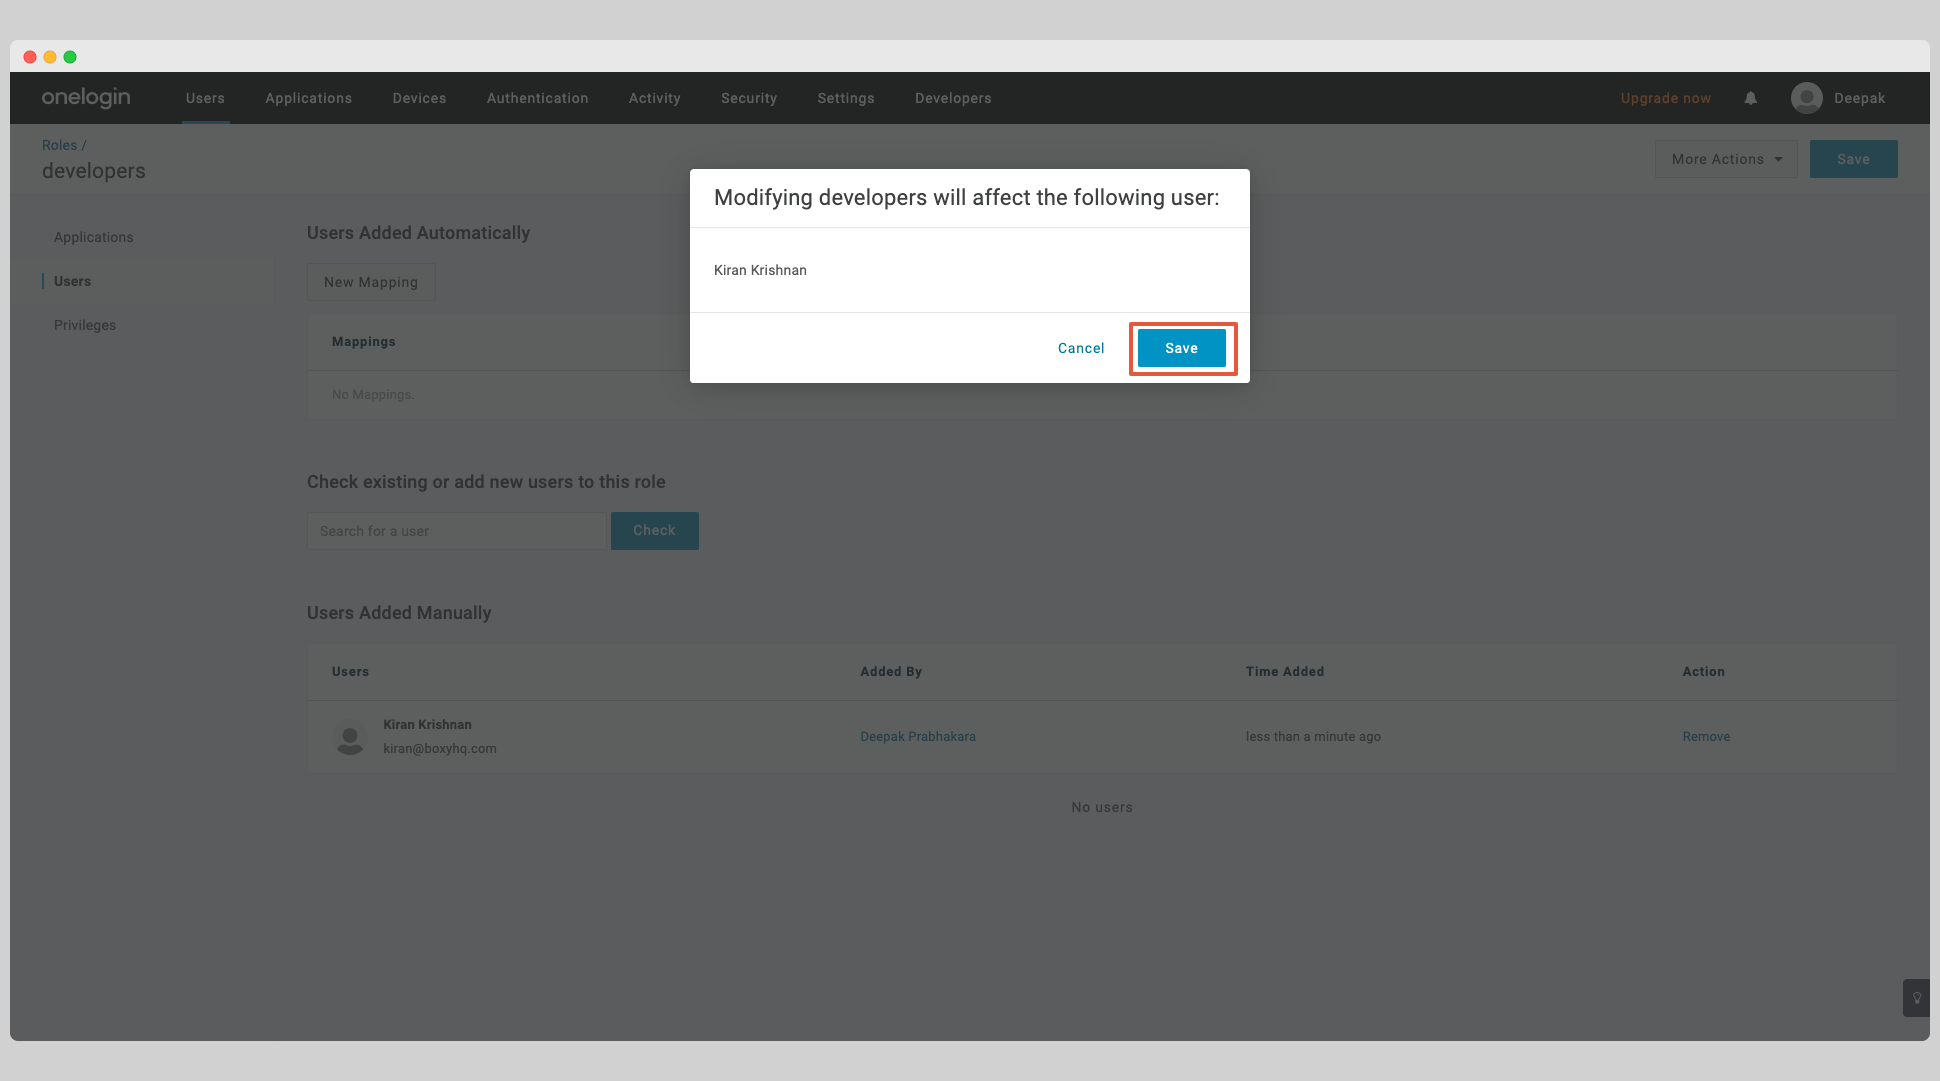
Click Save in the next modal to confirm the assignment.
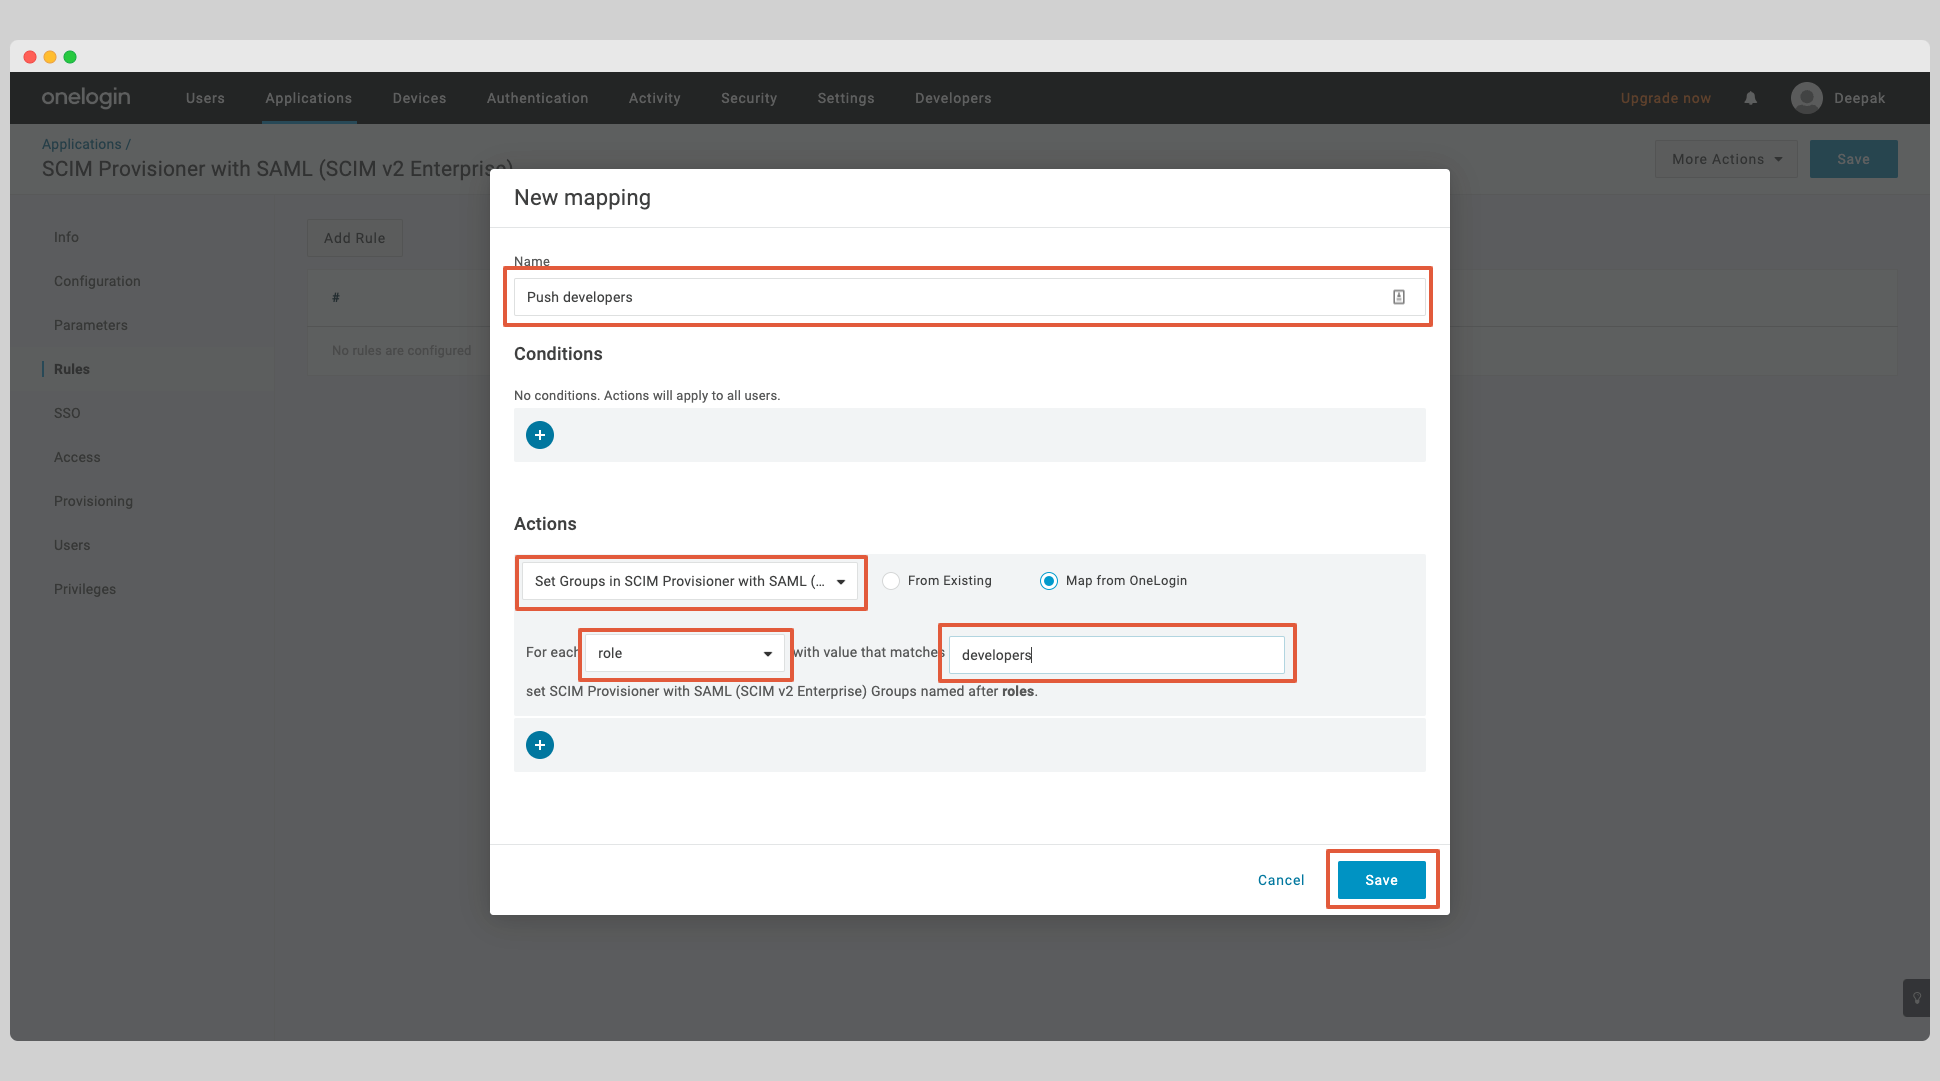
Go back to your app and click the Rule tab on the left and click the Add Rule button.
Give the rule a name. Under the Actions, select the Set Groups in your-app-name from the dropdown, then select for each role with values that matches your-app-name. Click the Save button.
Click the Users tab on the left, you may see Pending provisions in the table. Click that text to approve the assignment.
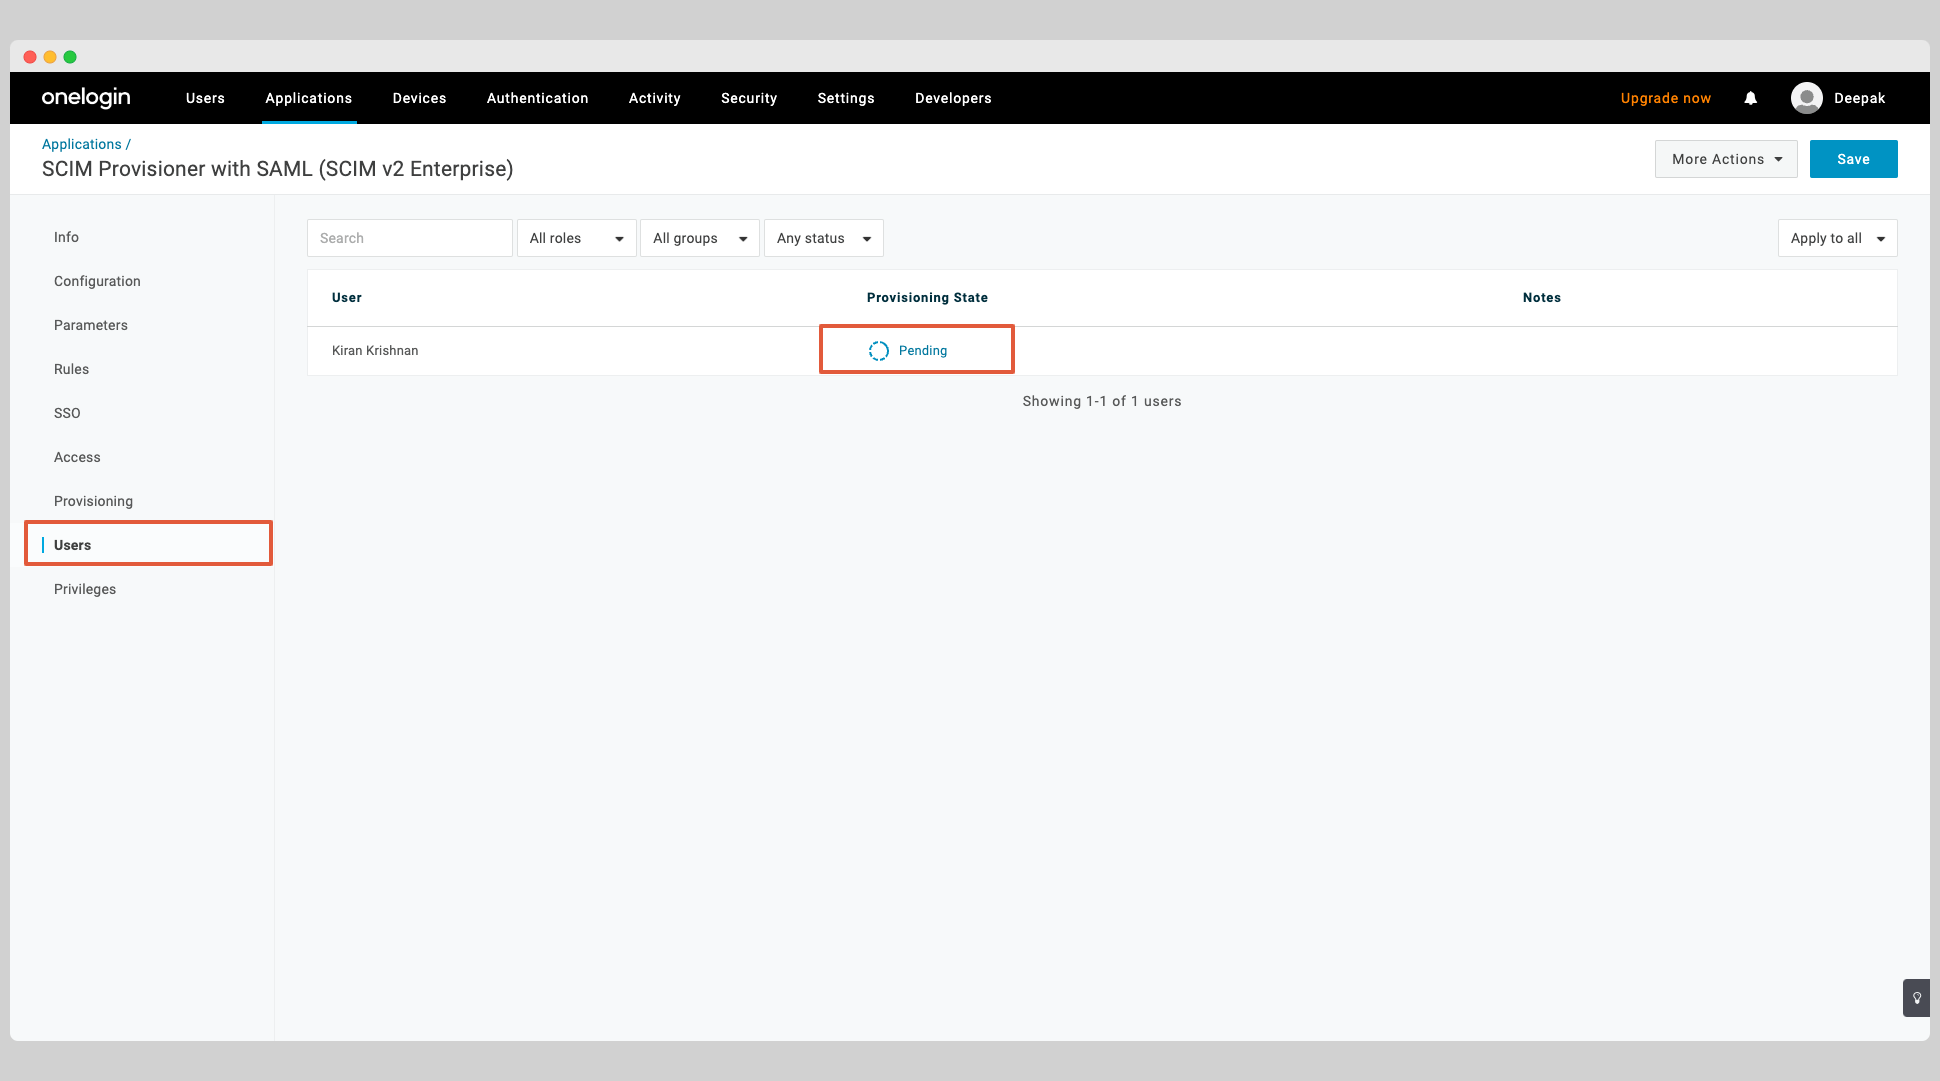
Click Approve in the next modal to confirm the assignment.

FAQ
Why don't I see any event when a group is removed in OneLogin?
It is a known issue with OneLogin SCIM. OneLogin does not dispatch a specific deprovisioning event for groups that are deleted, so you won't see any event such as group.deleted or group.user_removed when a group is removed. It is recommended to remove the users from the group before deleting the group itself from the SCIM application.