Okta SCIM v2.0
The following guide will walk you through the process of configuring SAML Jackson to use the Okta as a directory sync provider.
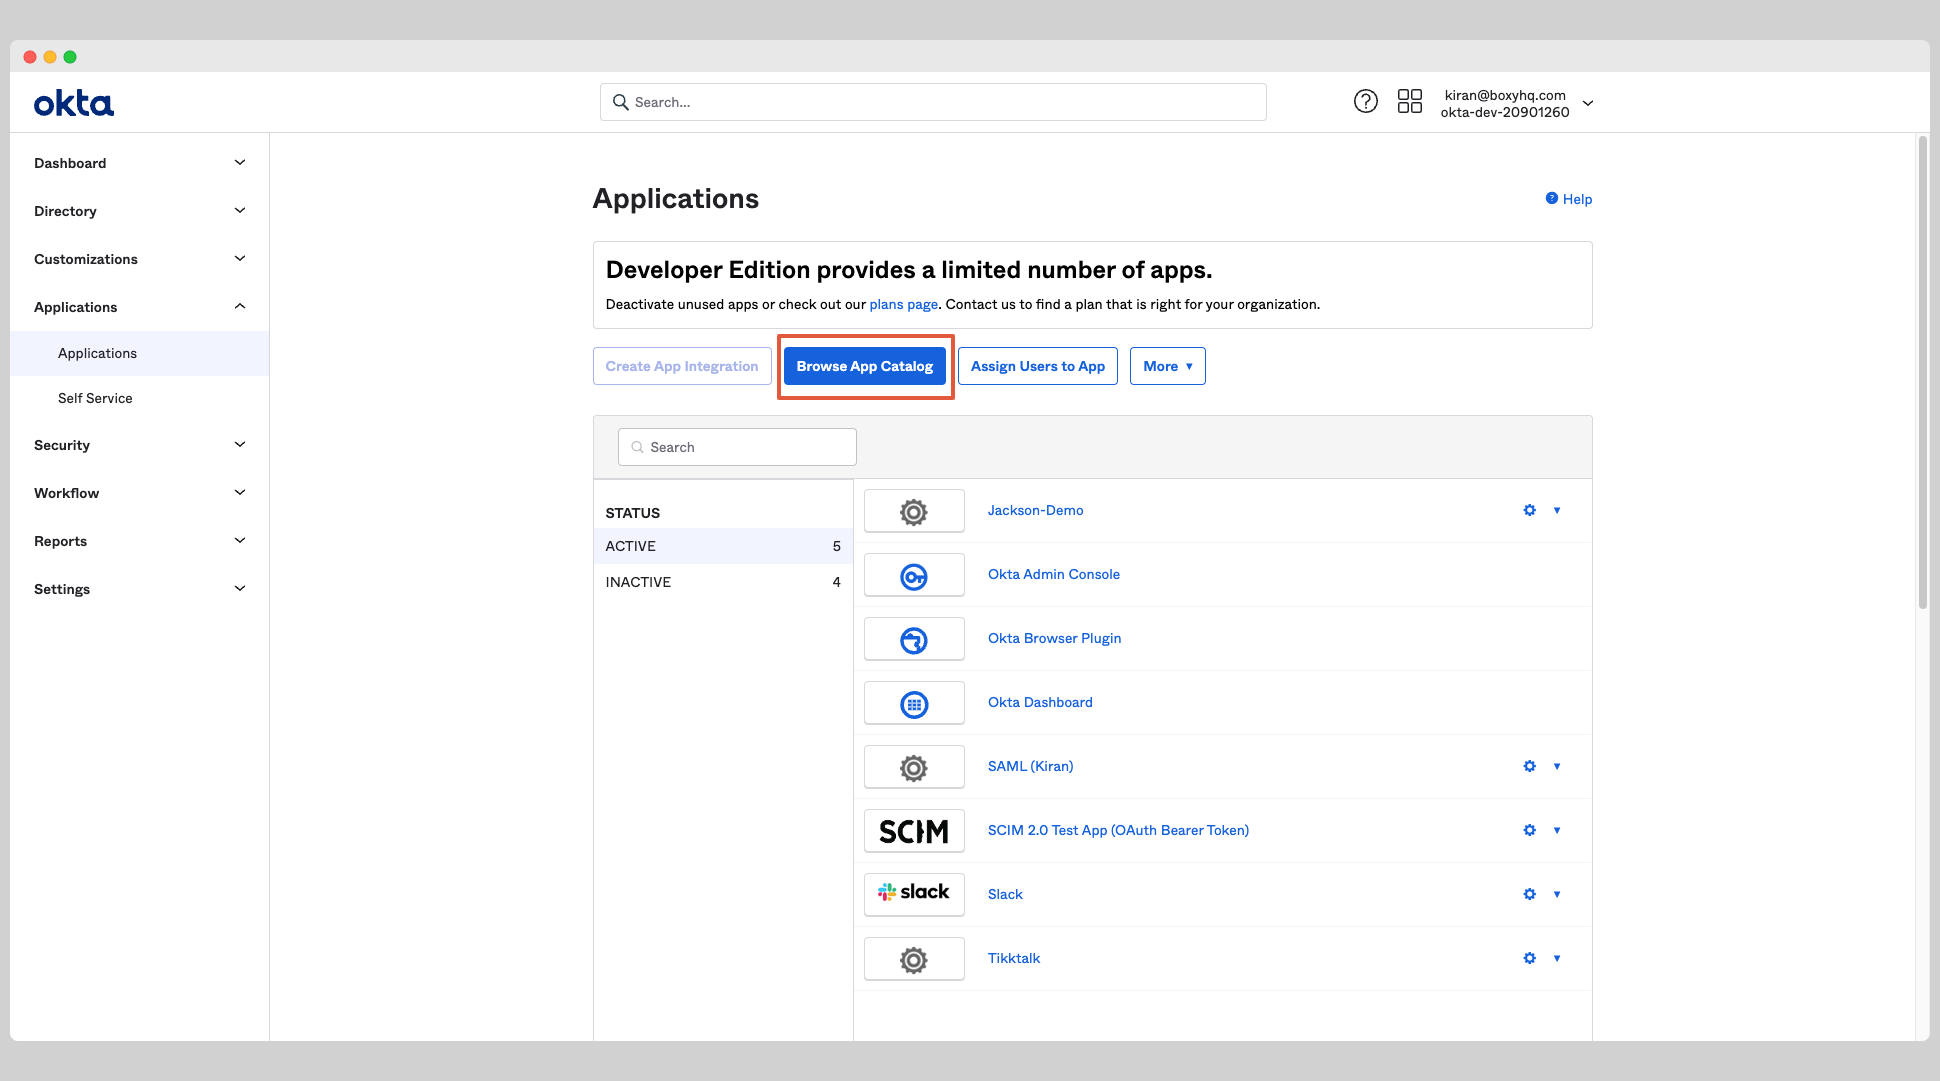
Create Okta Application
Click Applications from the left navigation menu and click Browse App Catalog button.
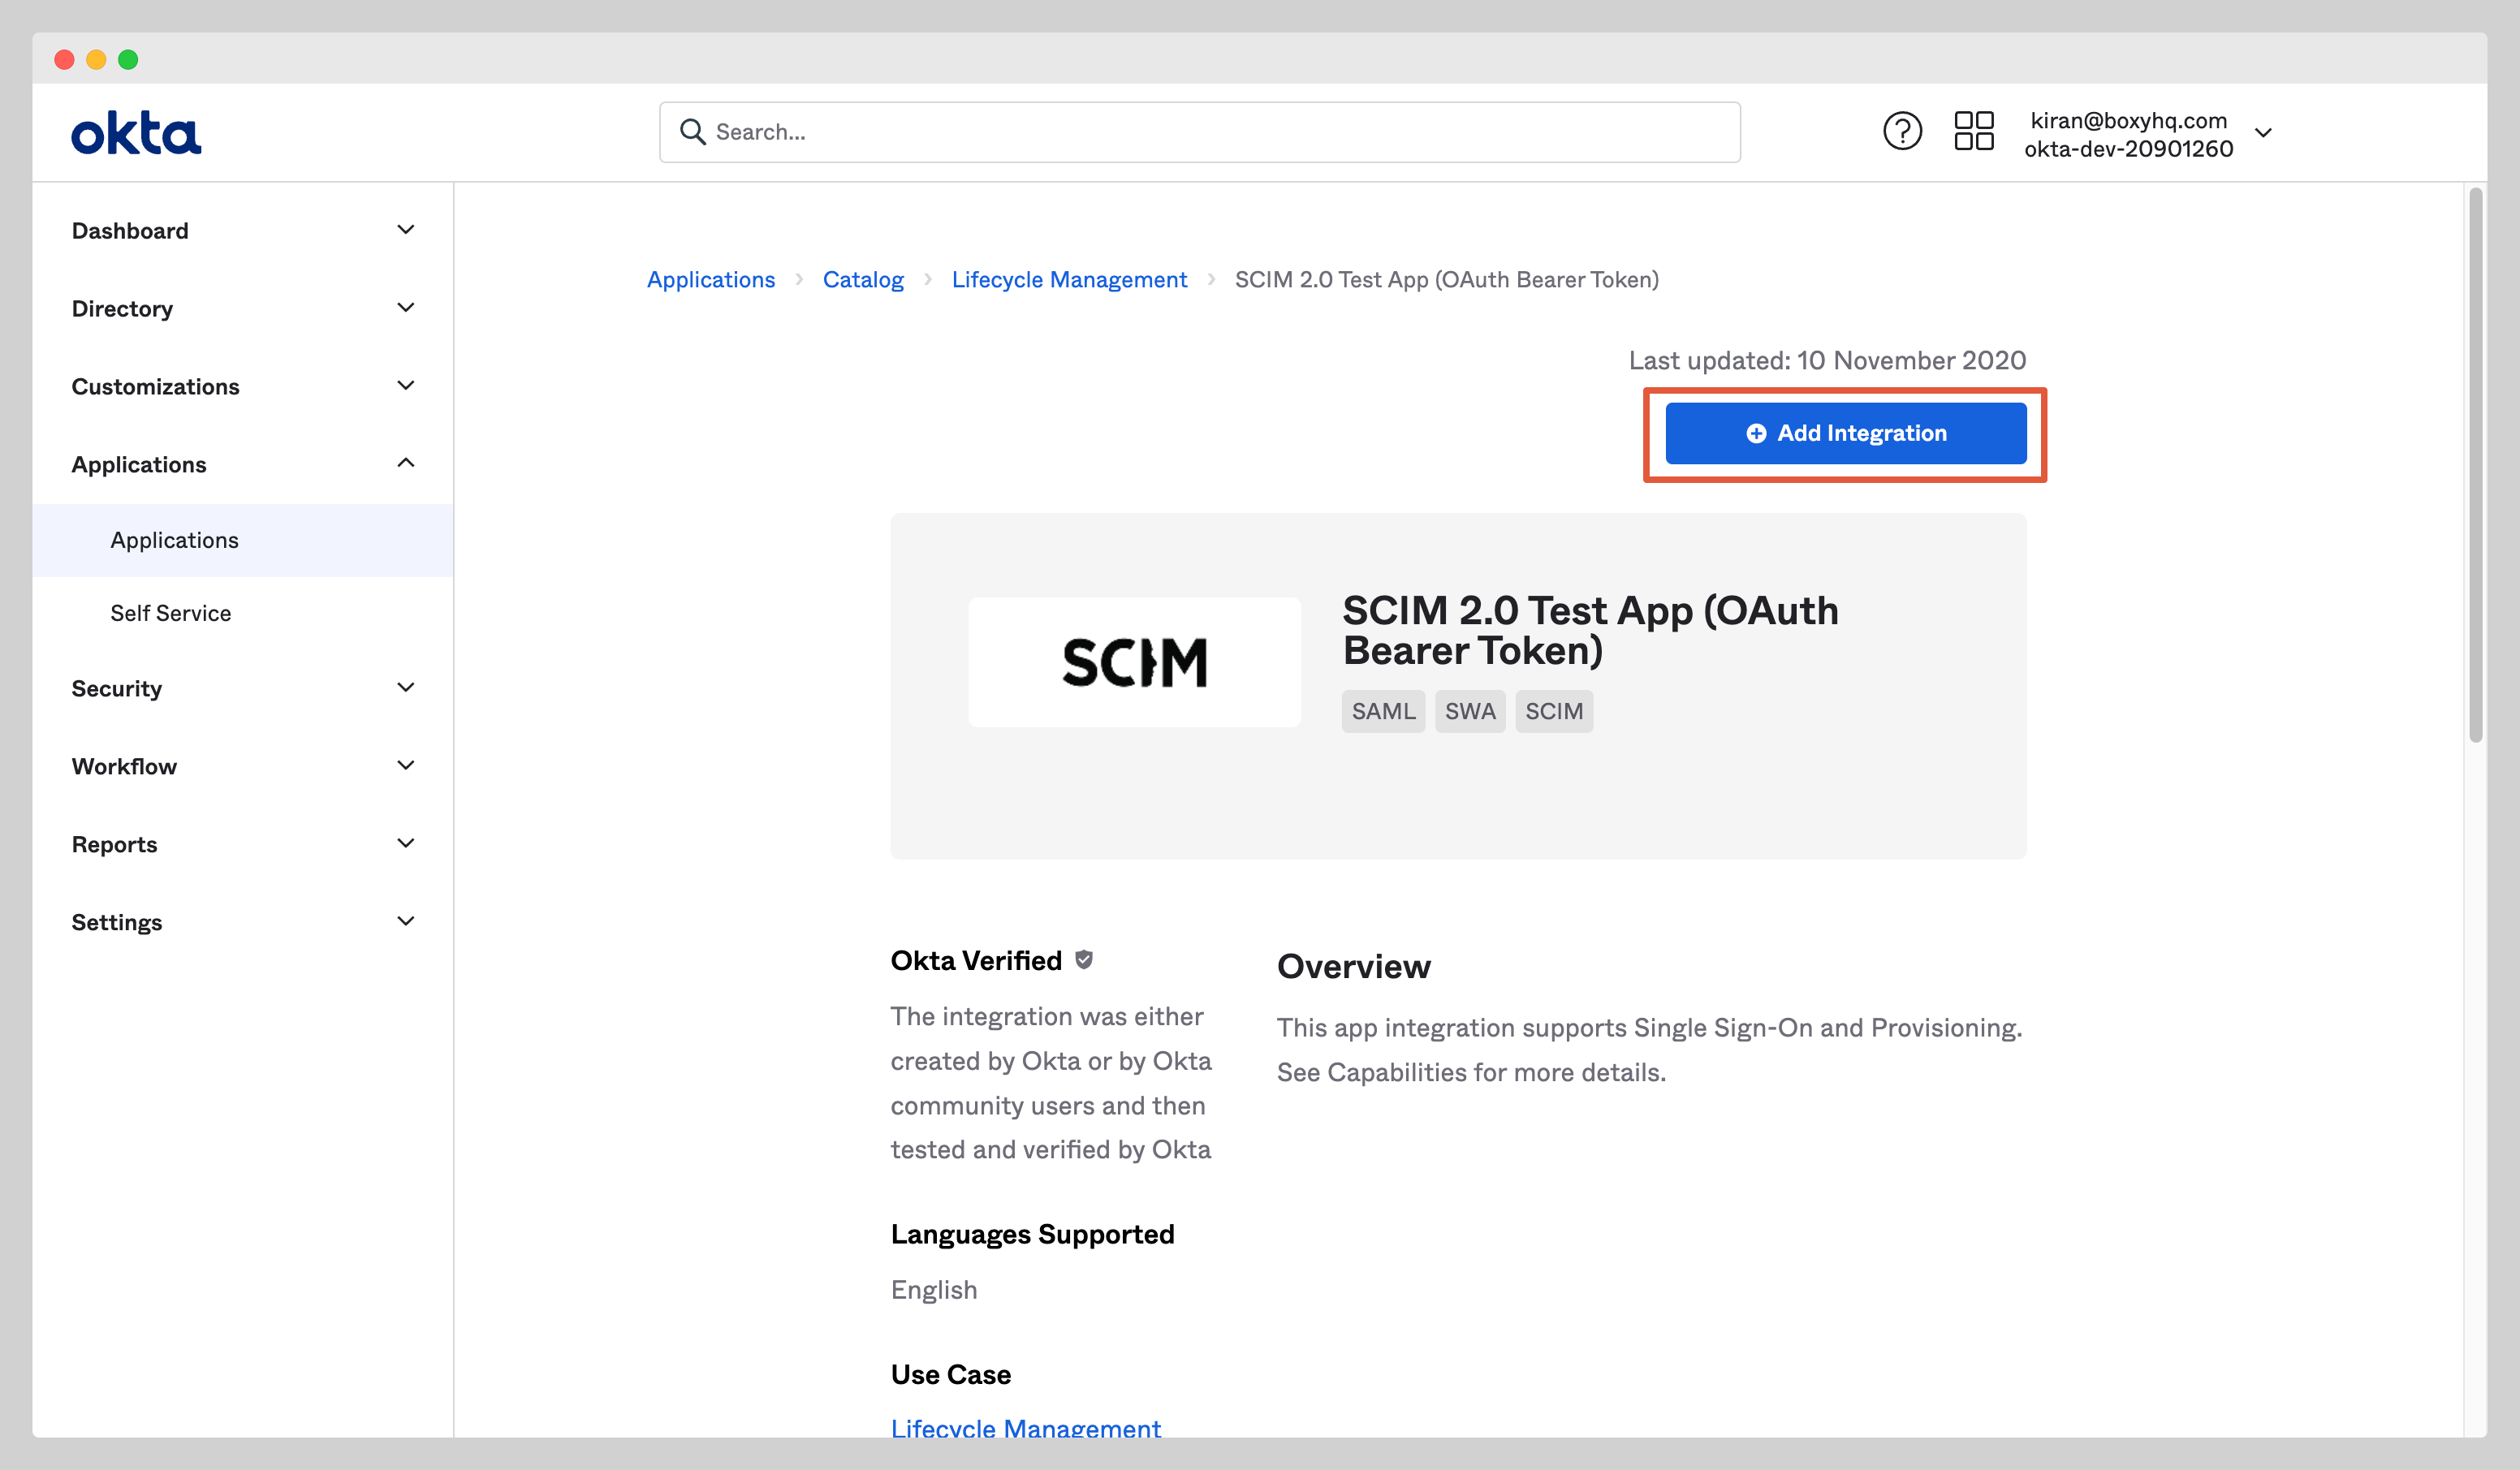
Search for SCIM 2.0 Test App (Oauth Bearer Token) from the search box and choose the app called SCIM 2.0 Test App (Oauth Bearer Token).

From the app page, click the Add Integration button.
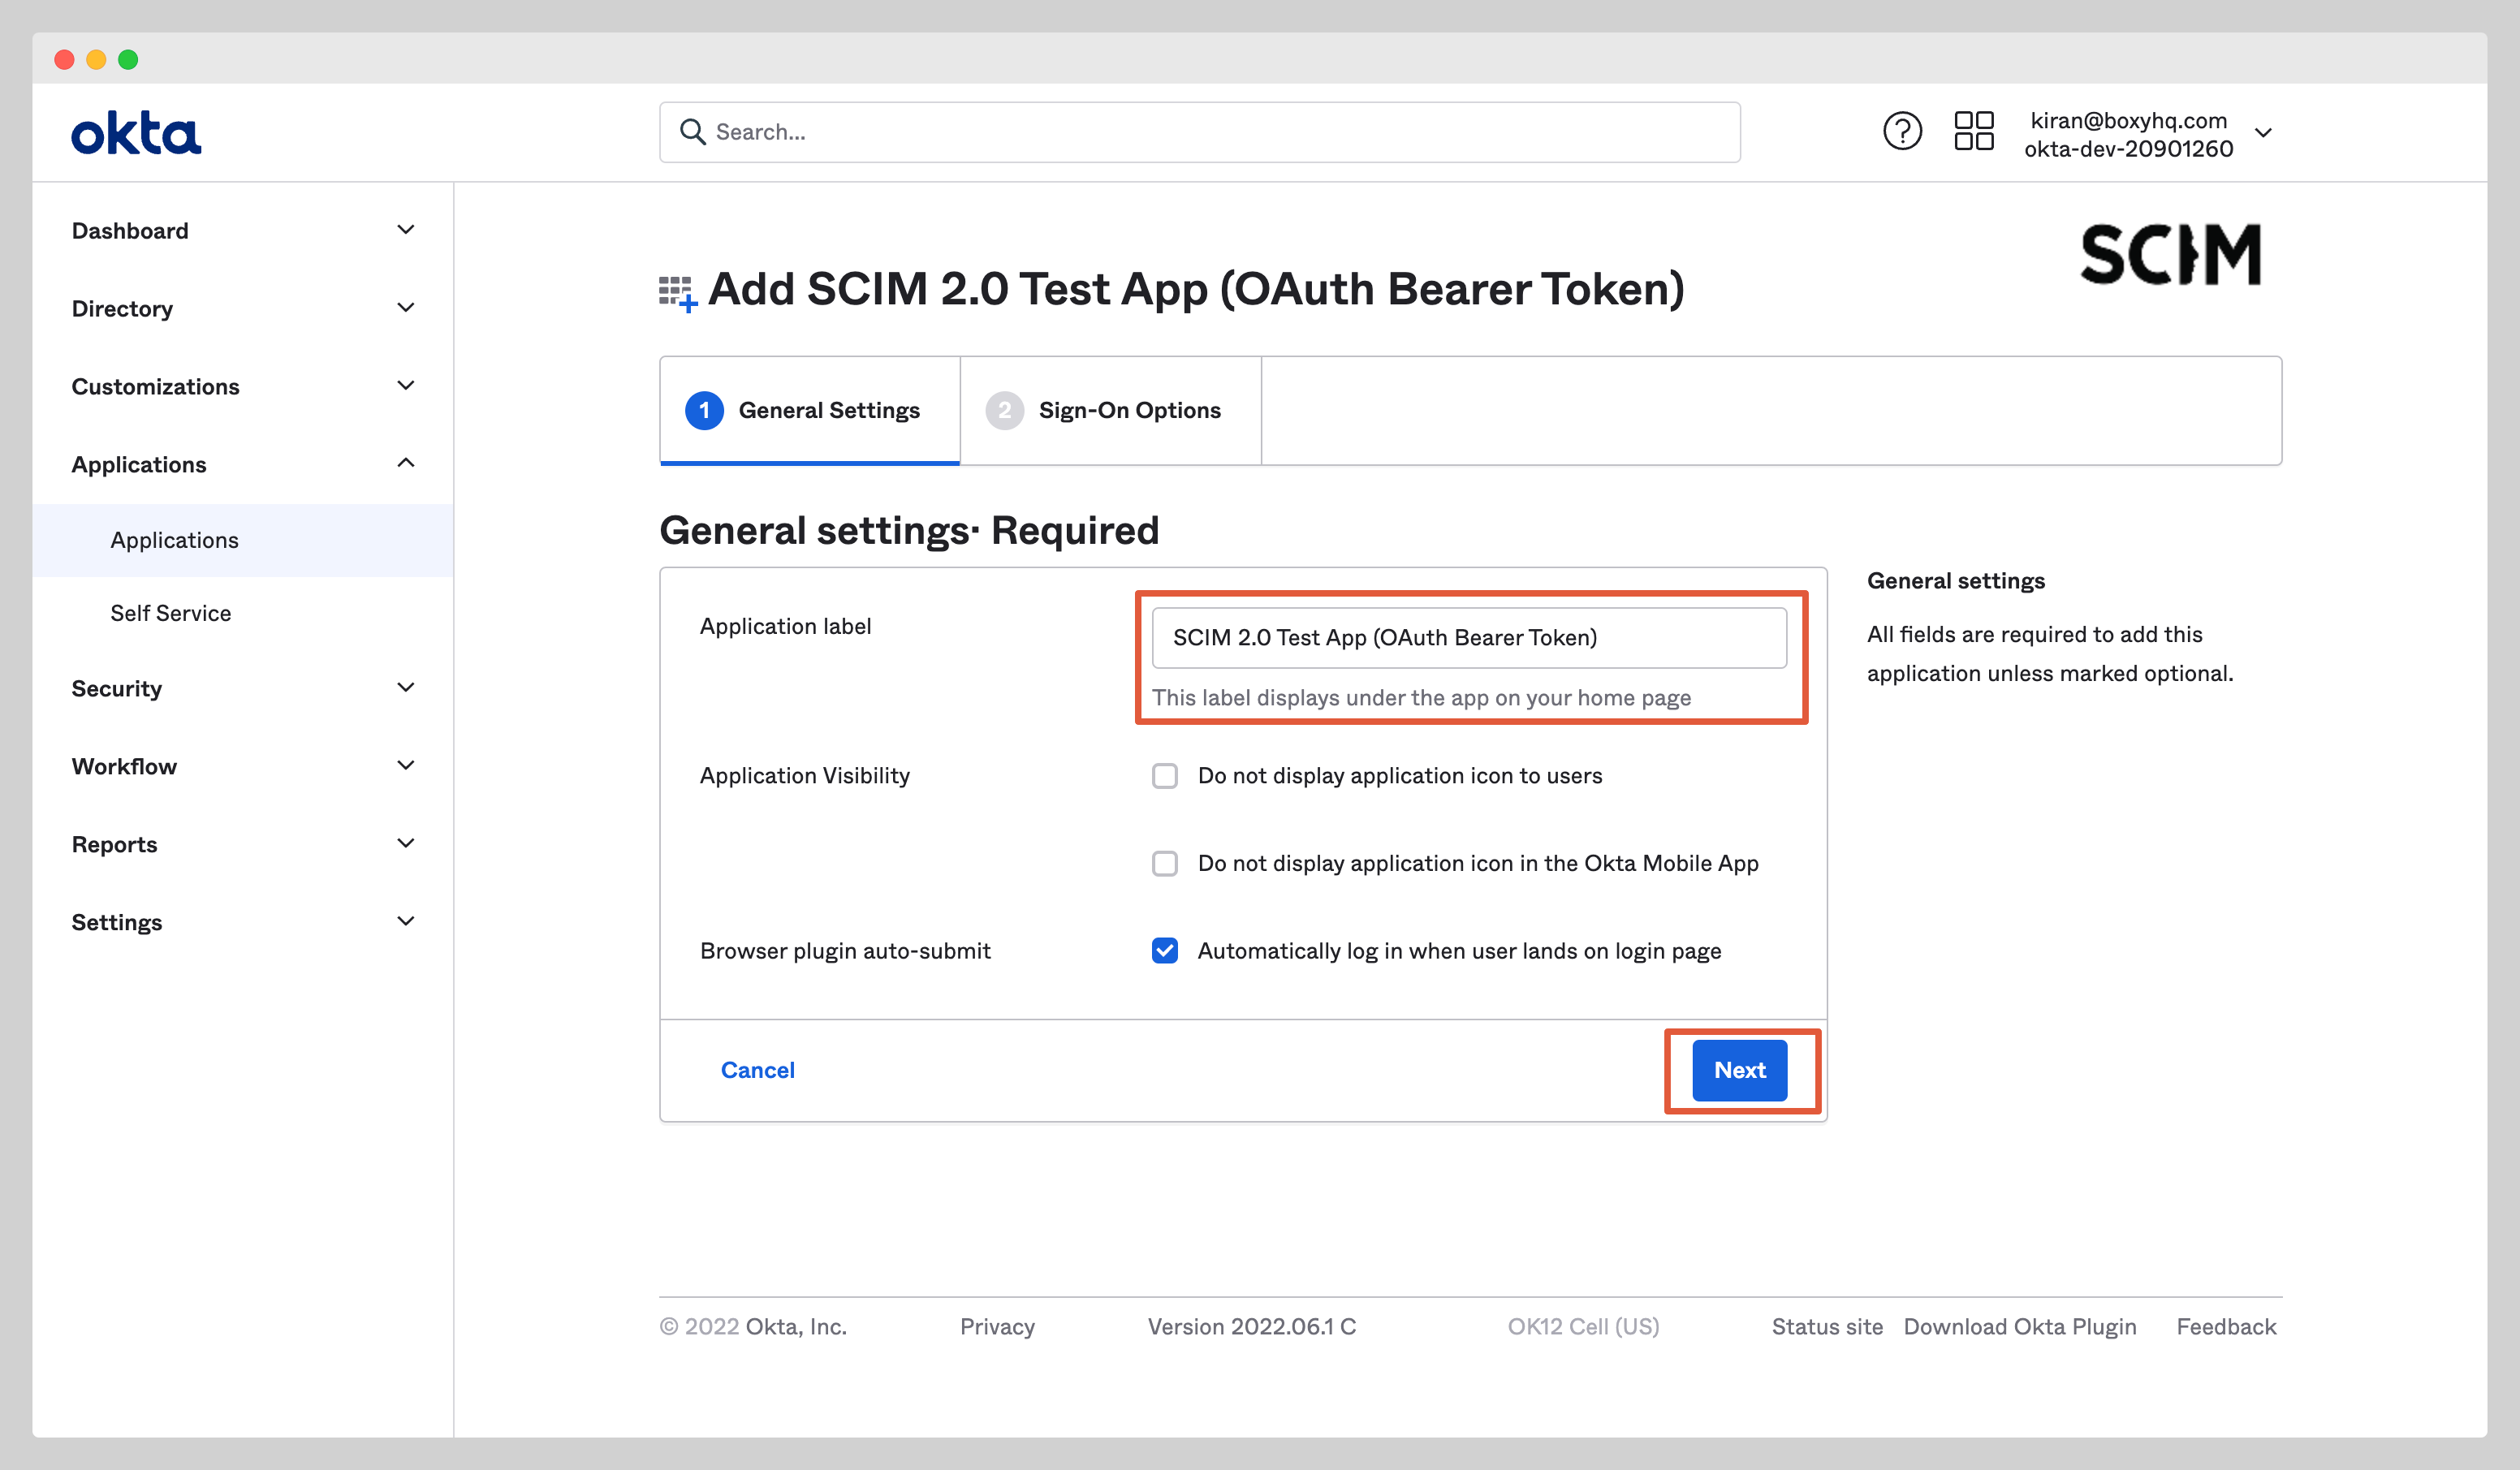
Give the app a name and click the Next button. Click Done to finish the creation of the app.
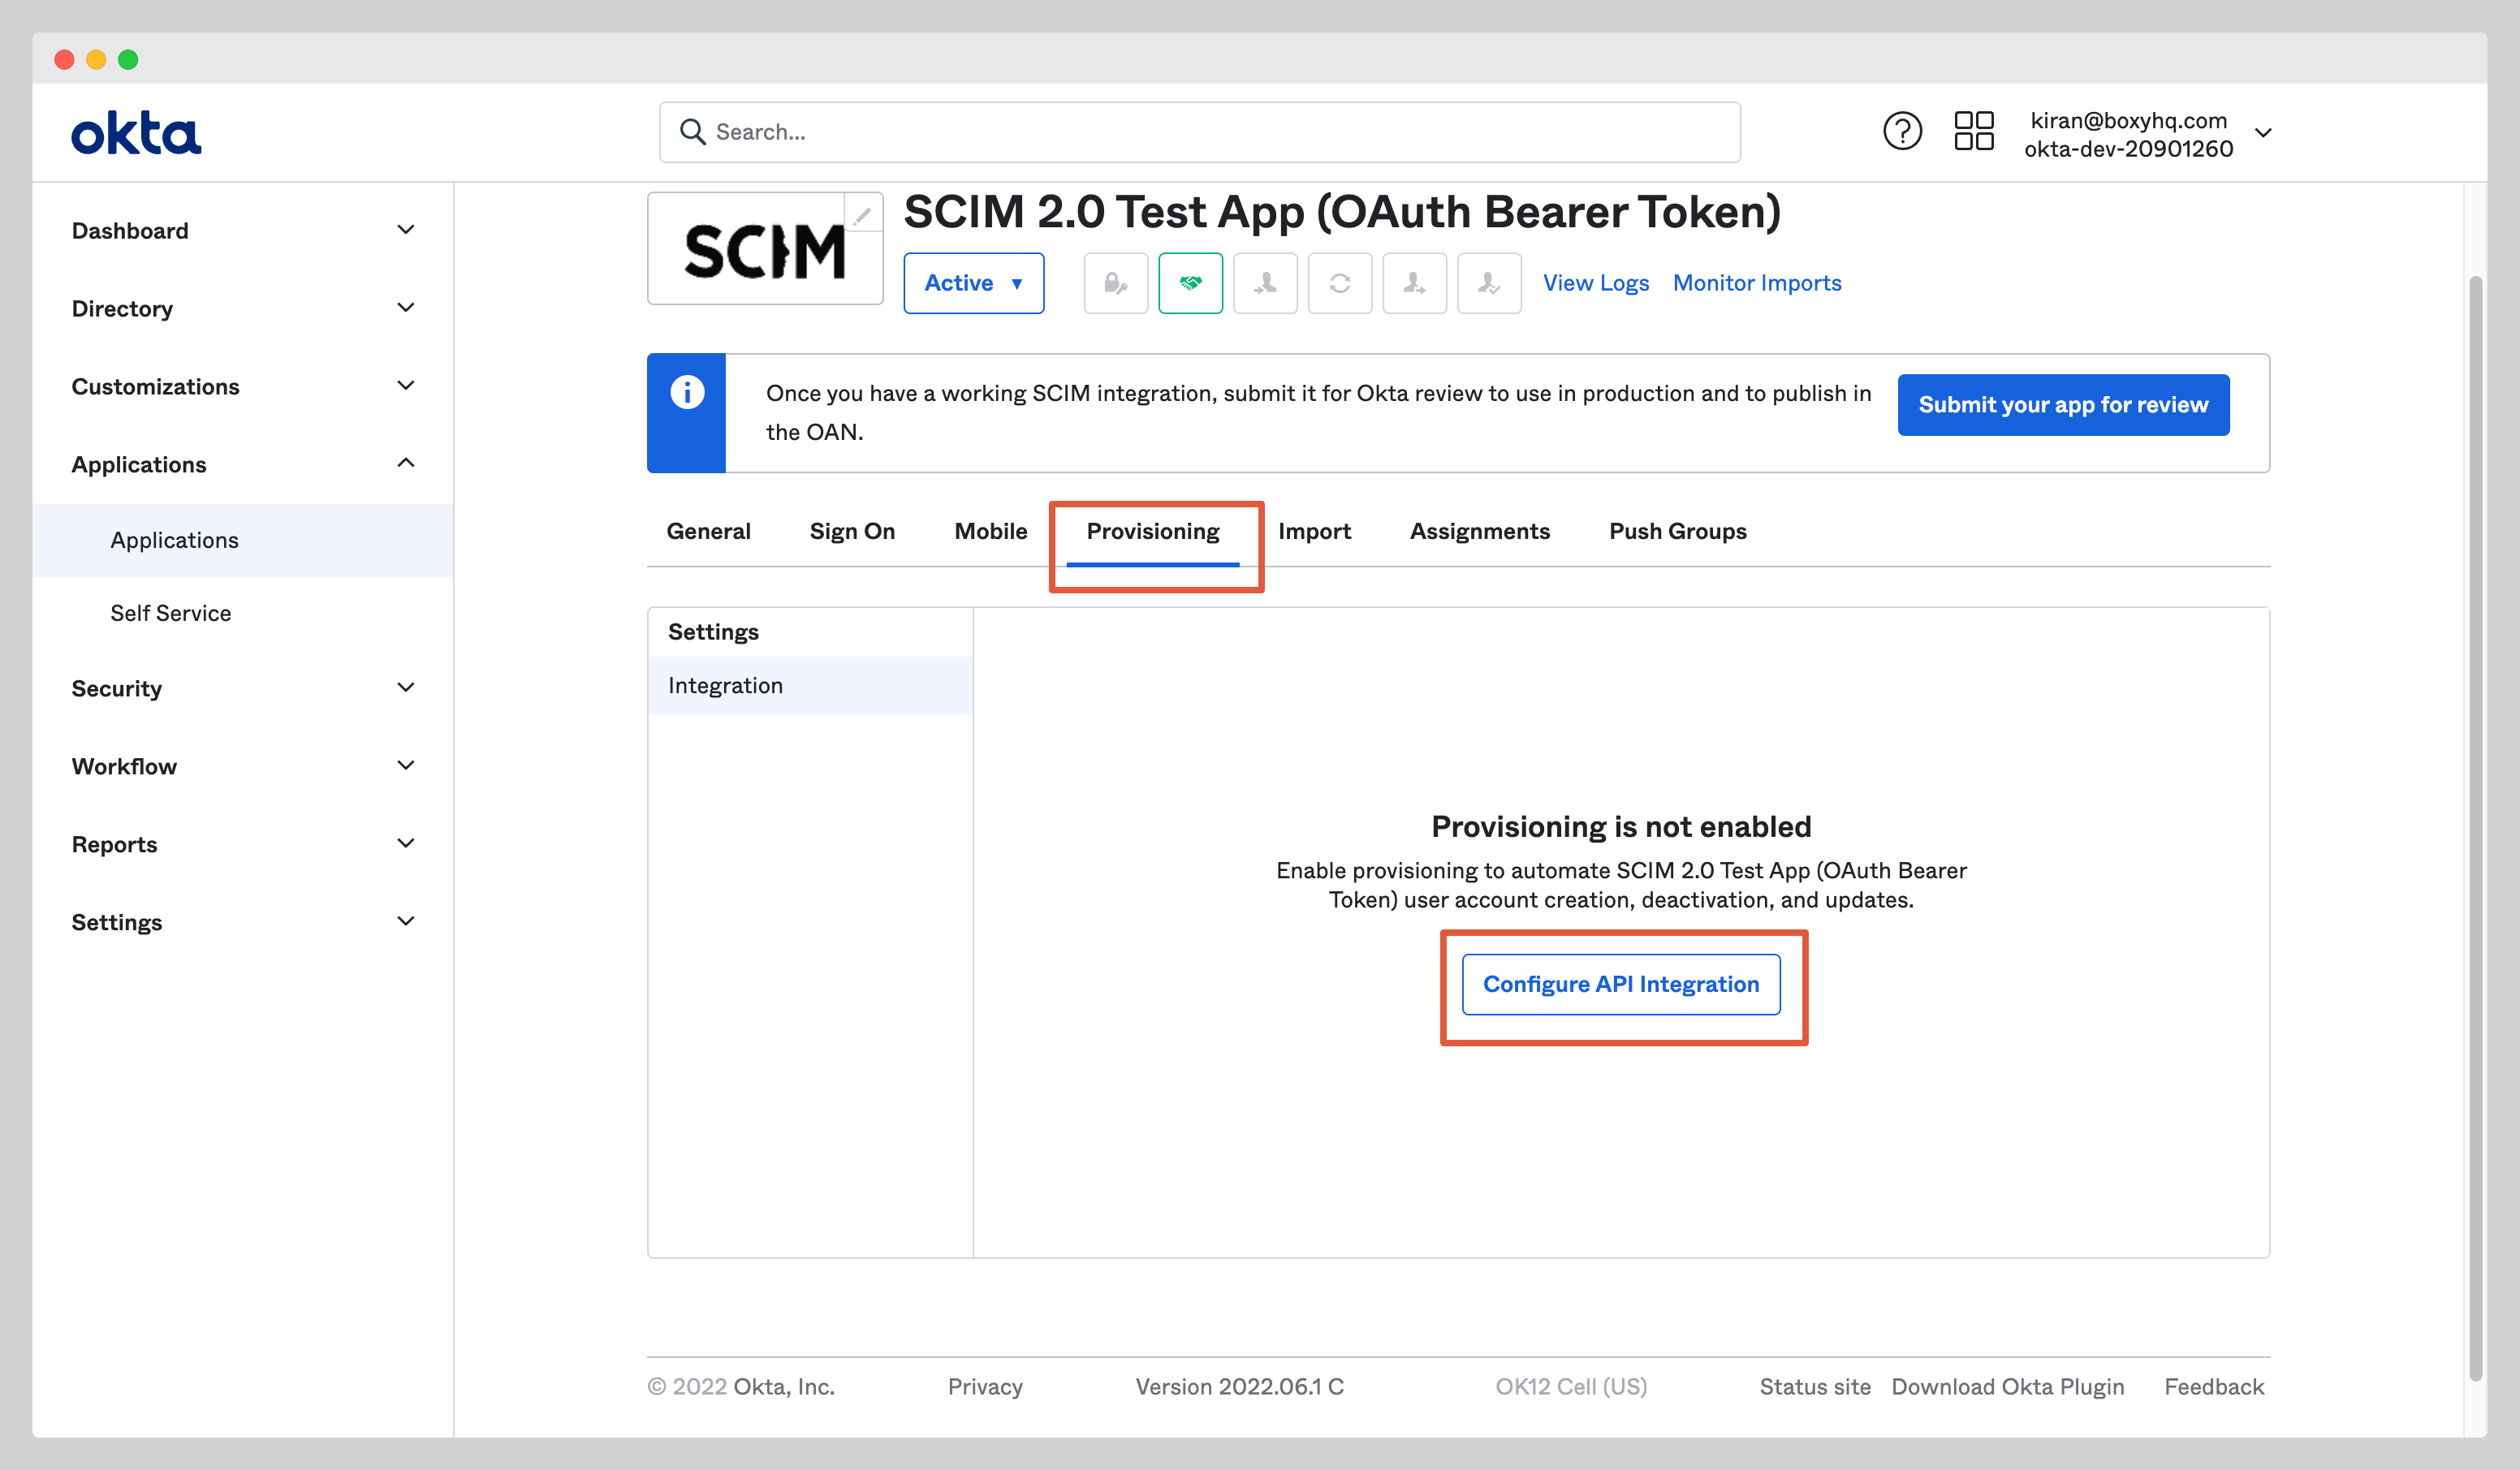
Enable Okta SCIM Provisioning
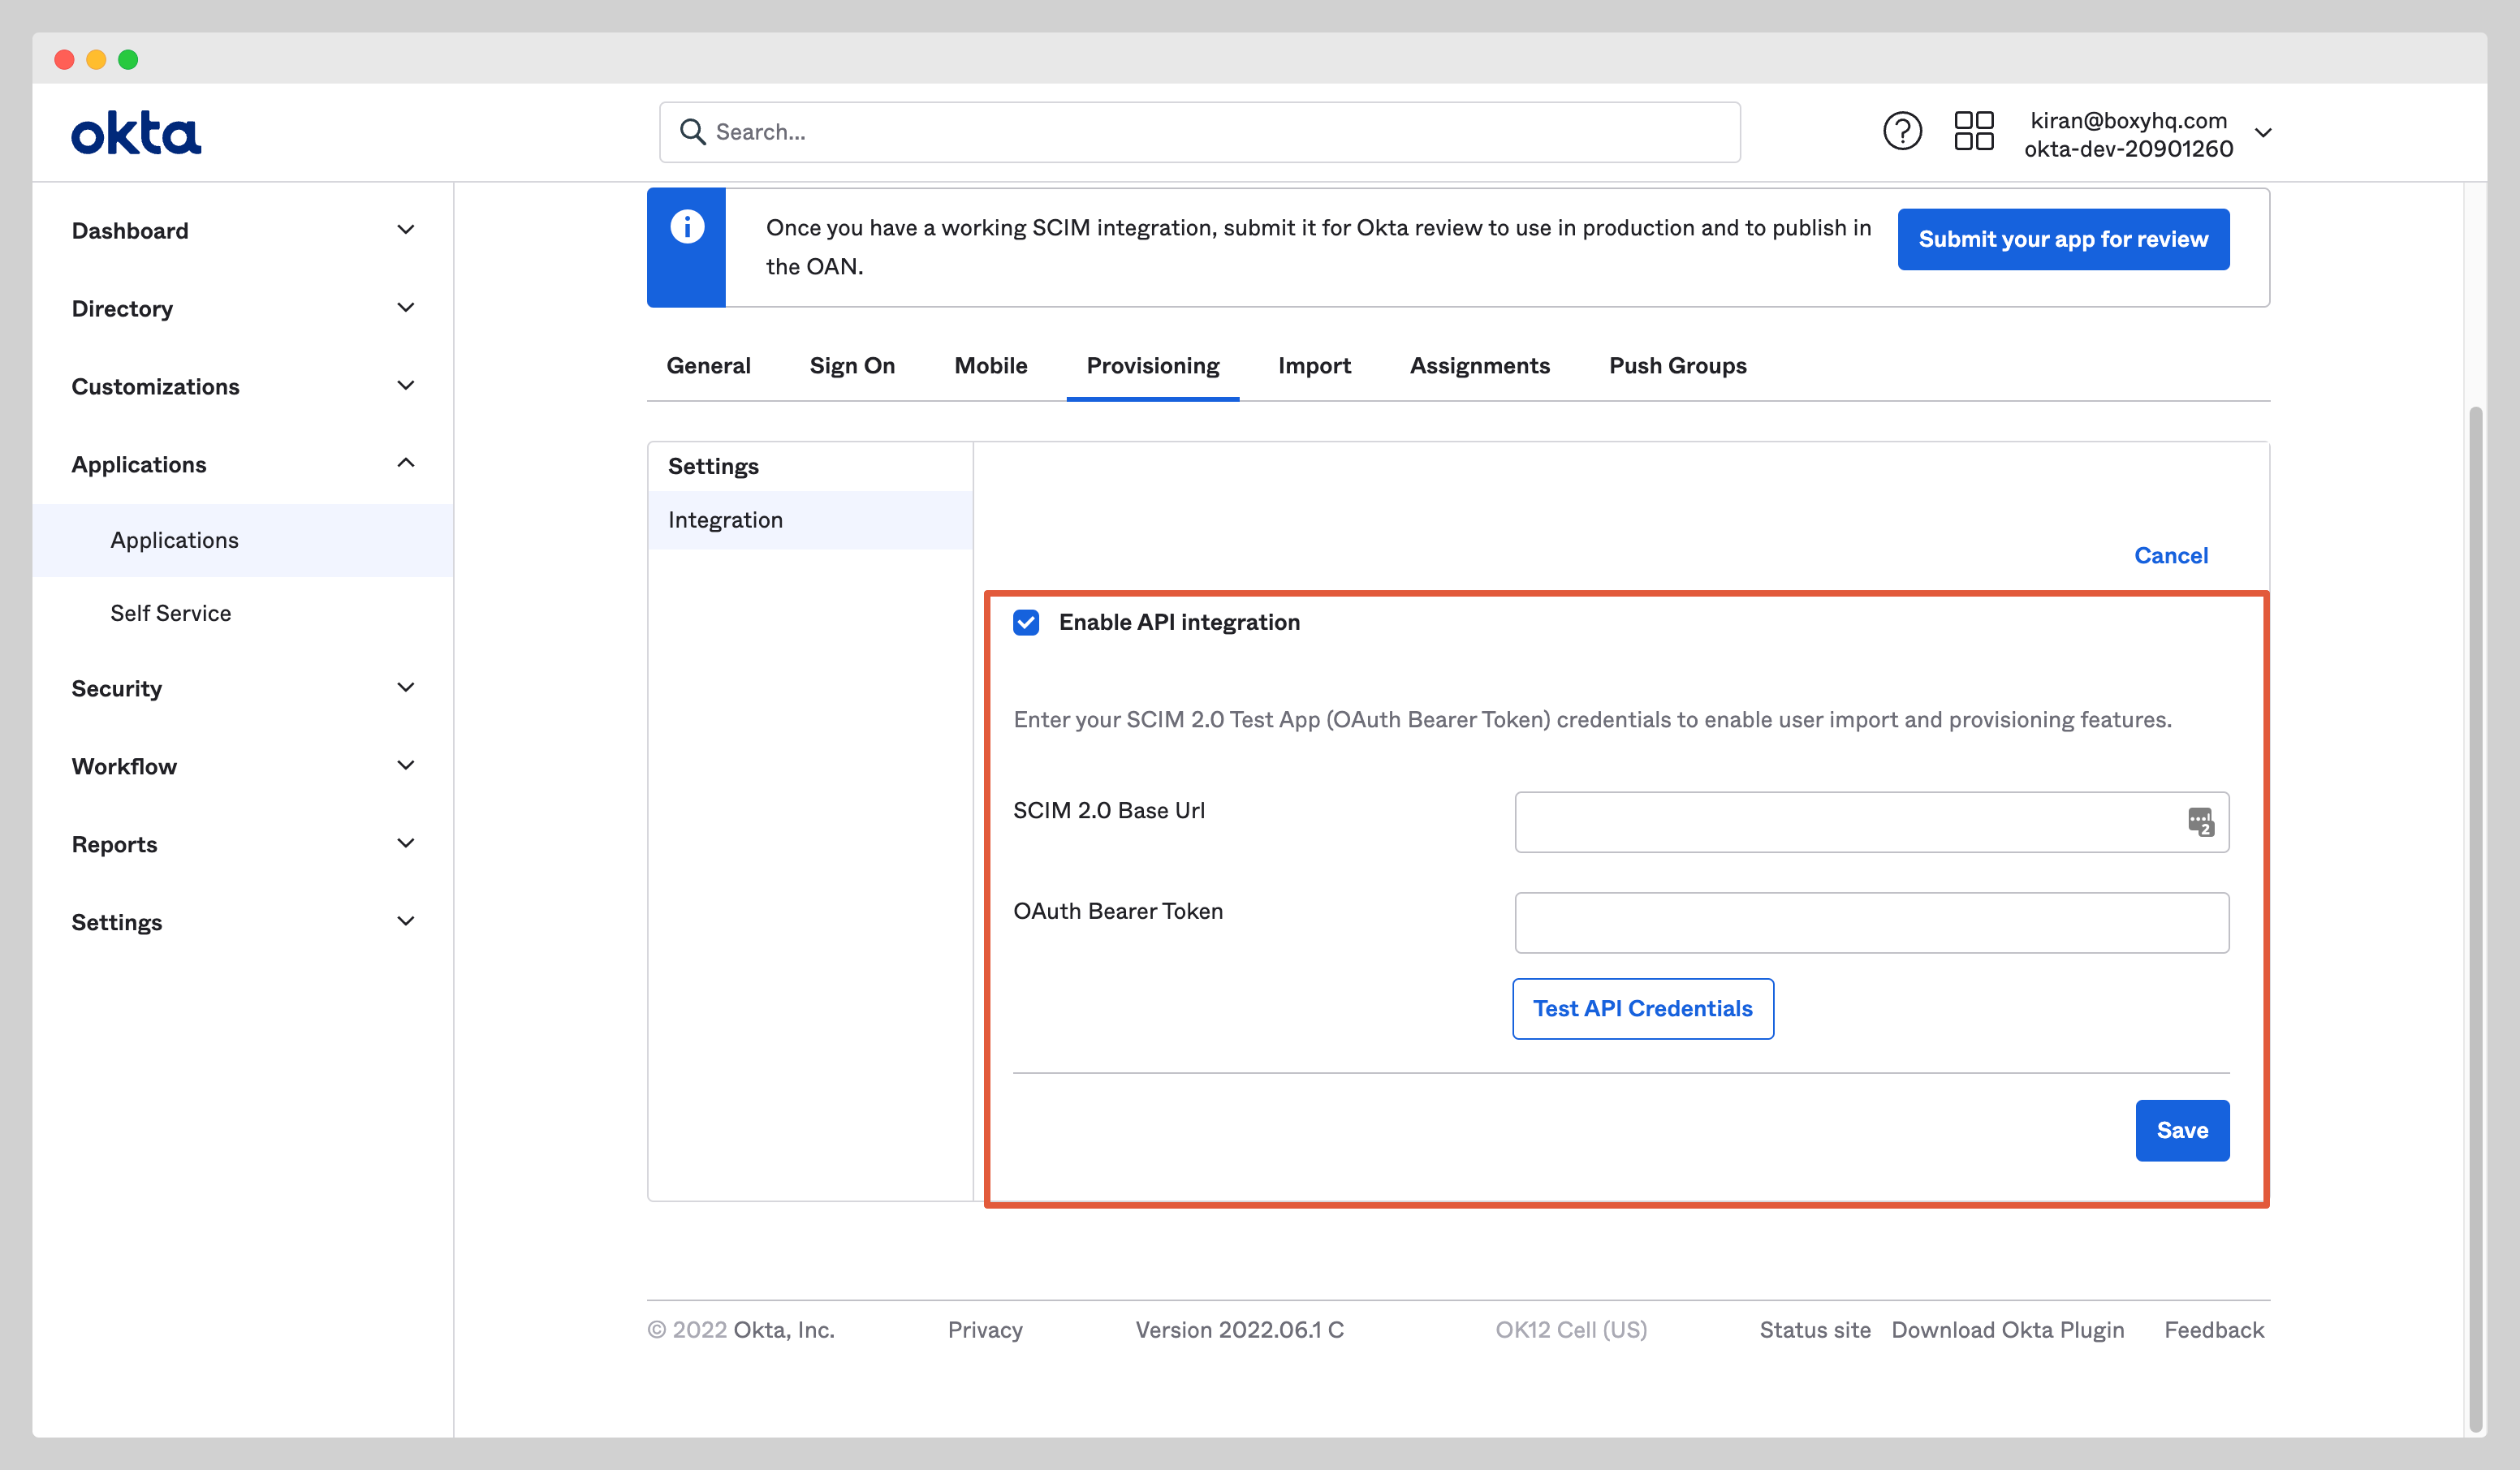
In your application, click the Provisioning tab and click Configure API Integration.
Check the Enable API Integration checkbox and enter the following information:
- SCIM 2.0 Base URL
- OAuth Bearer Token
You'll receive these information from Jackson when you create the directory sync connection either via the API or the Admin Portal.
Click Test API Credentials to test the connection to see if the credentials are correct then click the Save to save the credentials.
You'll see a new setting page, click To App and enable the following settings:
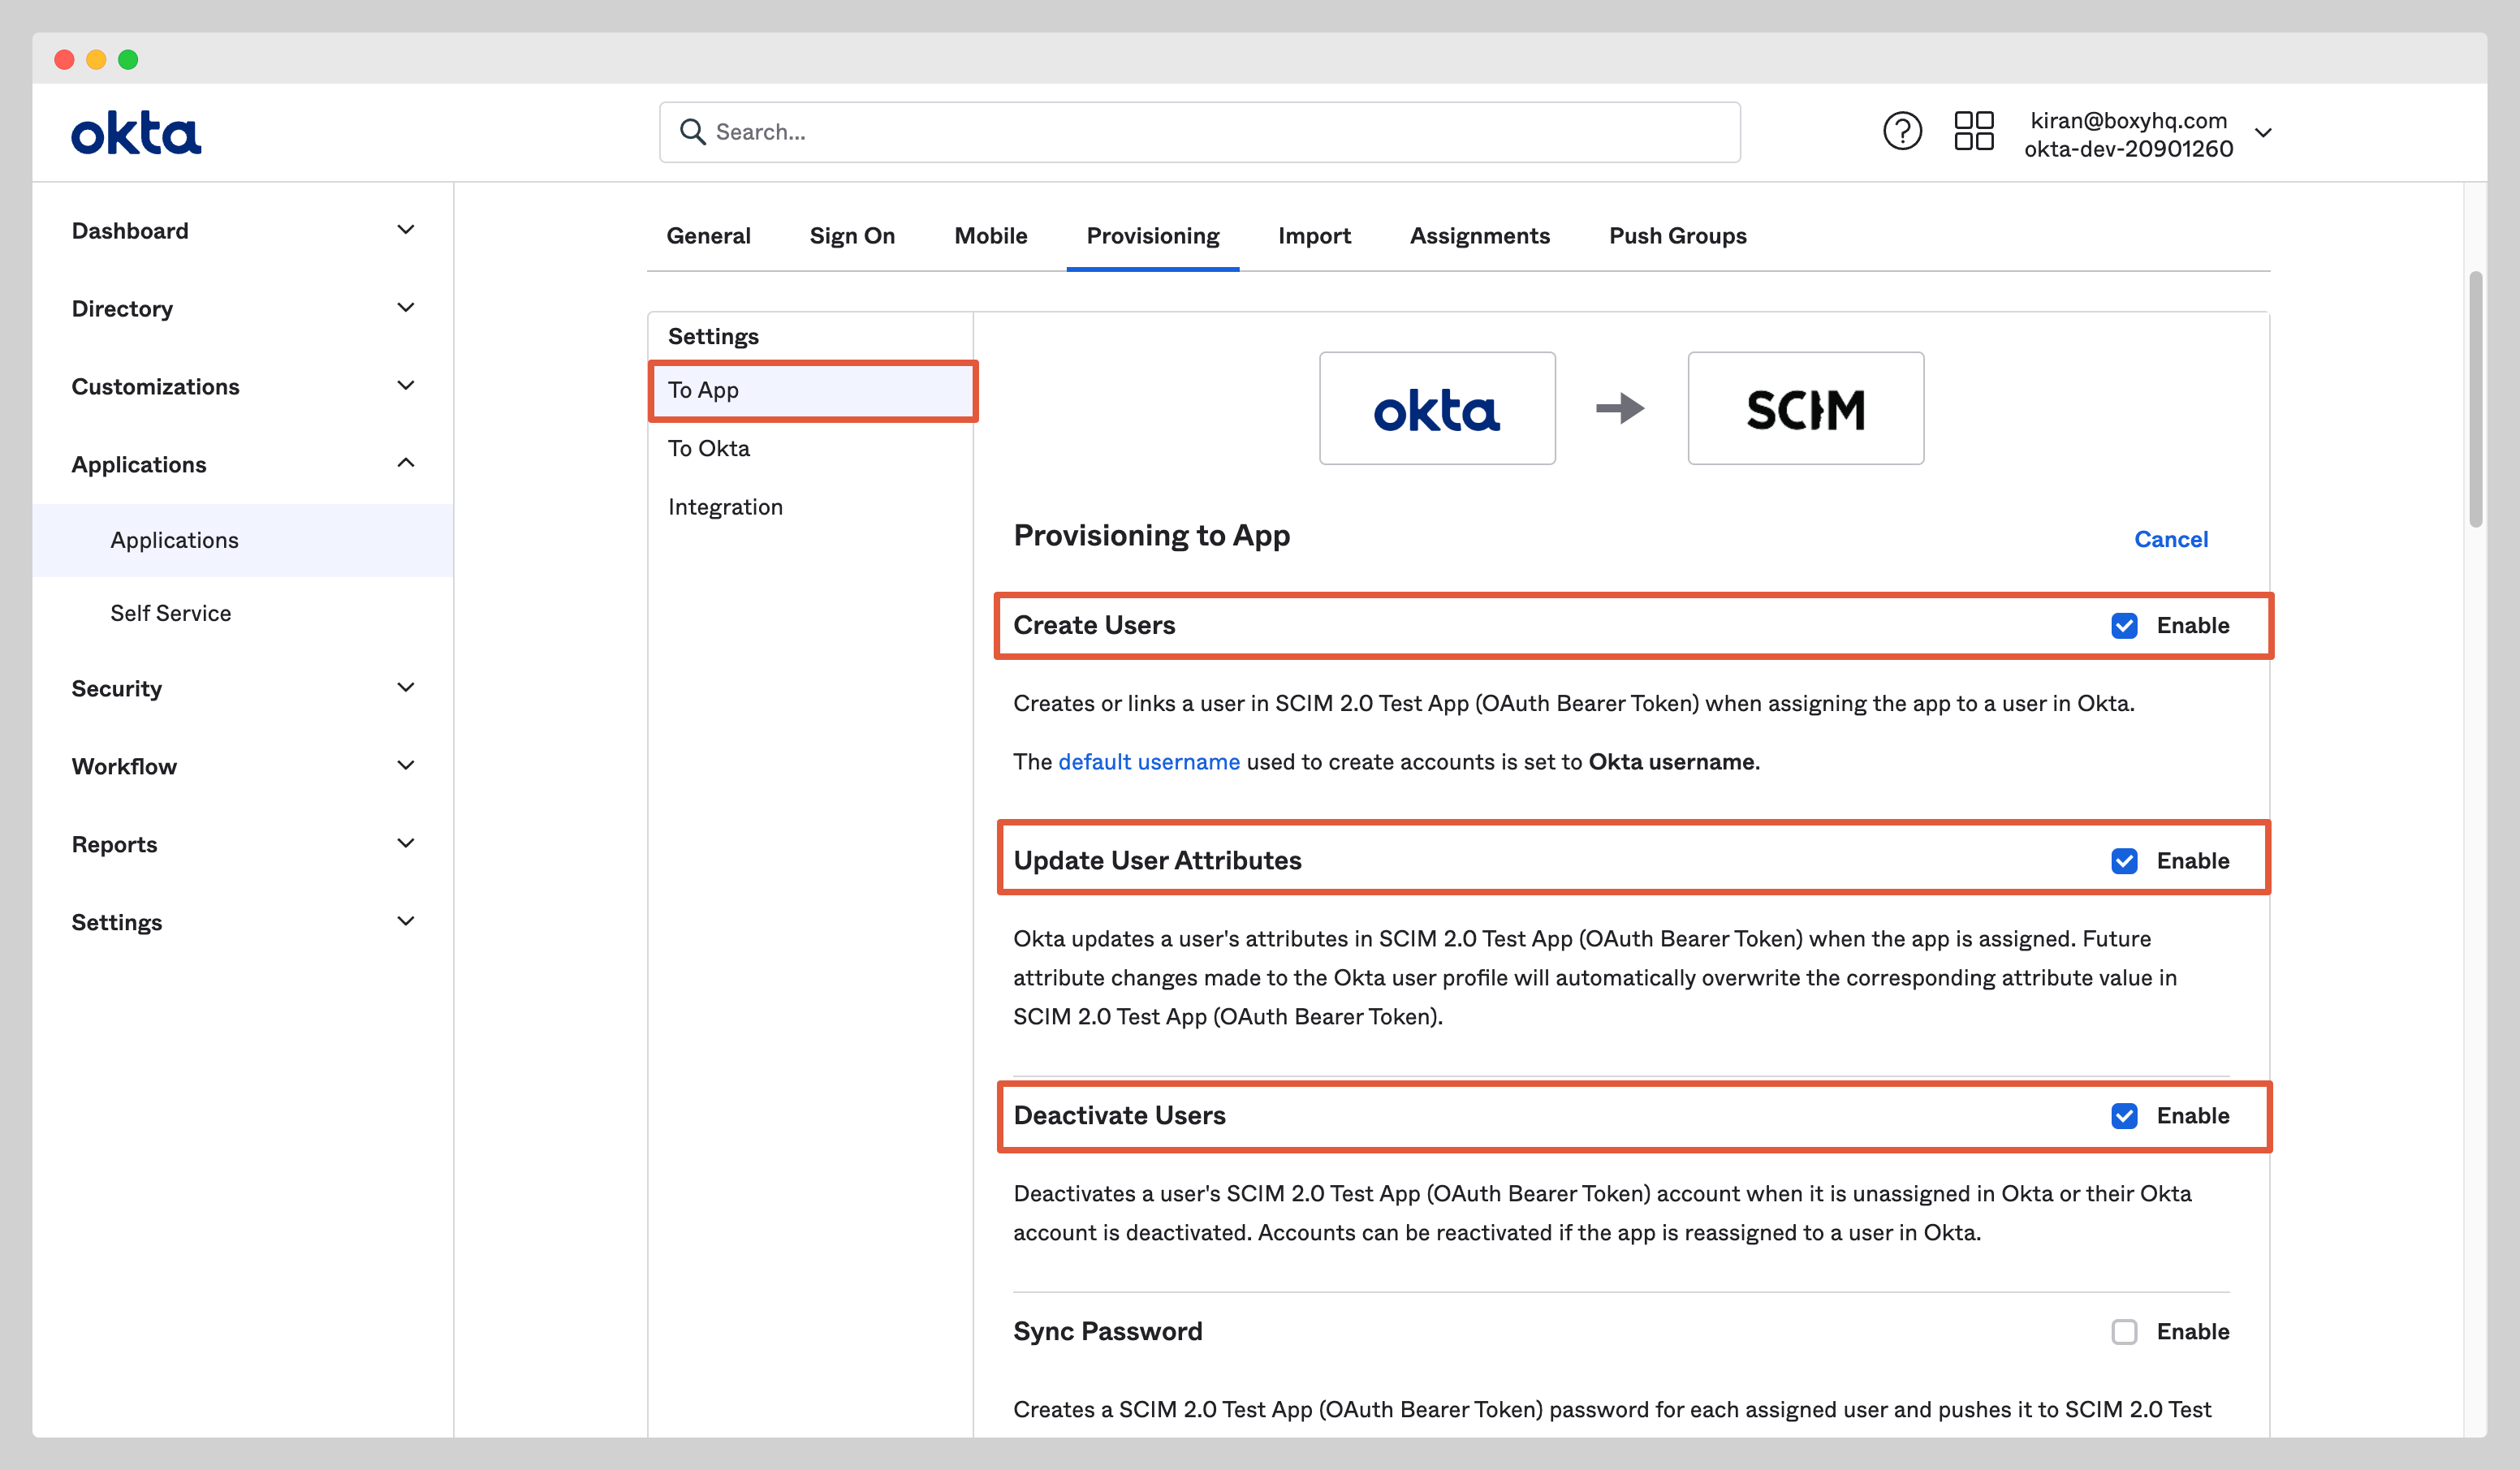
At this stage, you've successfully configured the Okta SCIM API integration.
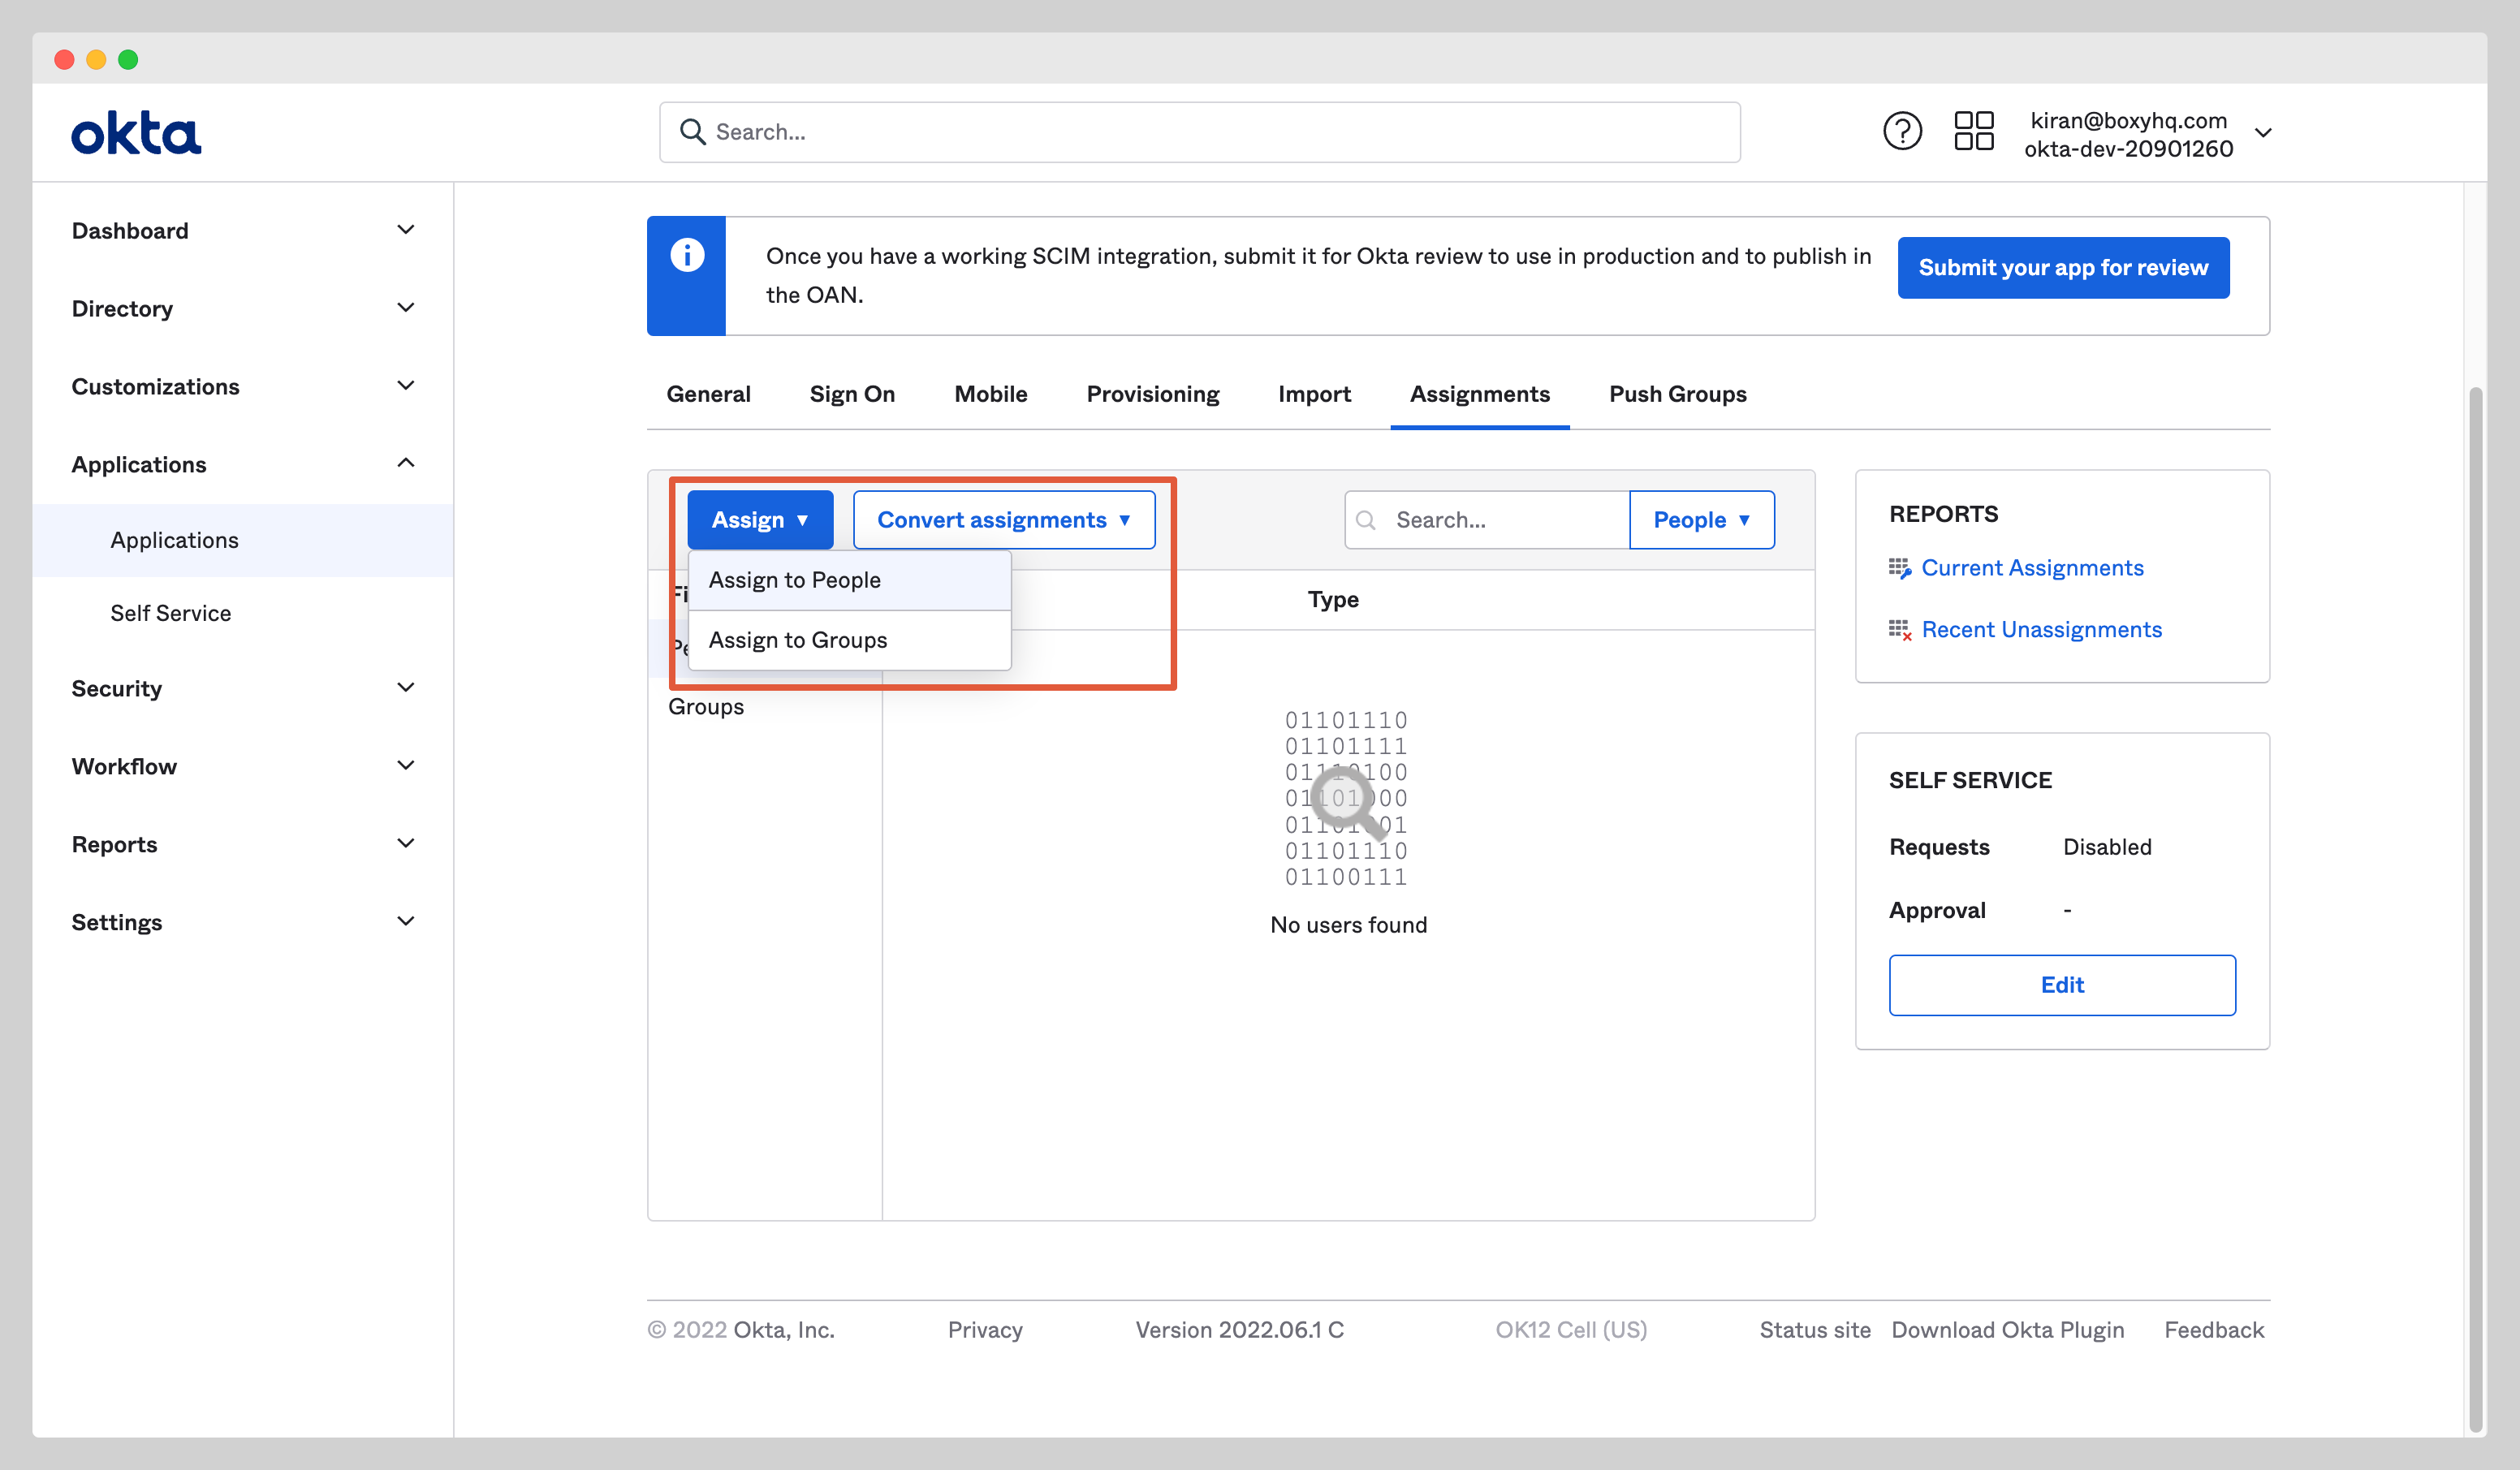
Assign Users
In your application, click the Assignments tab and select Assign to People from the dropdown Assign.
Select users you want to assign to the app and click the Assign button.
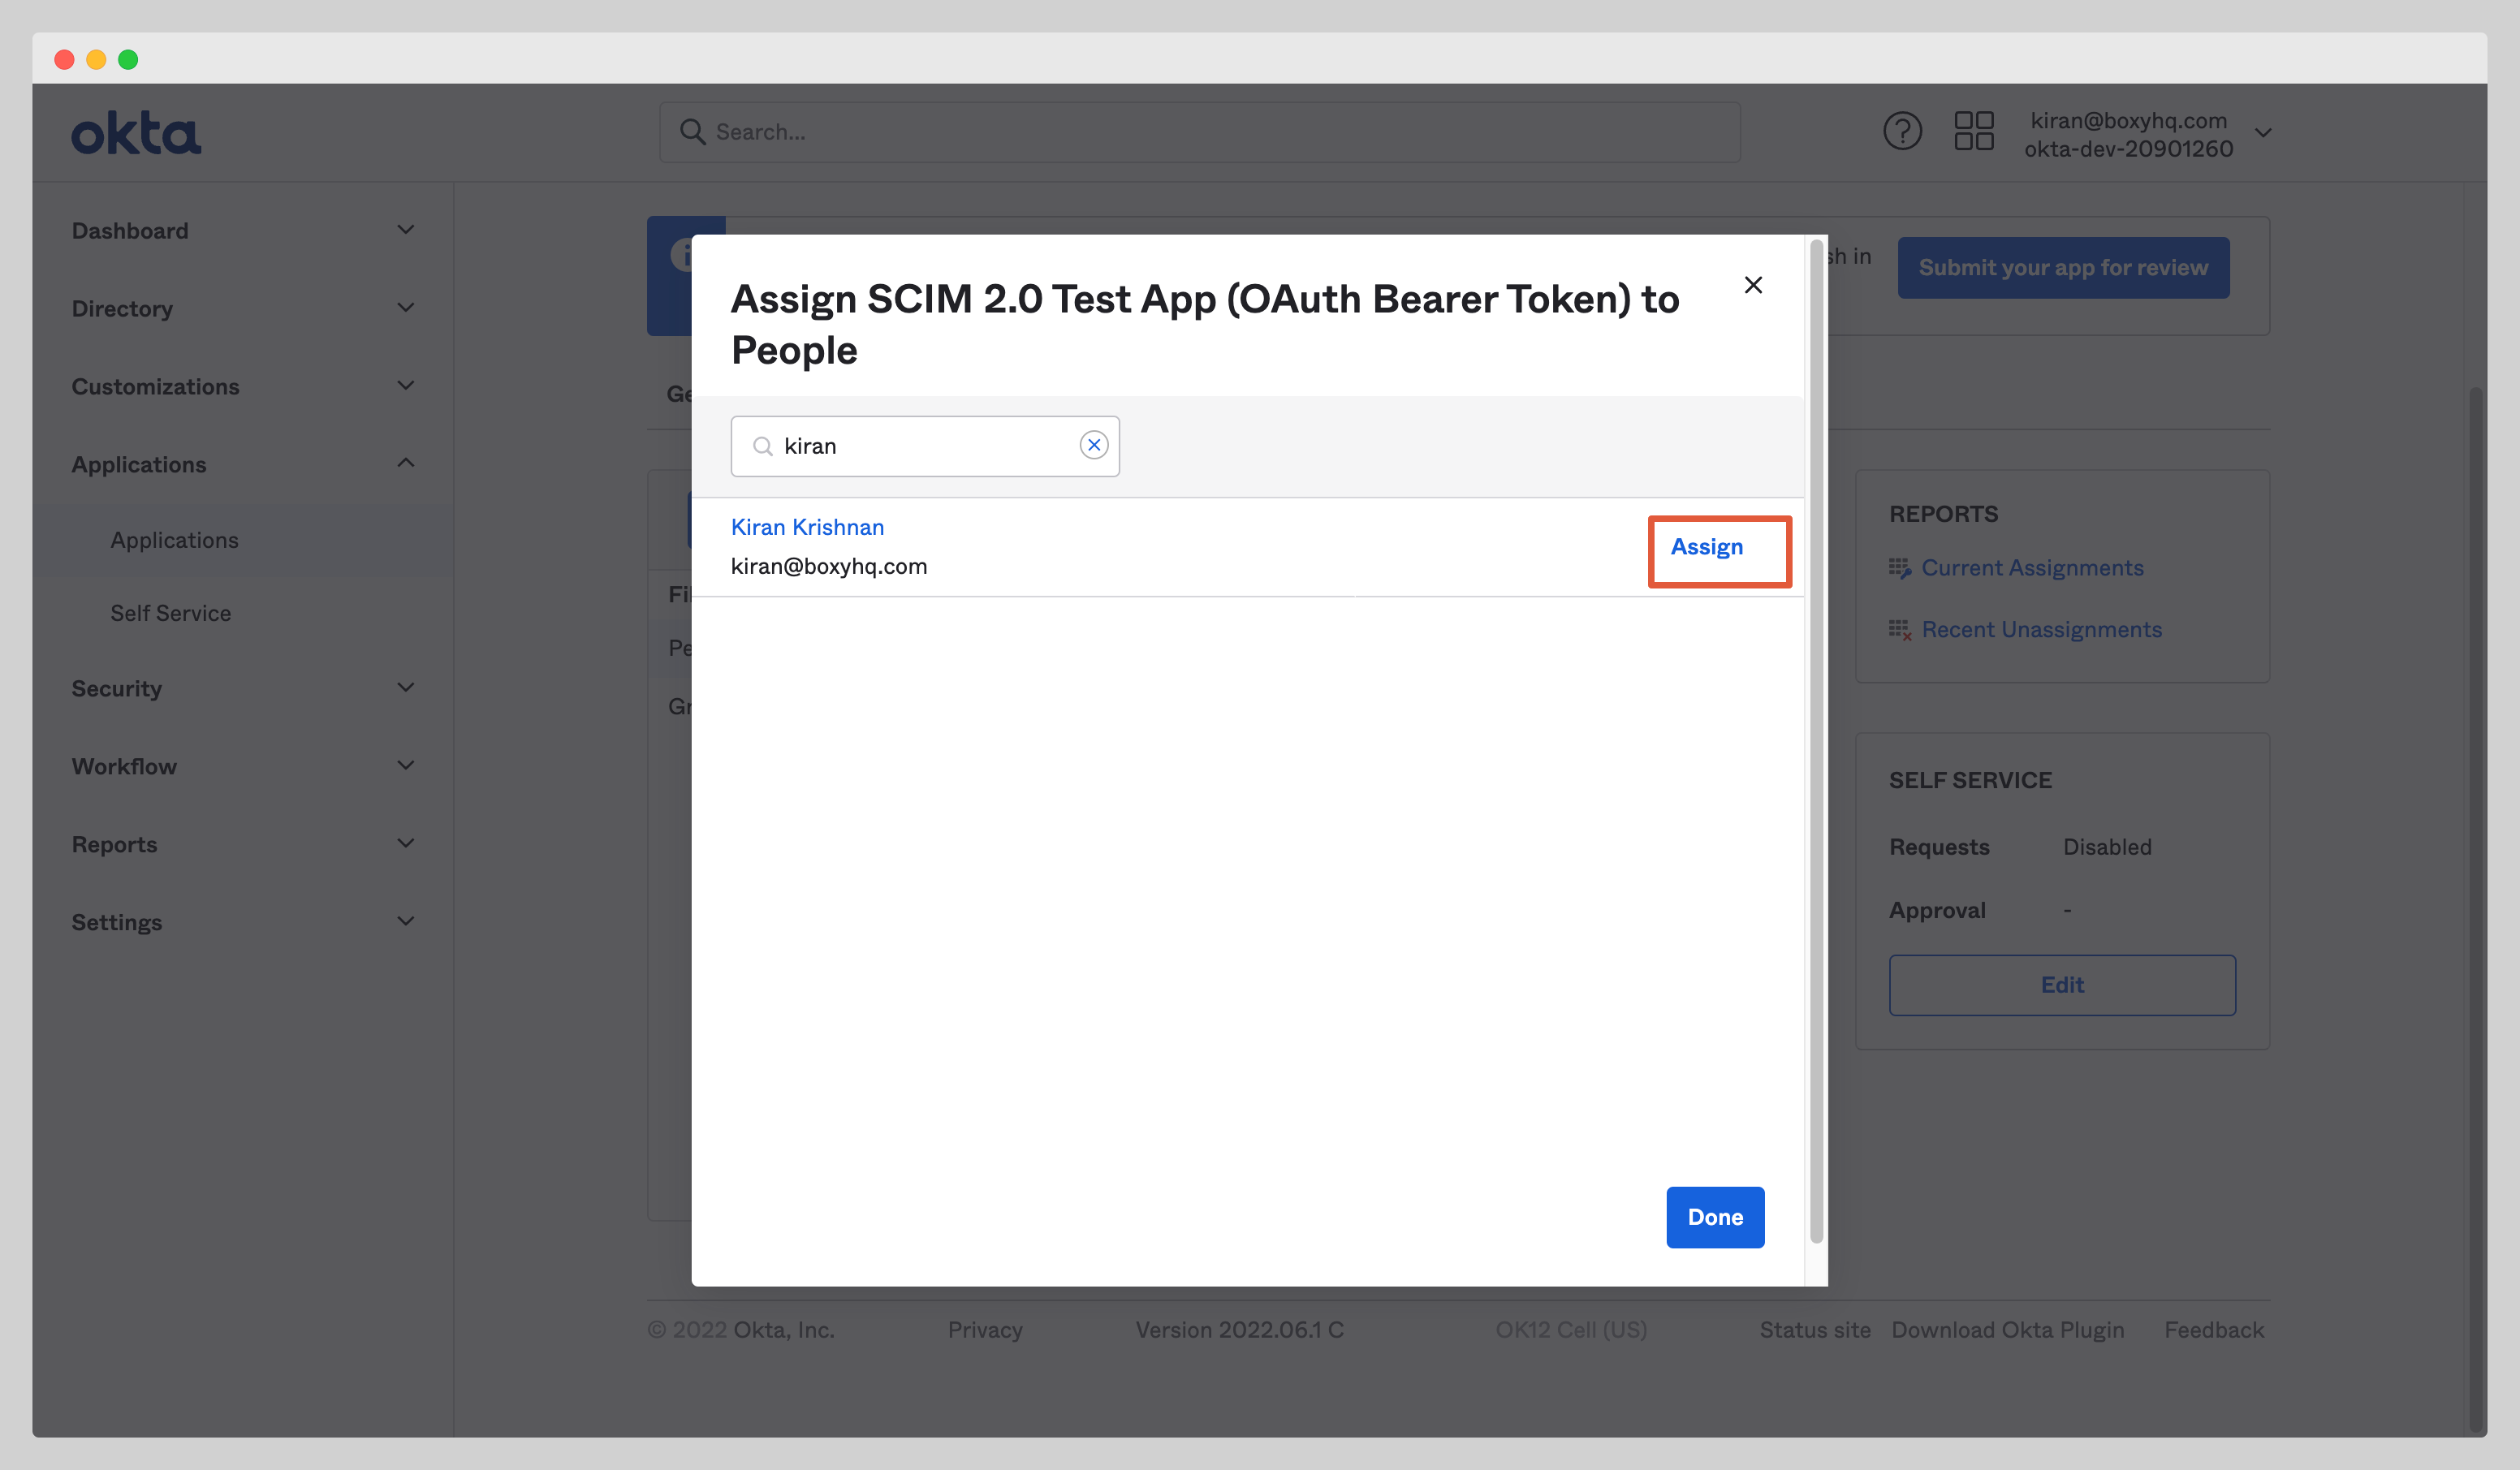
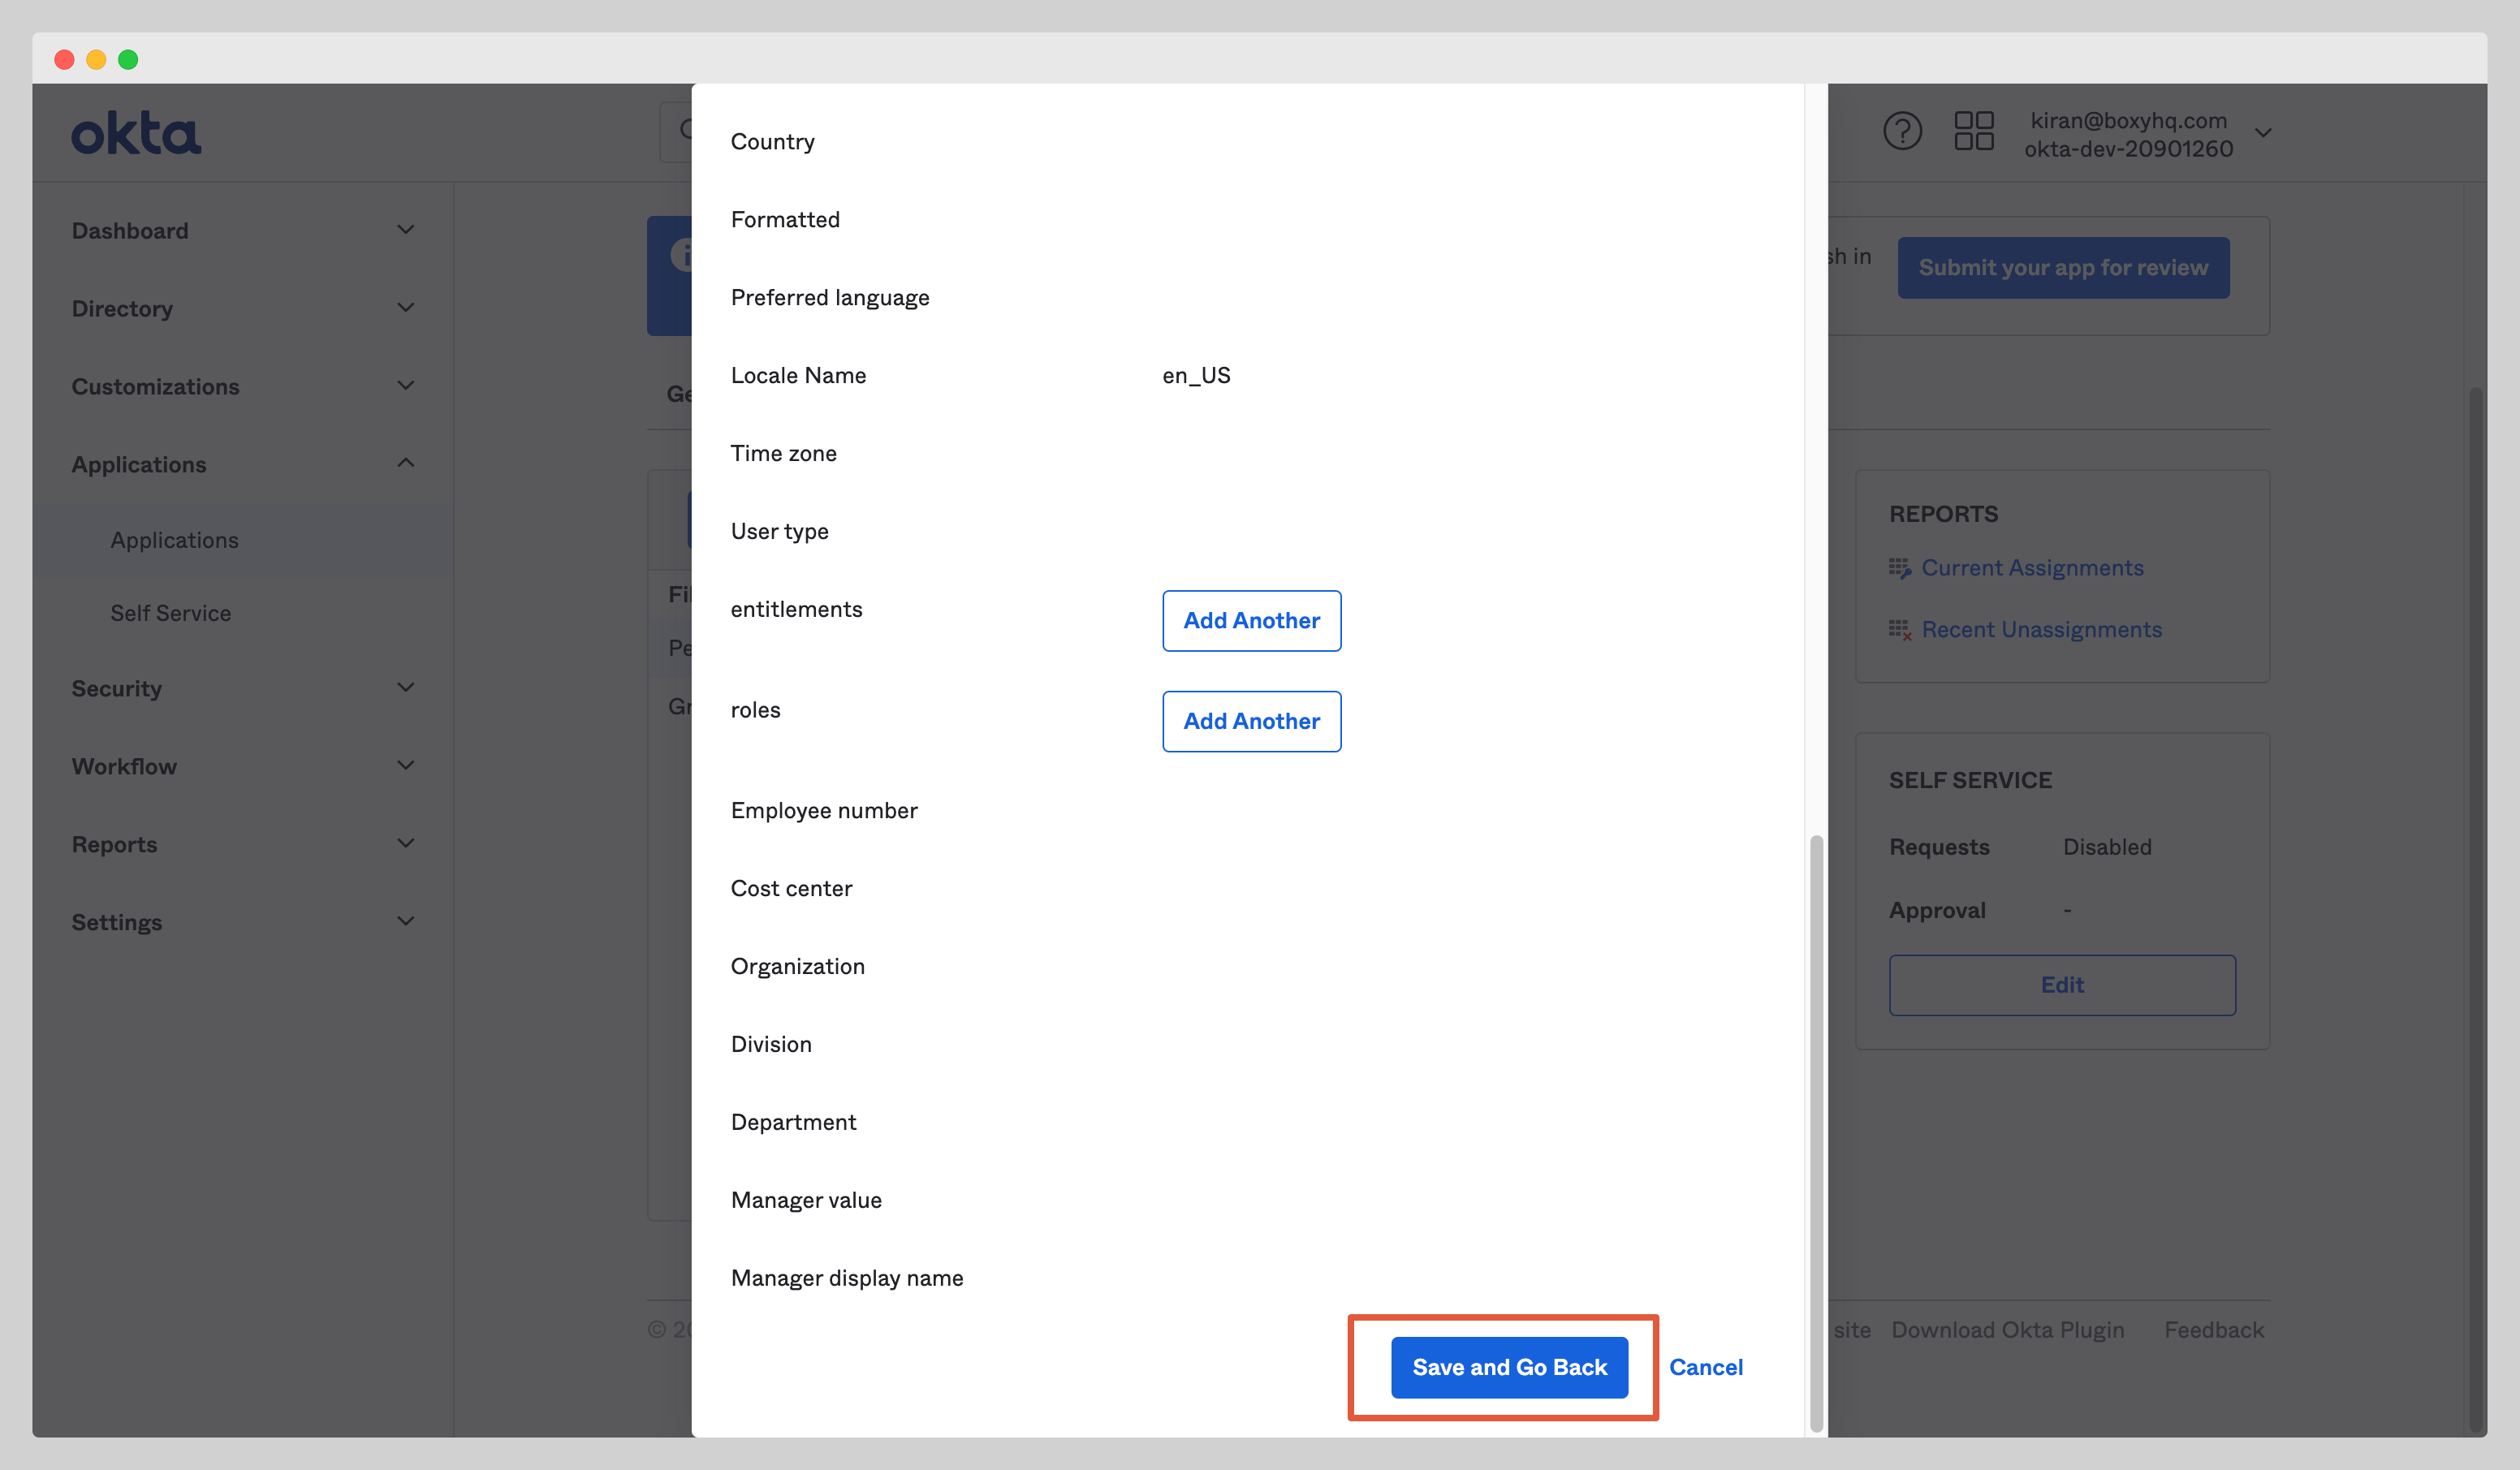
After you click the Assign button, you'll see a new popup window with various fields. Confirm the field values and click the Save and Go Back button.
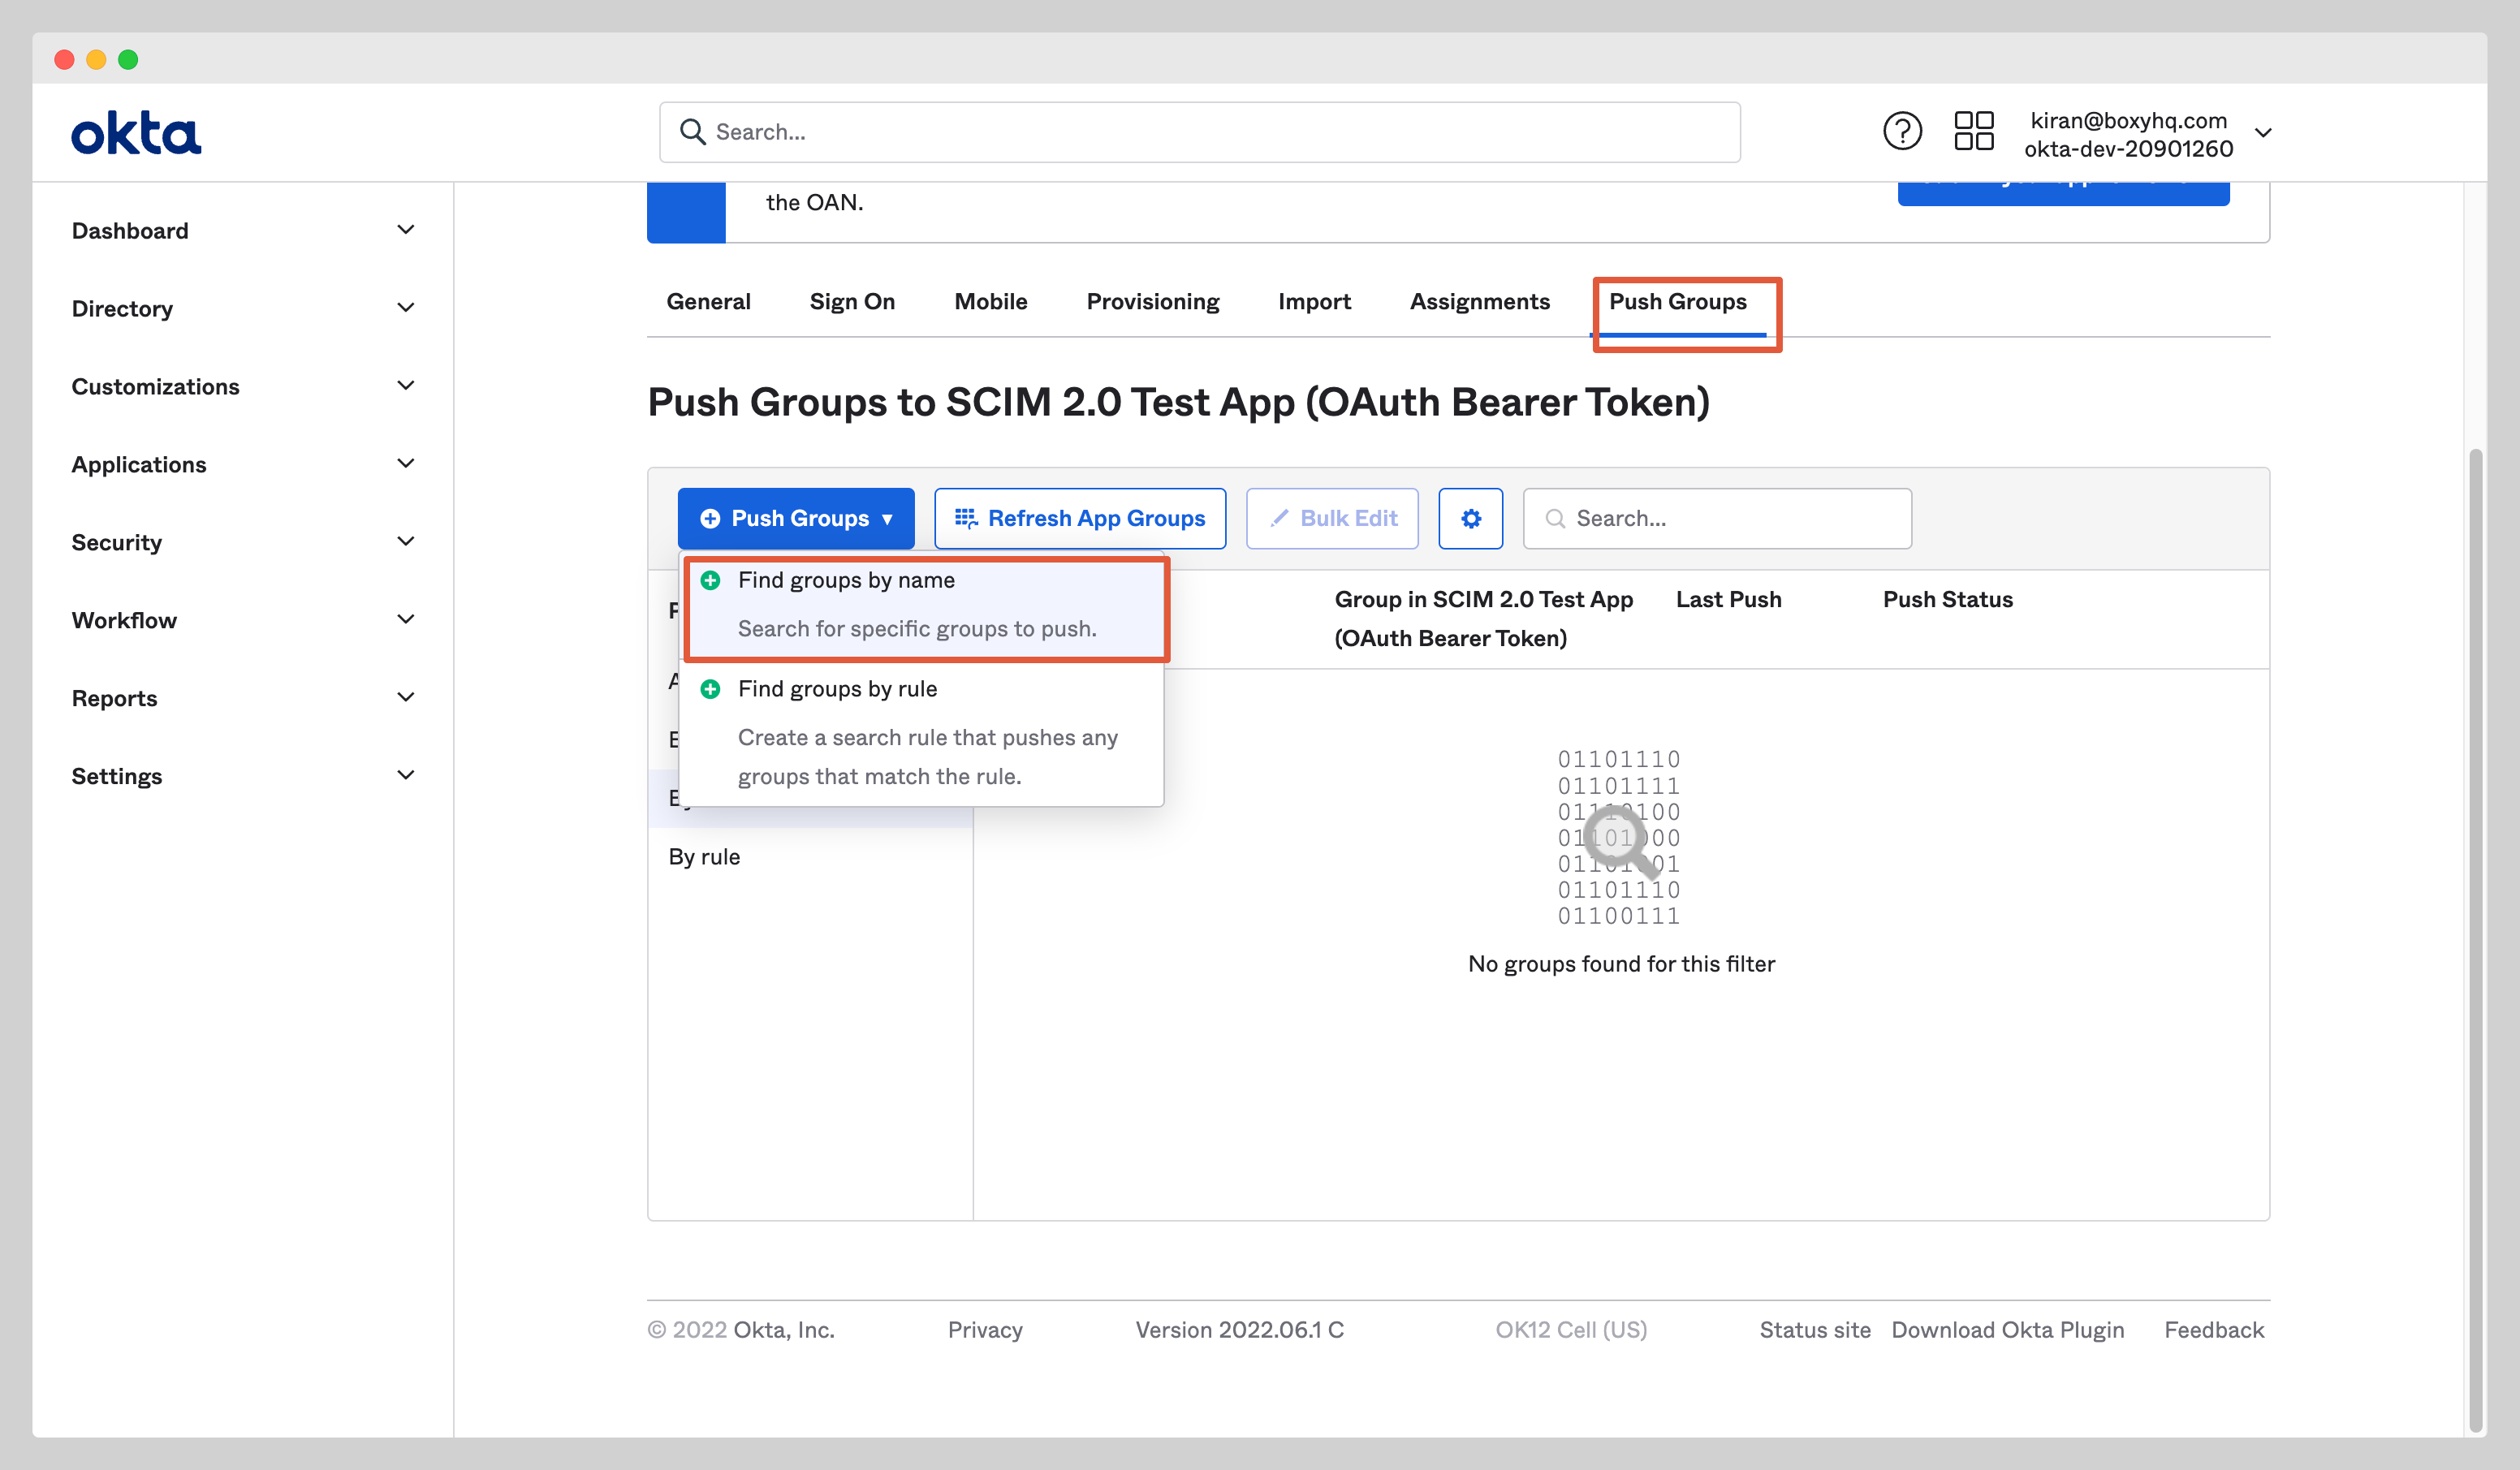
Push Groups
Navigate to the tab Push Groups and select Find group by name from the dropdown Push Groups.
Find the group you want to assign to the app and click the Save button.

FAQ
Why don't I see a DELETE event for a user that was removed in Okta?
Instead of executing a DELETE operation, Okta sends a request to the SCIM application to set the active attribute to false. Consequently, you will observe a user.updated event with the active attribute changed to false for users removed from the Okta application.
Why is there no event for a user that was deactivated in Okta?
Okta does not dispatch a specific deprovisioning event for users that are suspended. This omission of a deactivation event is a known issue with Okta.