Microsoft Entra ID (formerly Azure AD) SAML SSO
In this section, we will show you how to set up your own custom SAML application for Microsoft Entra ID SAML.
Create Application
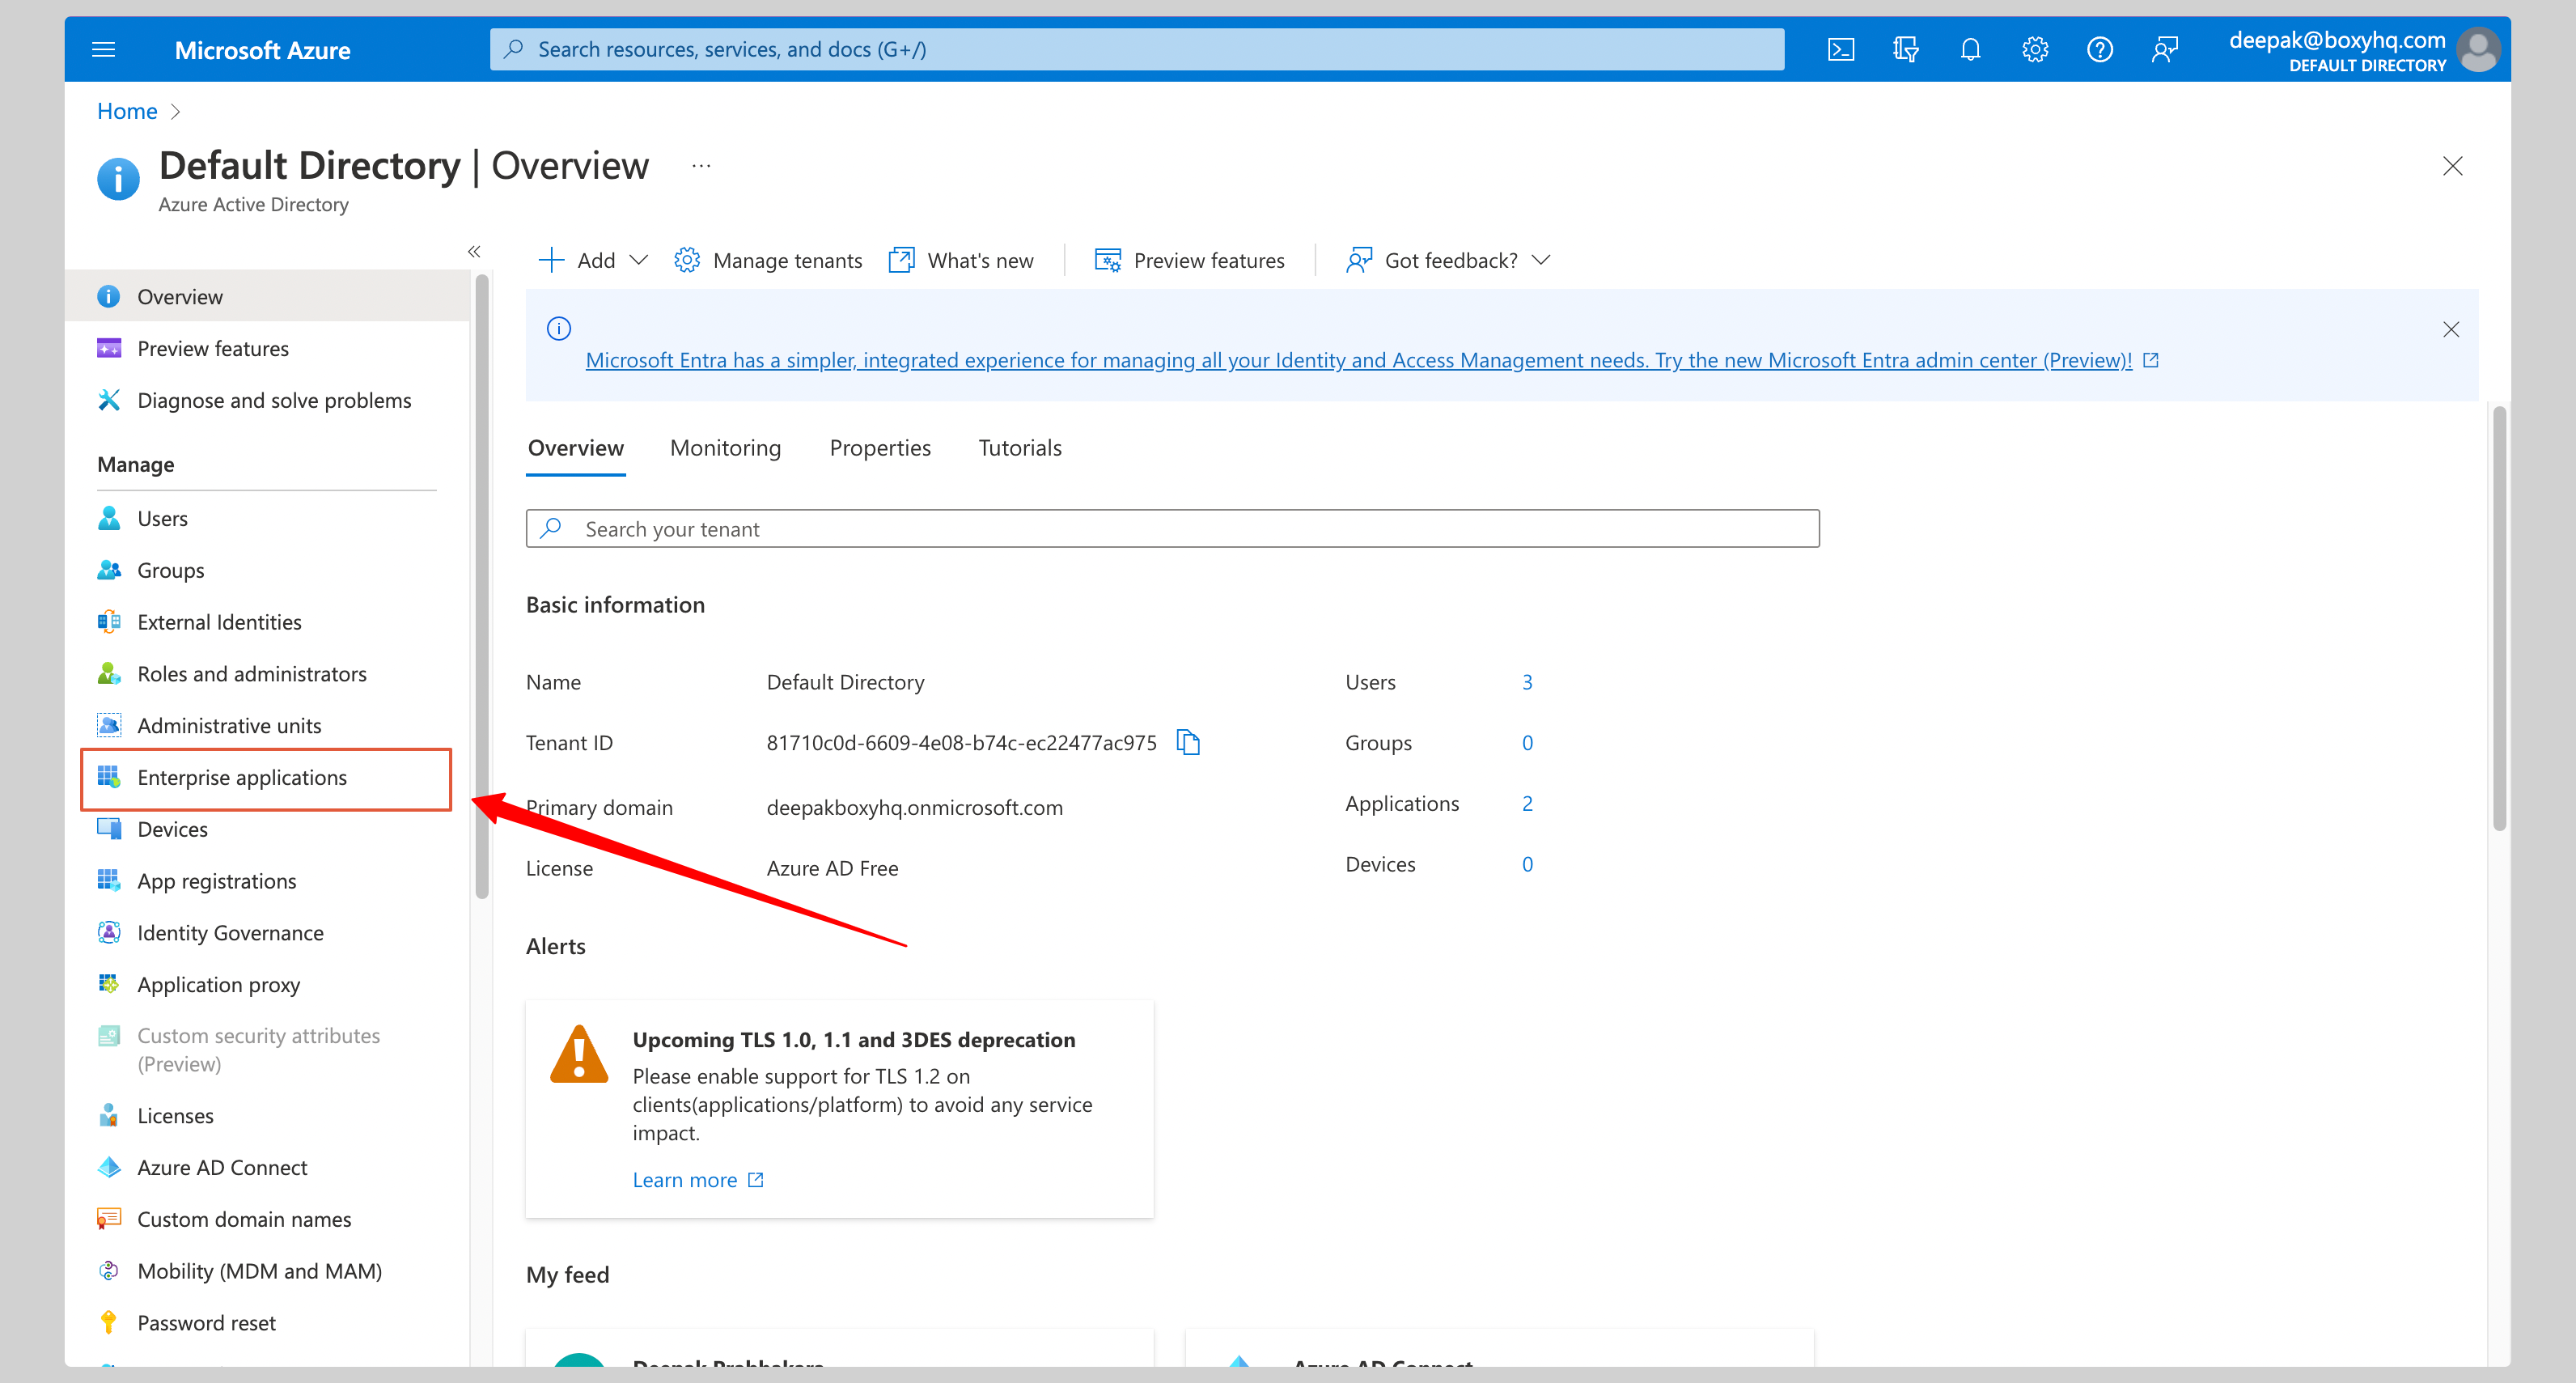
From your Azure Admin console, click Enterprise applications from the left navigation menu.
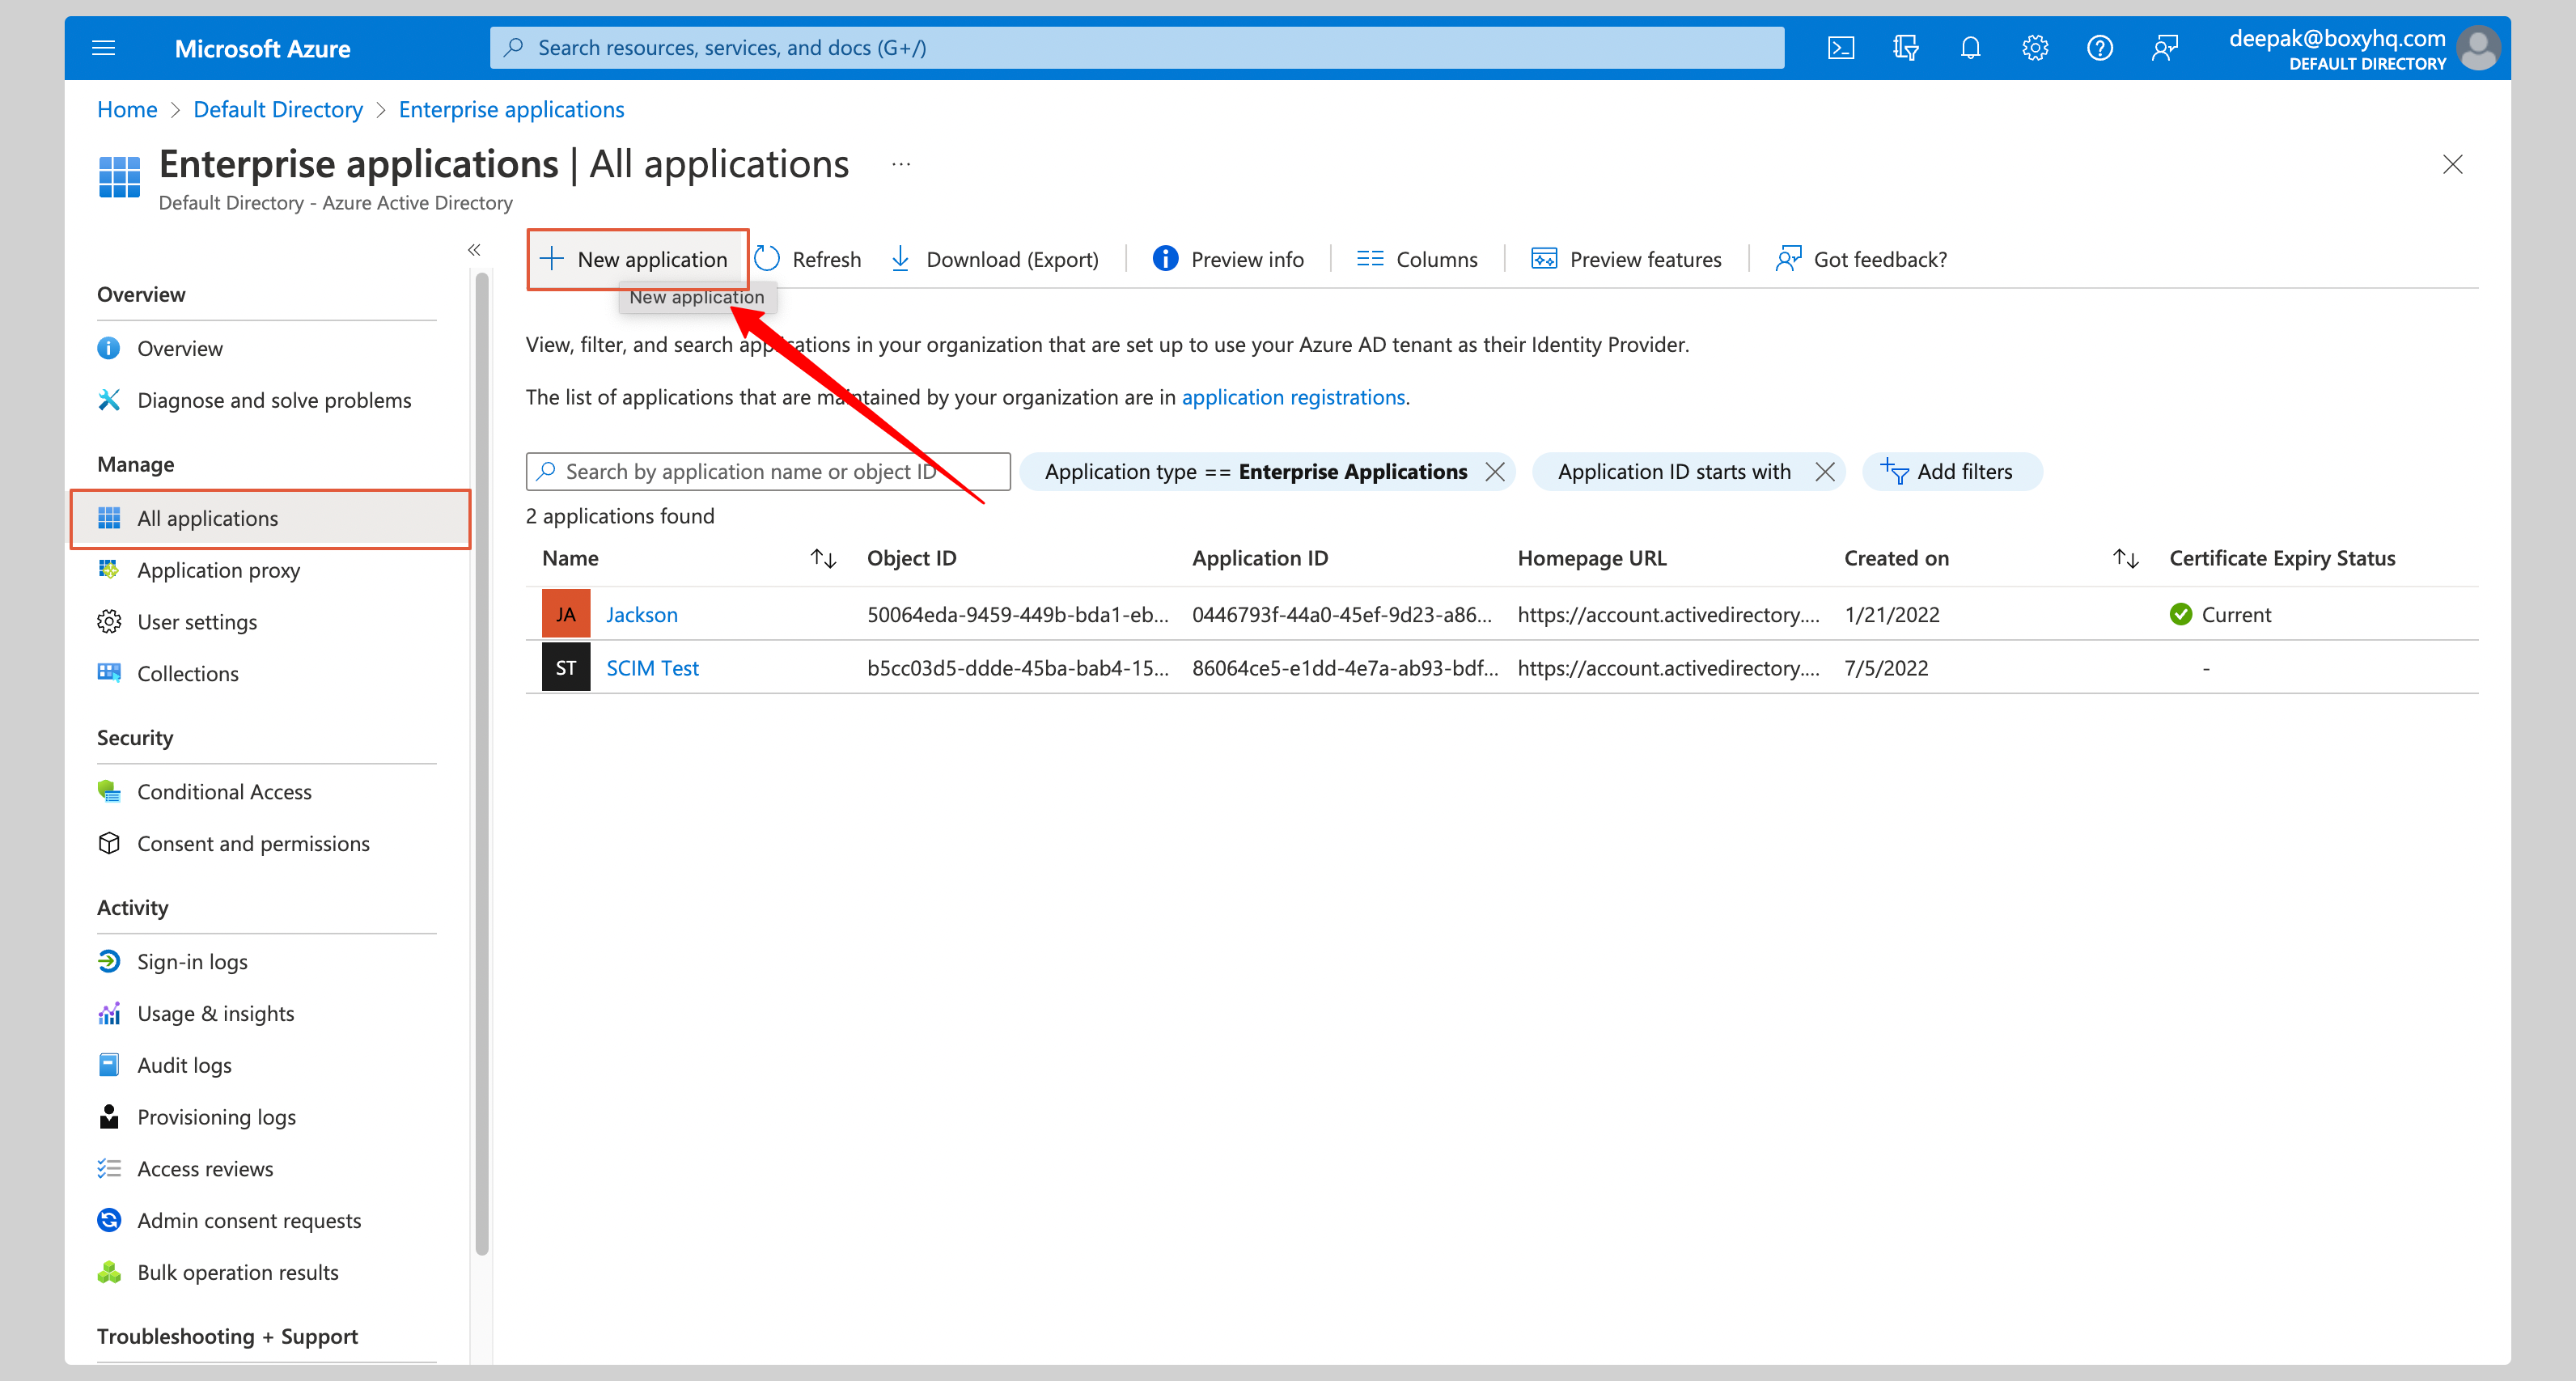
If your application is already created, choose it from the list and move to the section Configure Application
If you haven't created a SAML application, click New application from the top to create a new application.
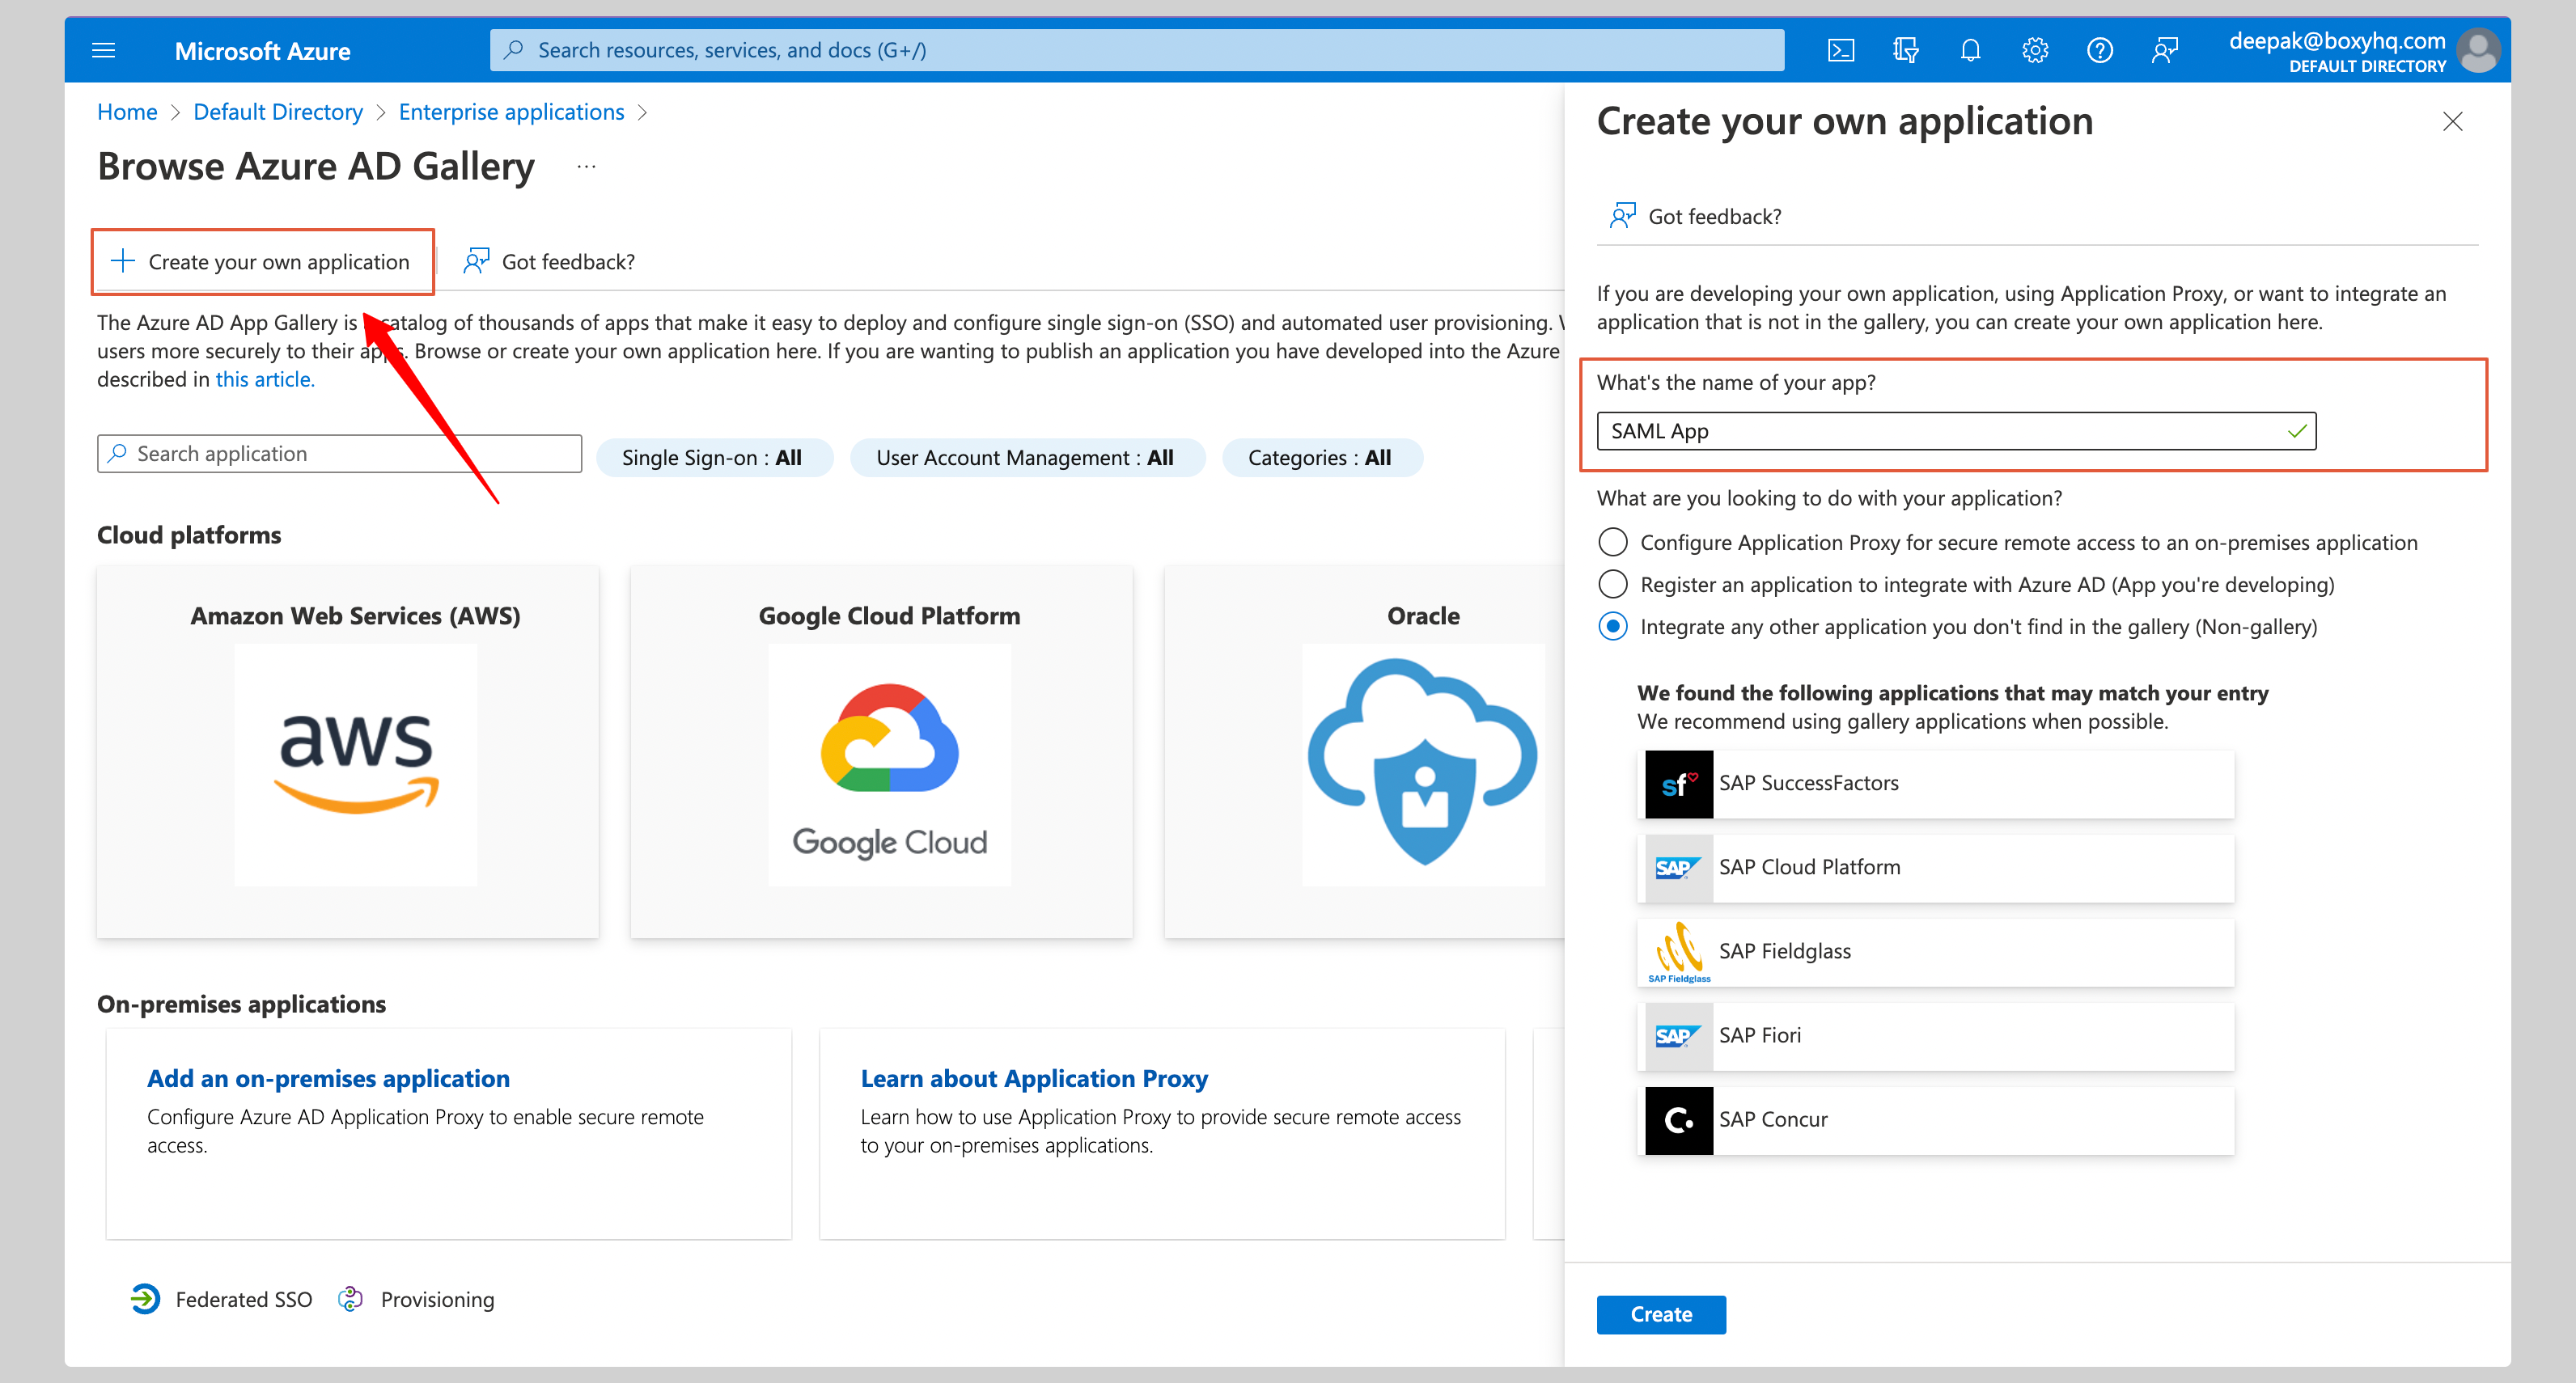
From the next screen, click Create your own application. Give your application a Name and click Create.
Configure Application
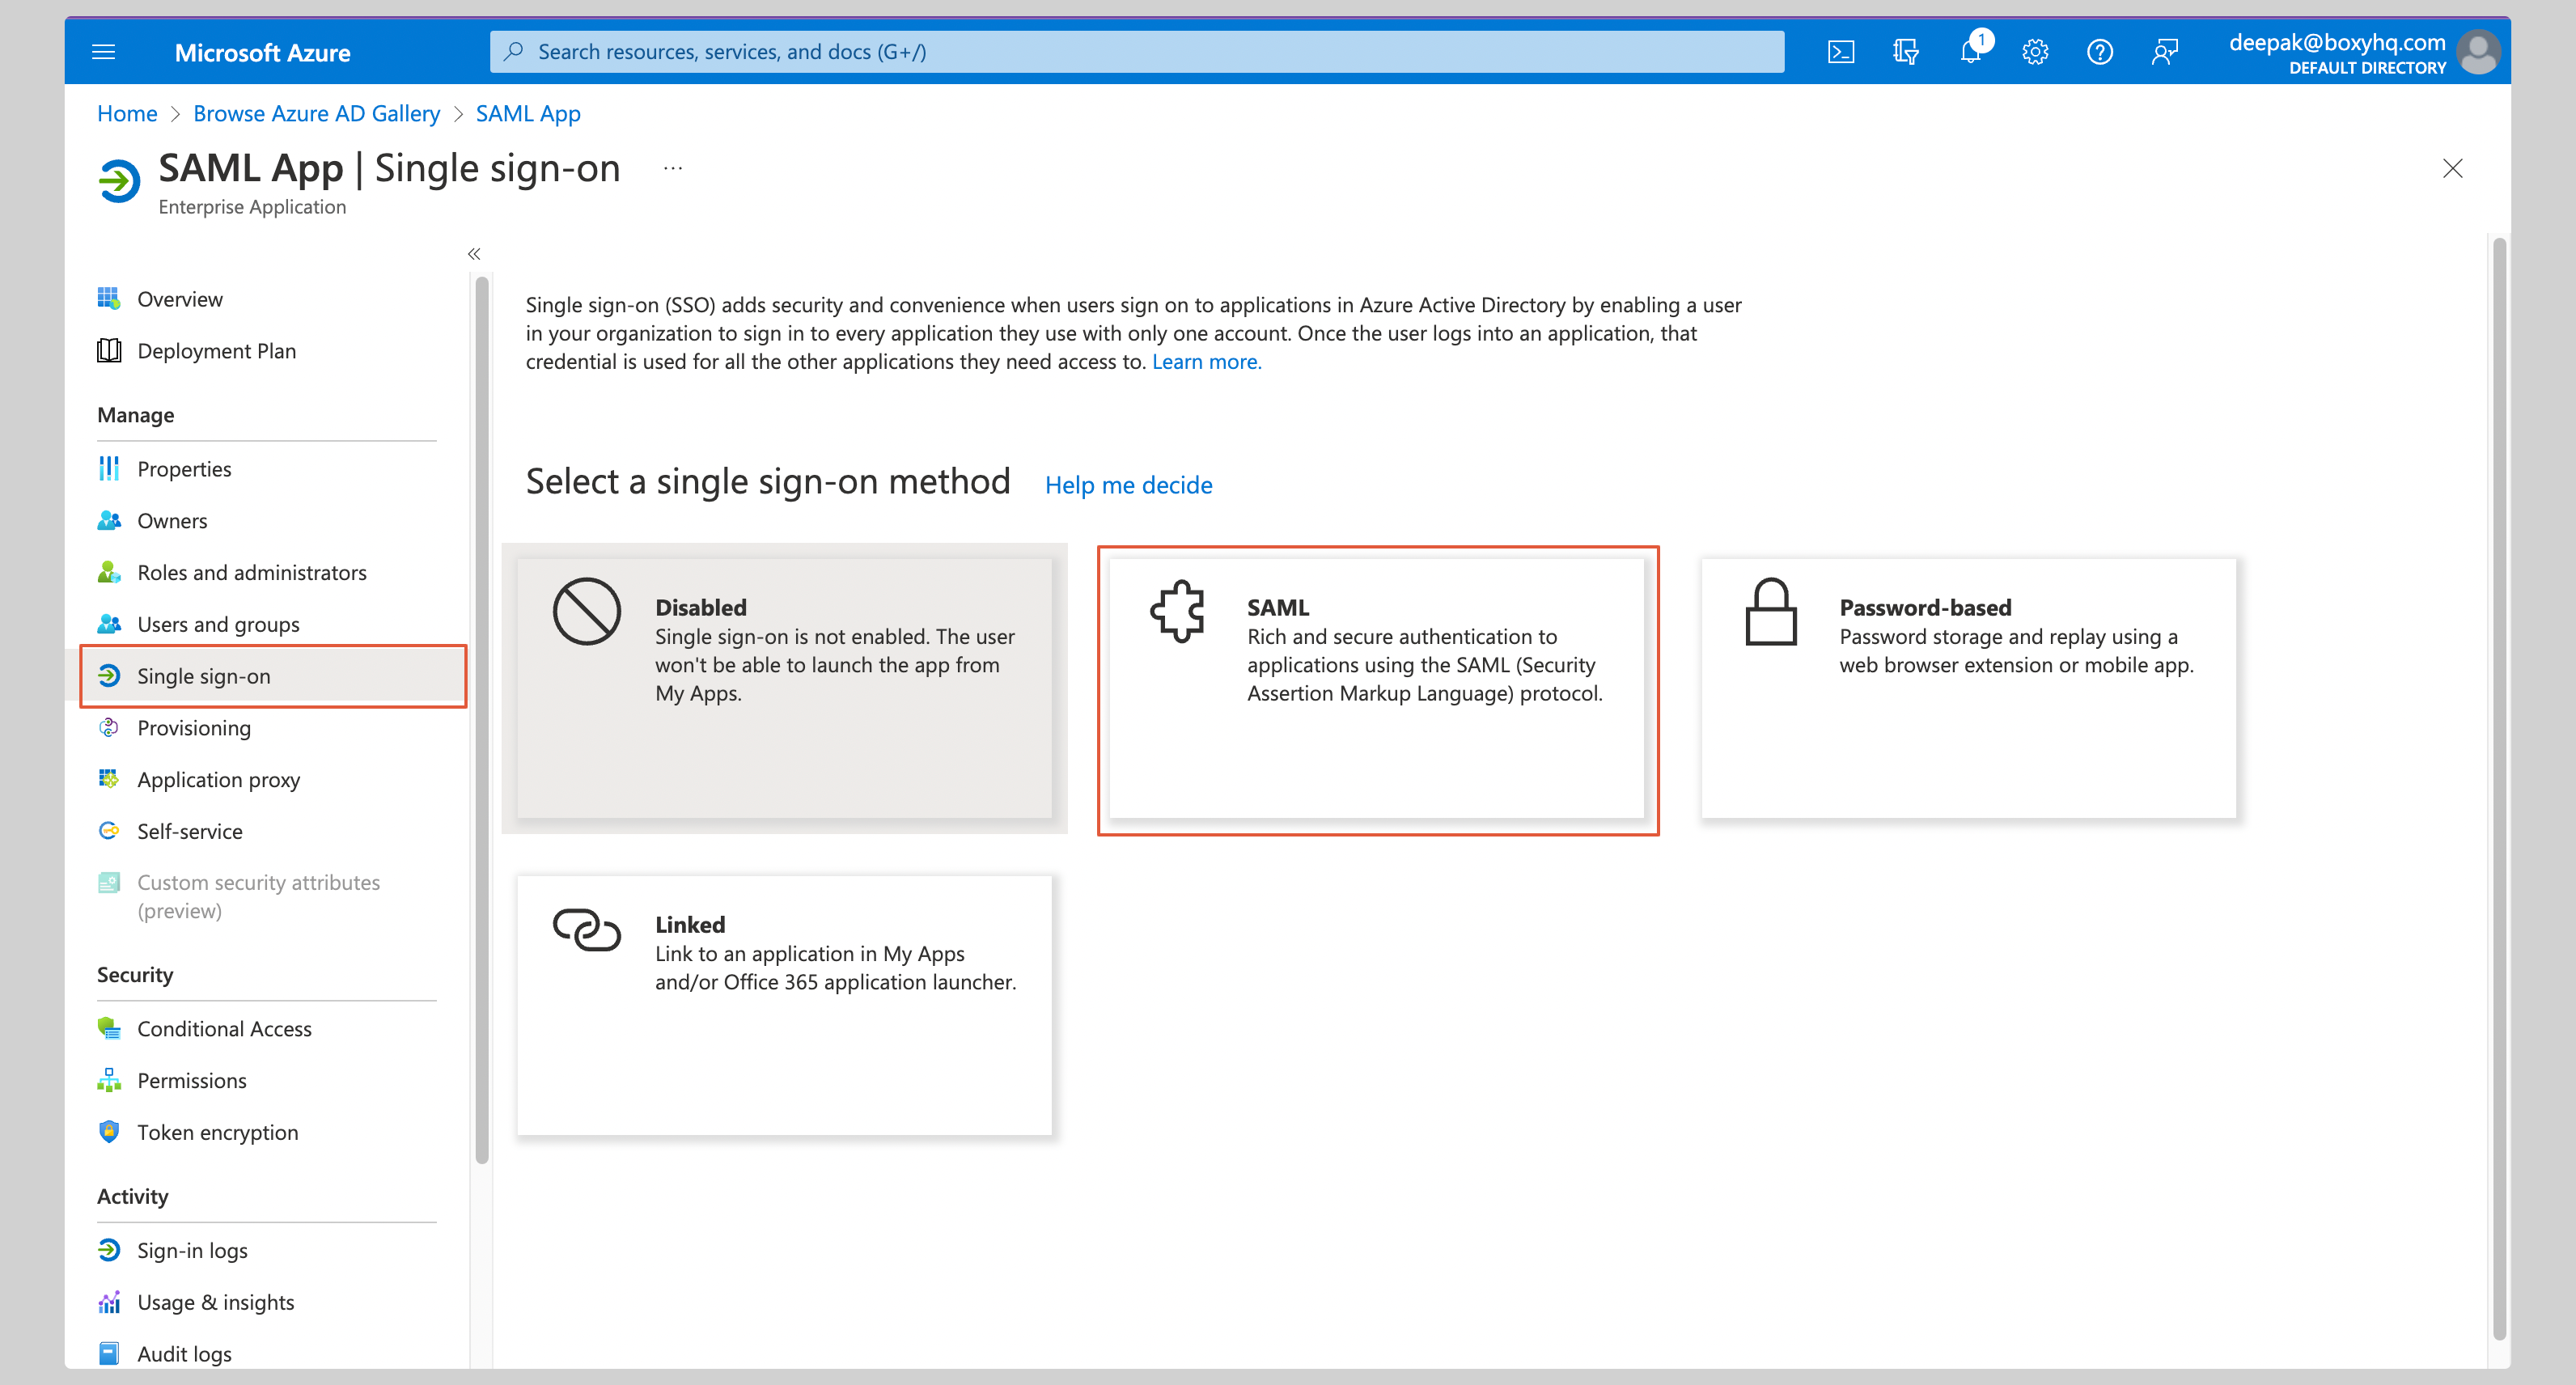
Select Single Sign On from the Manage section of your app and then SAML.
Click Edit on the Basic SAML Configuration section.
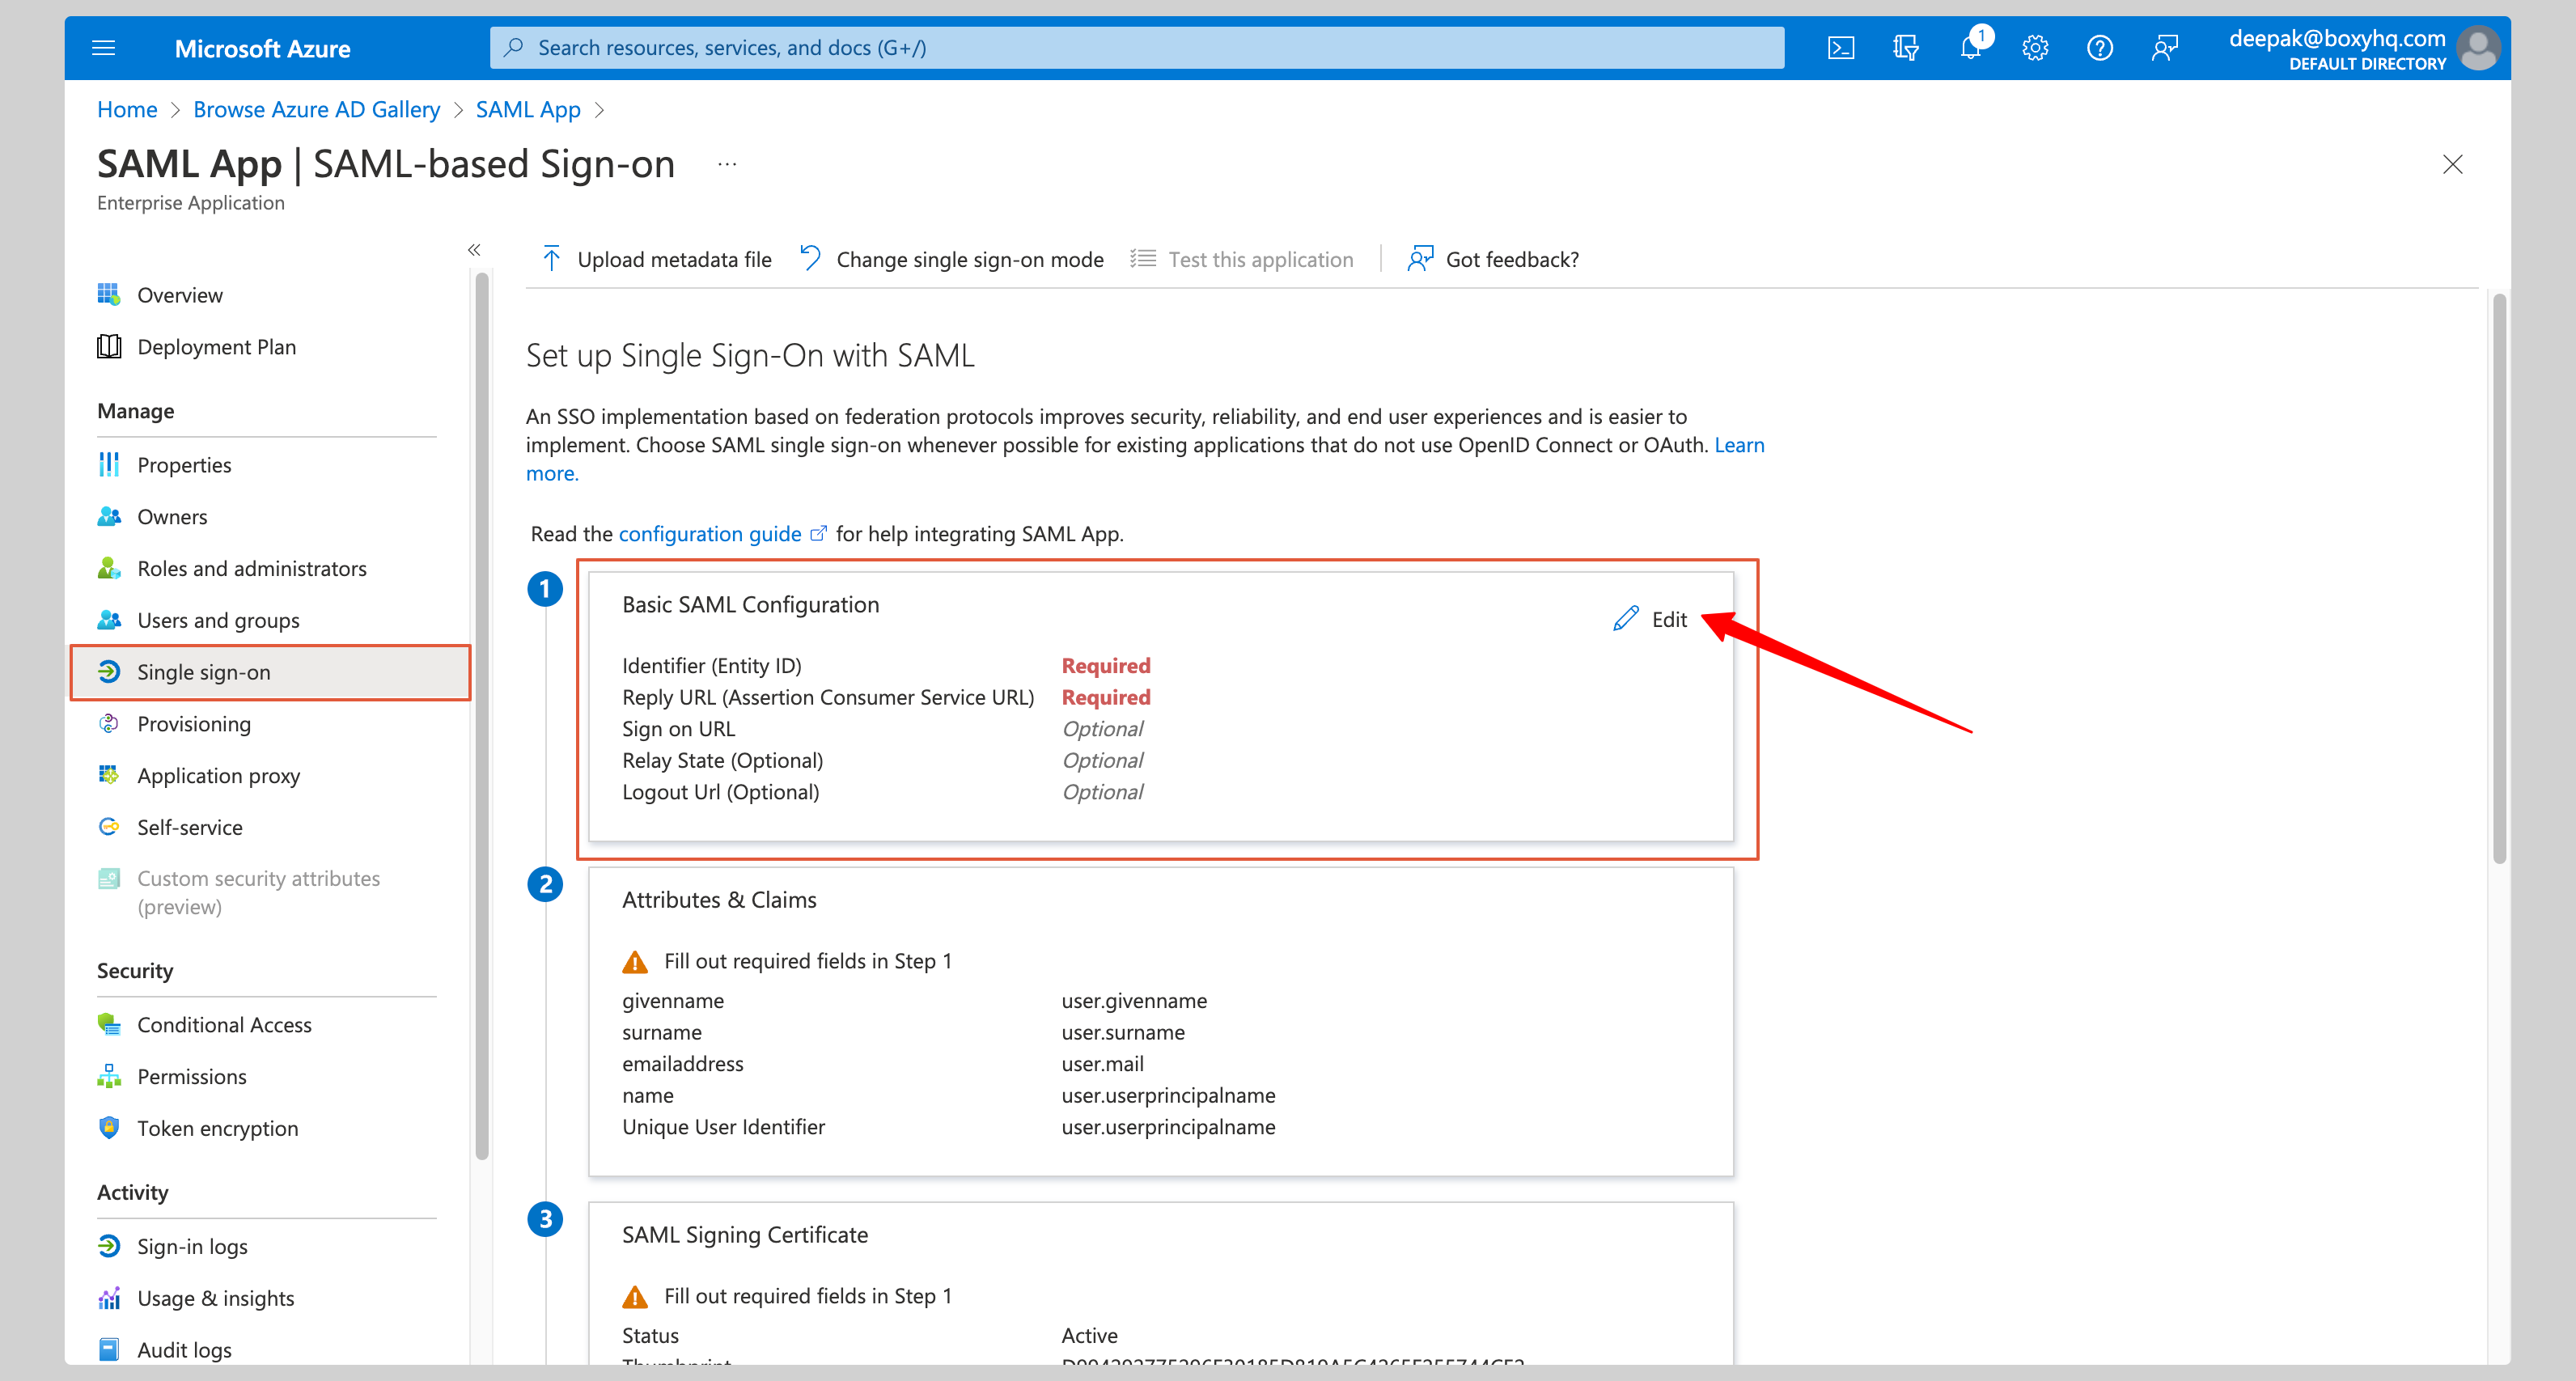
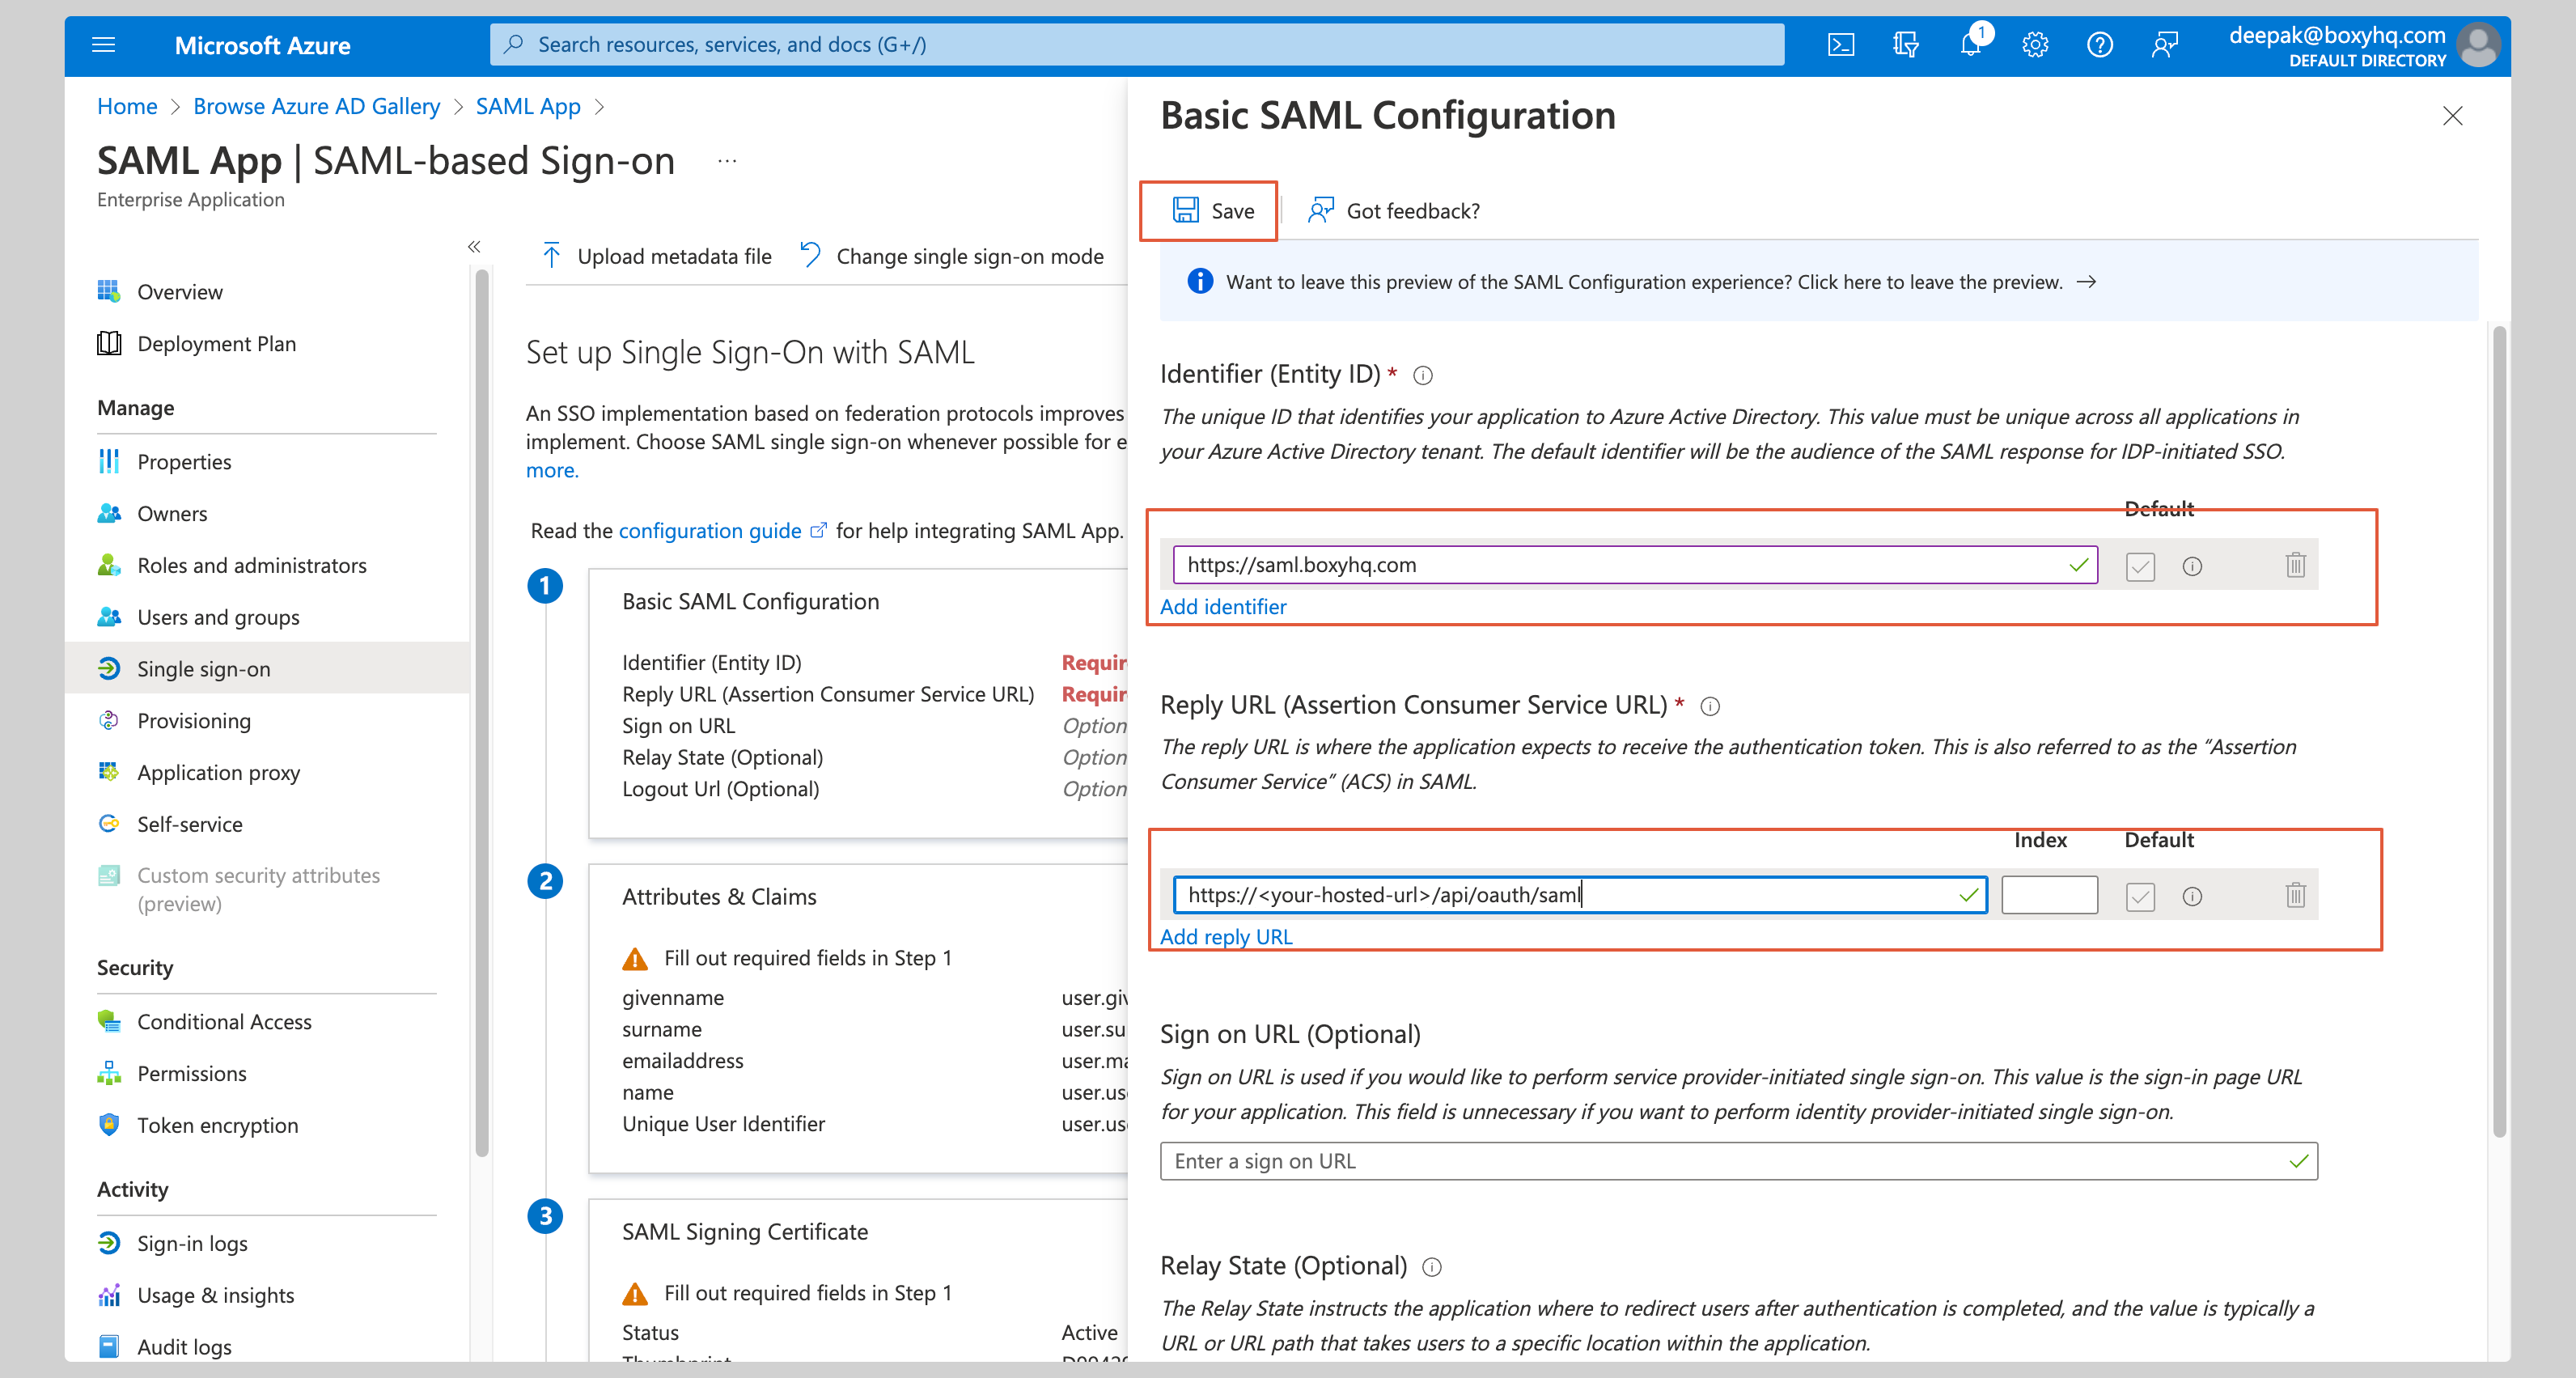
Enter the following values in the Basic SAML Configuration section on the next screen:
- Identifier (Entity ID)
- Reply URL (Assertion Consumer Service URL)
Replace the values with the ones you have received from SAML Jackson.
Click Save to save your changes.
Attribute Mapping
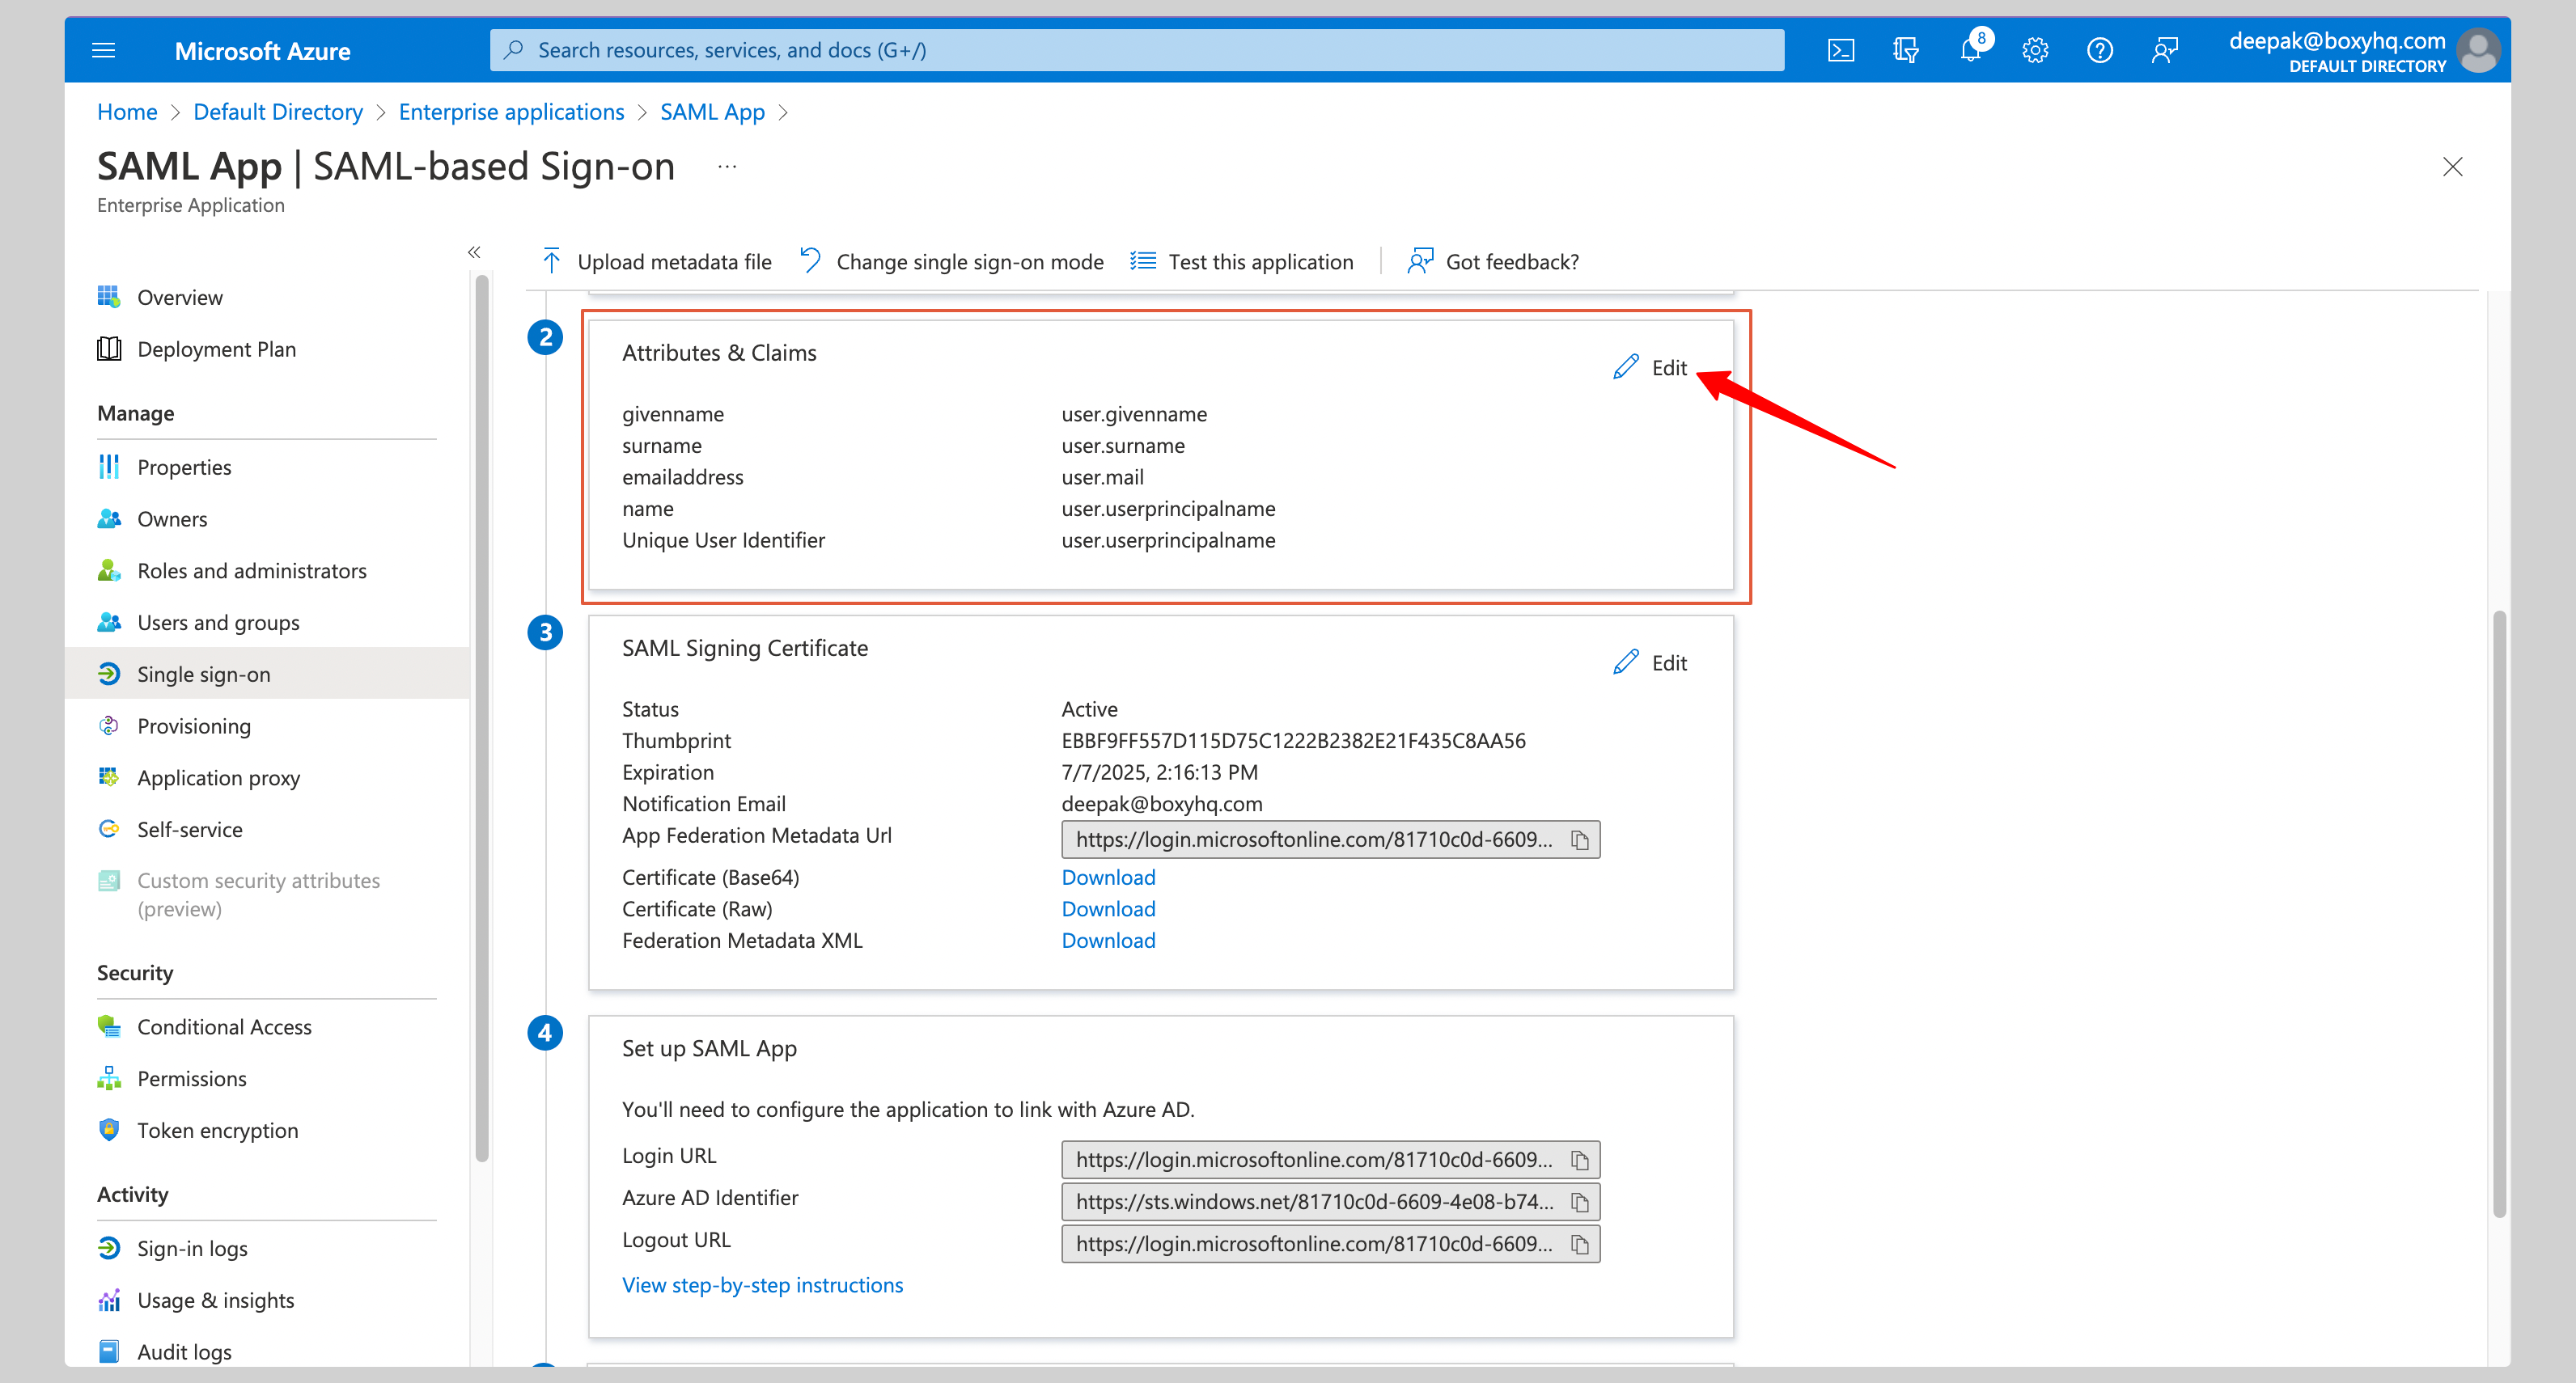
Click Edit on the Attributes & Claims section.
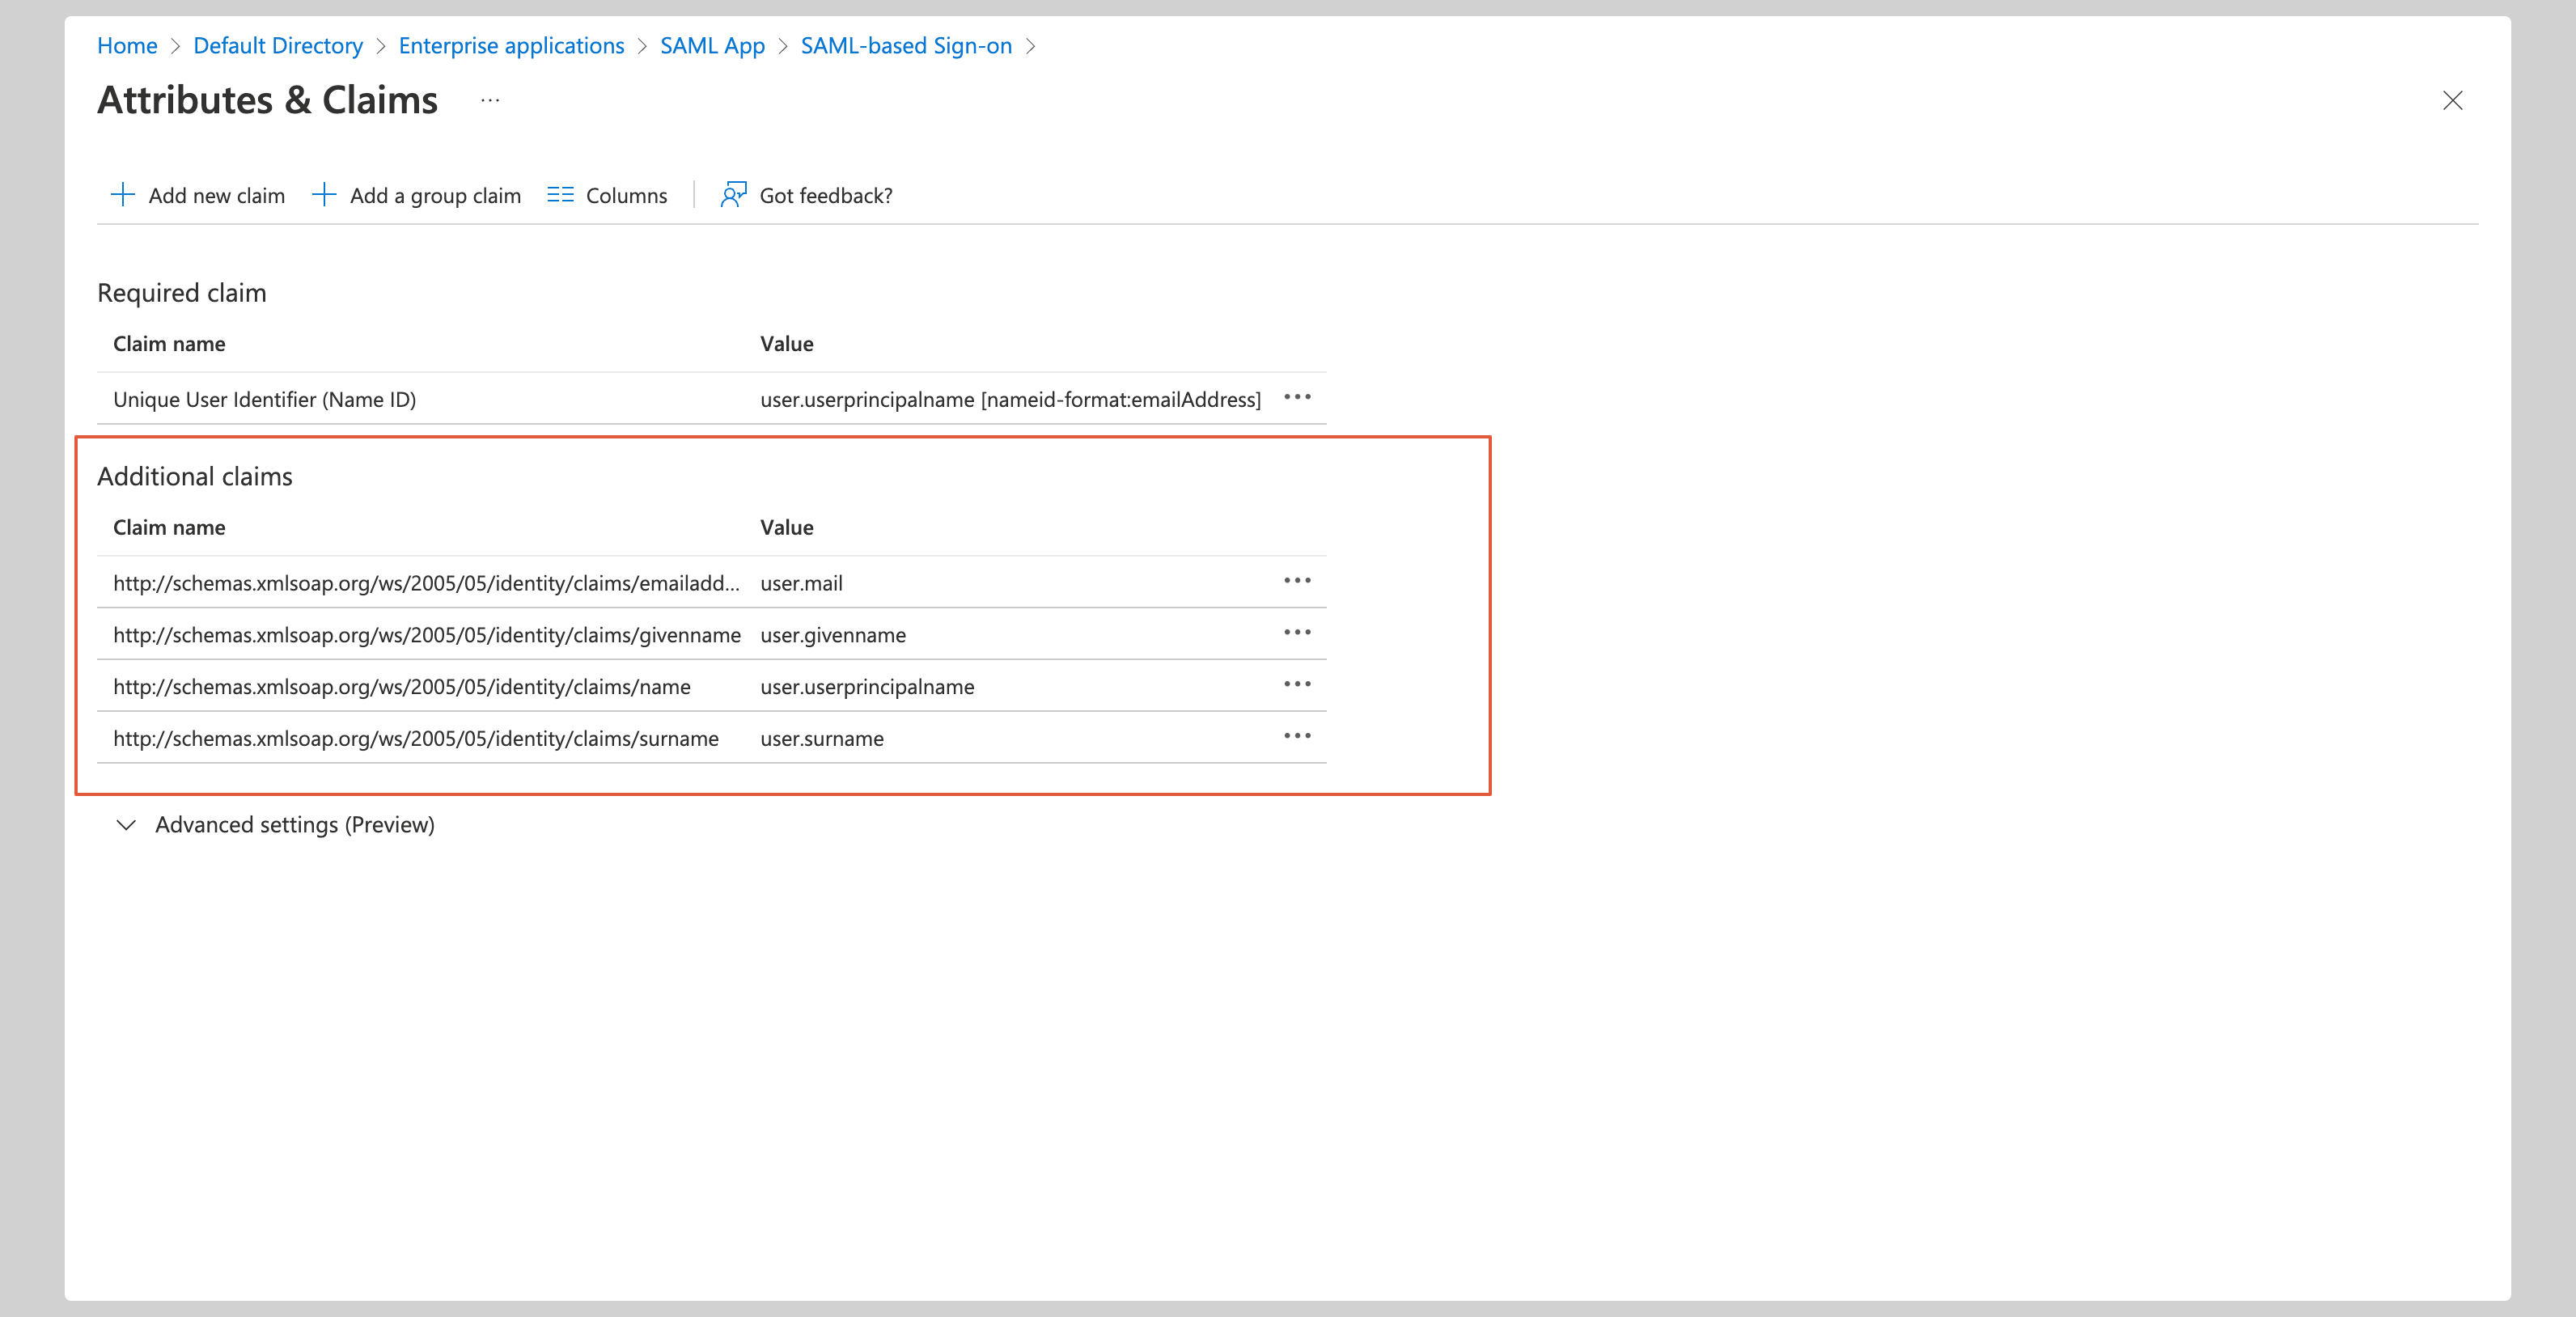
You have to configure the following attributes under the Attributes & Claims section:
| Name | Value |
|---|---|
http://schemas.xmlsoap.org/ws/2005/05/identity/claims/emailaddress | user.mail |
http://schemas.xmlsoap.org/ws/2005/05/identity/claims/givenname | user.givenname |
http://schemas.xmlsoap.org/ws/2005/05/identity/claims/name | user.userprincipalname |
http://schemas.xmlsoap.org/ws/2005/05/identity/claims/surname | user.surname |
See the screenshot below.
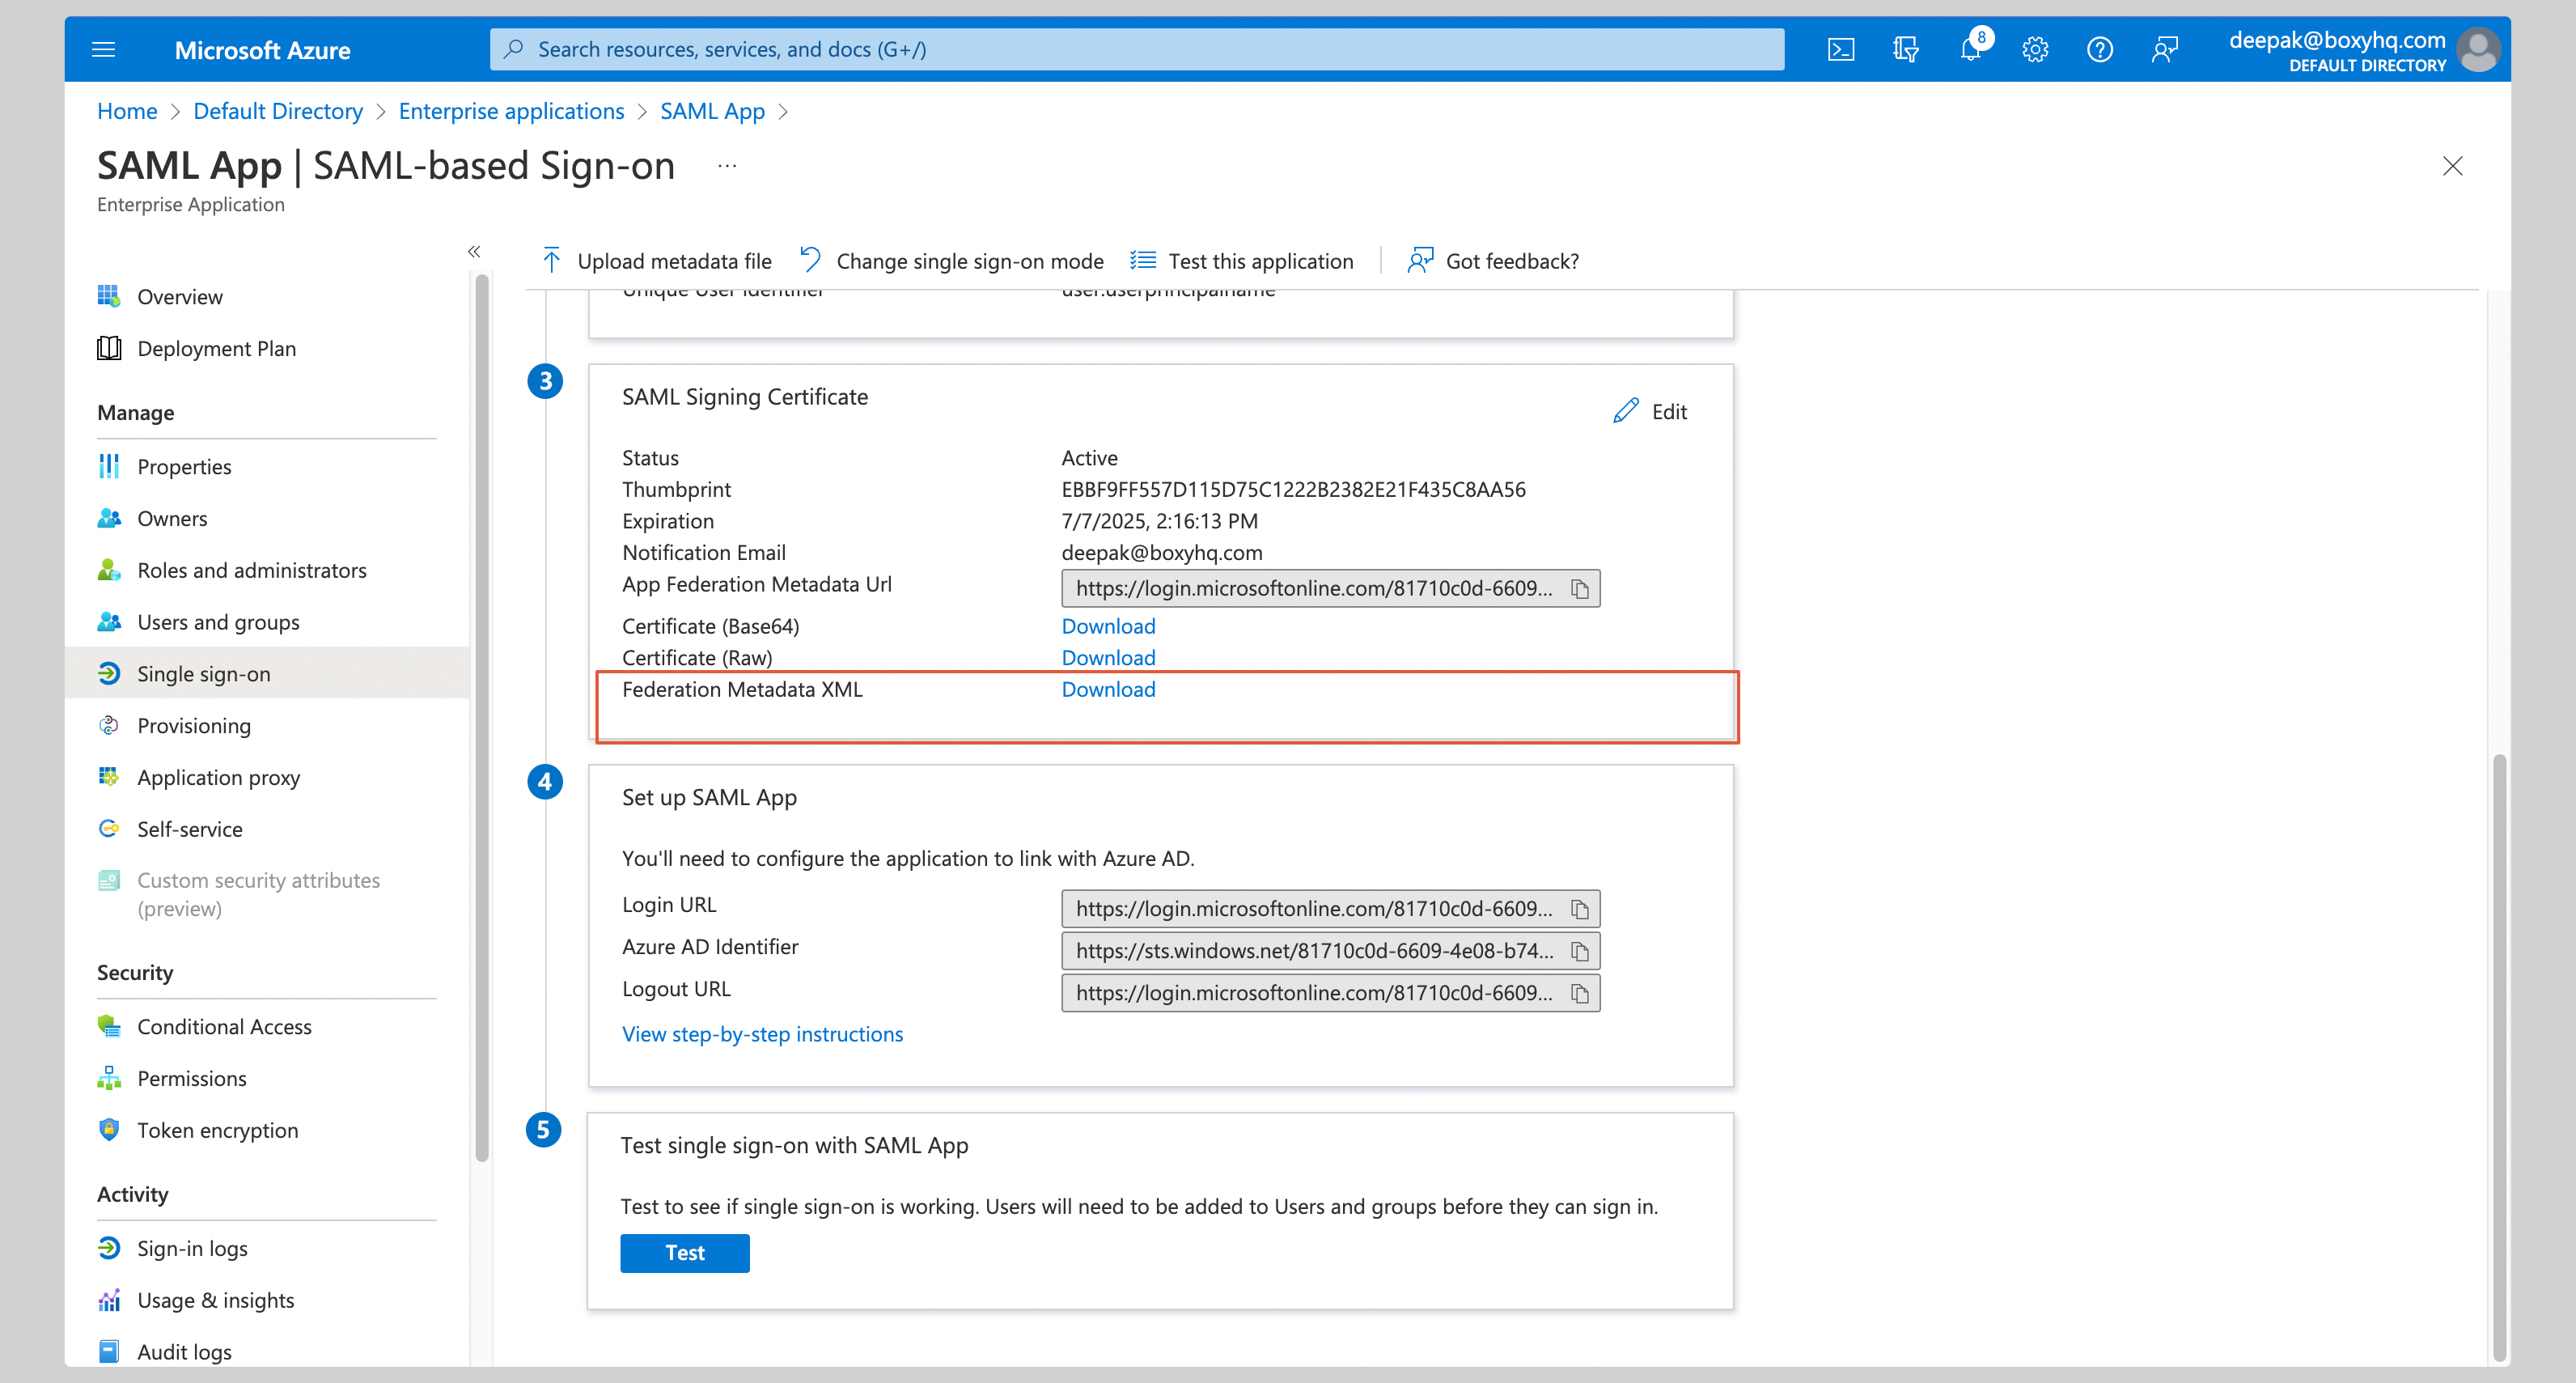
Go to the section SAML Signing Certificate section and download the Federation Metadata XML.
Next steps
You've successfully configured your custom SAML application for Microsoft Entra ID SAML. At this stage, you can assign users to your application and start using it.
Resources
Got a question? Ask here