PingOne SAML SSO
In this section, we will show you how to set up your own custom SAML application for PingOne SAML.
Create Application
From your PingOne account, click Connections > Applications from left navigation menu.
If your application is already created, choose it from the list and move to the section Configure Application
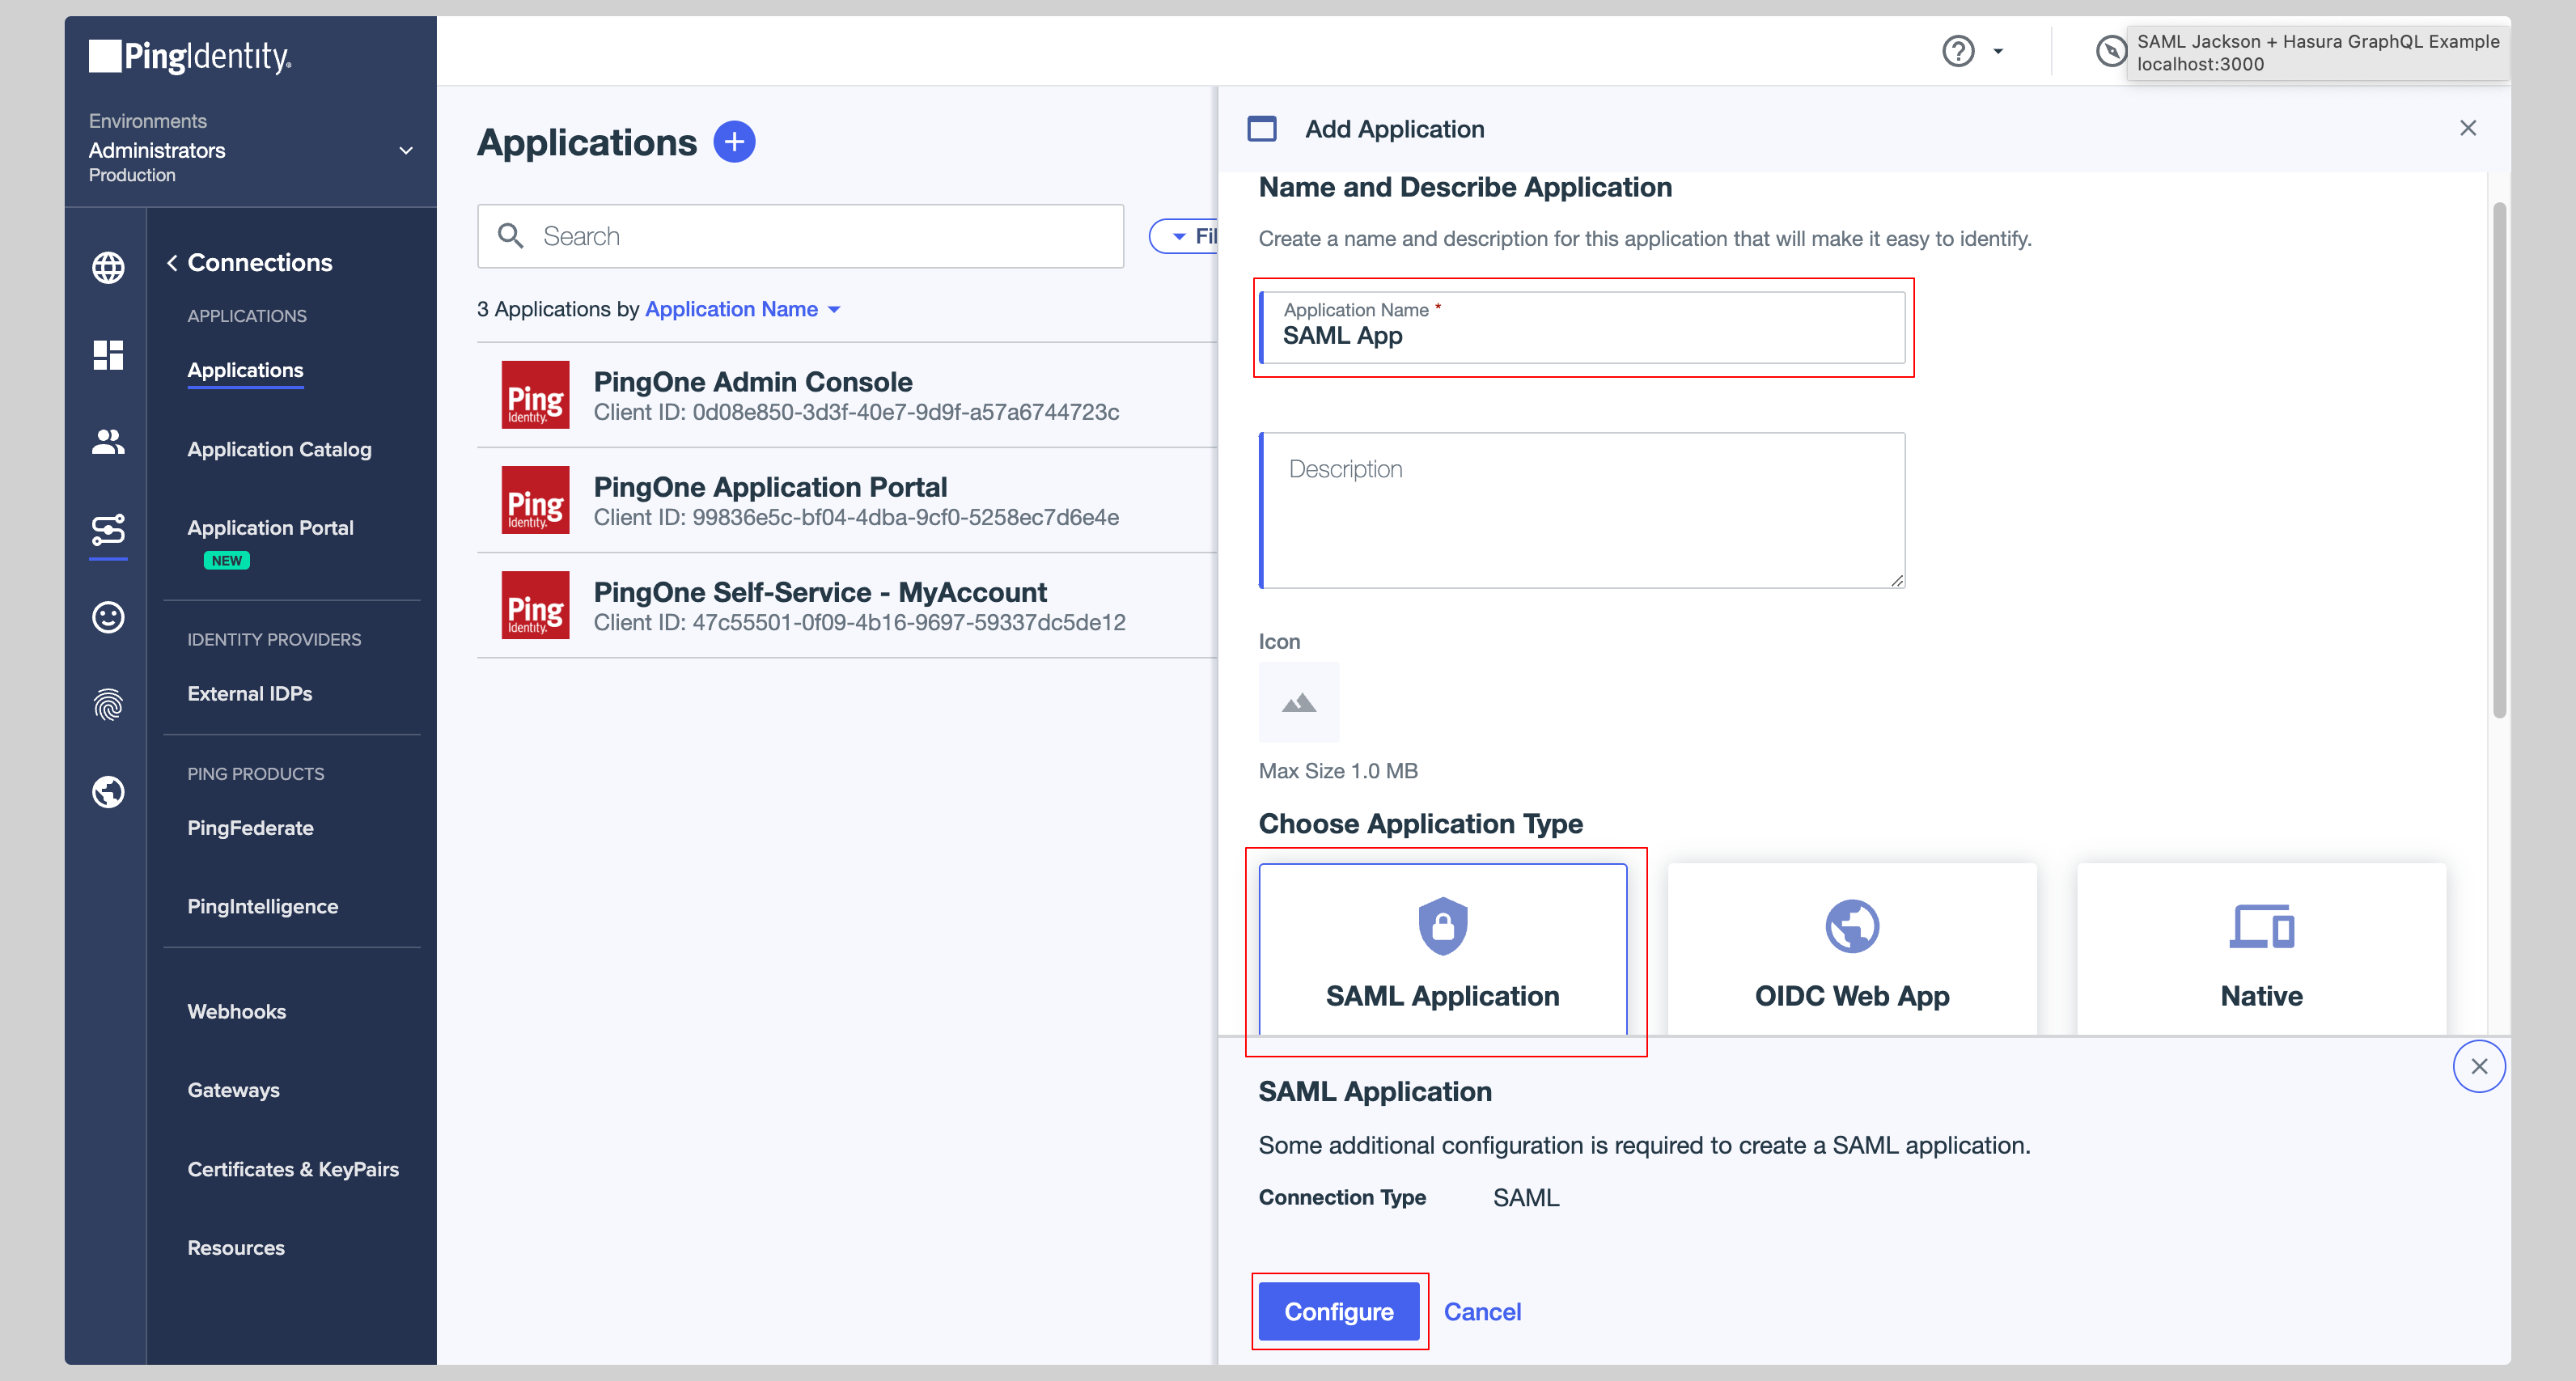
If you haven't created a SAML application, click plus button to create a new application.

Give your application a Application Name, choose SAML Application from the Application Type and click Configure.
Configure Application
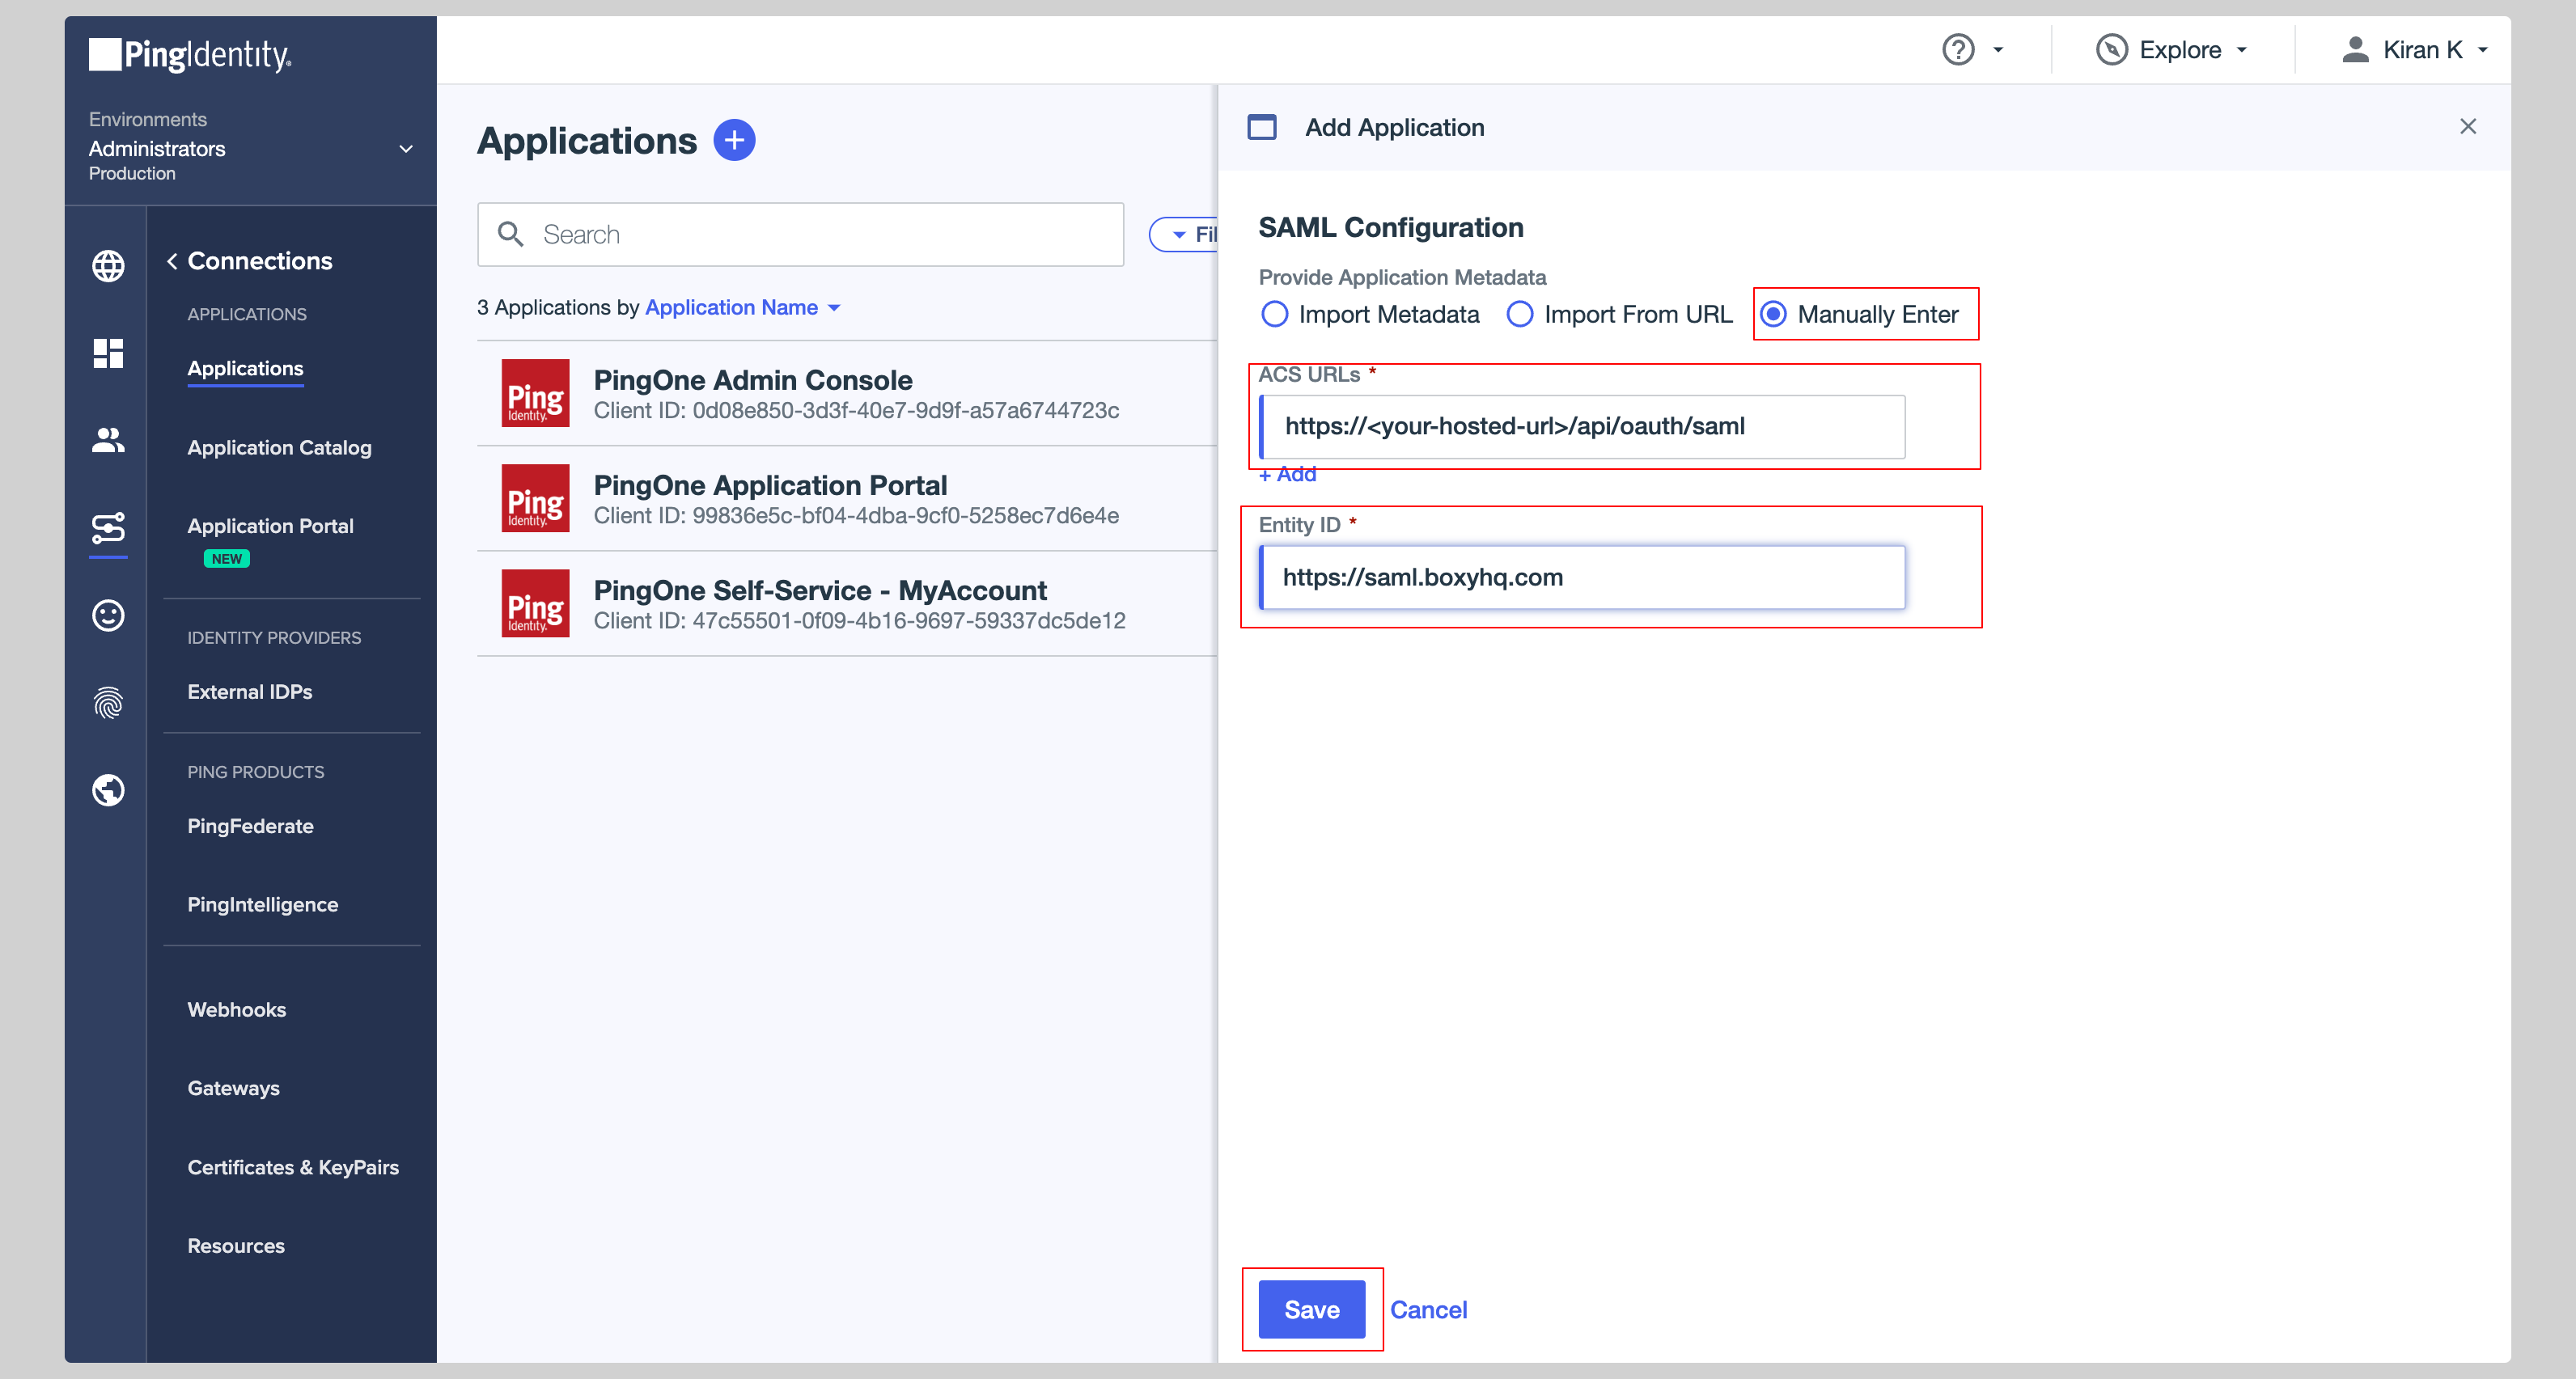
From the next screen, you have to enter the following values in the SAML Configuration section:
- ACS URLs
- Entity ID
Replace the values with the ones you have received from SAML Jackson.
Click Save to save the configuration.
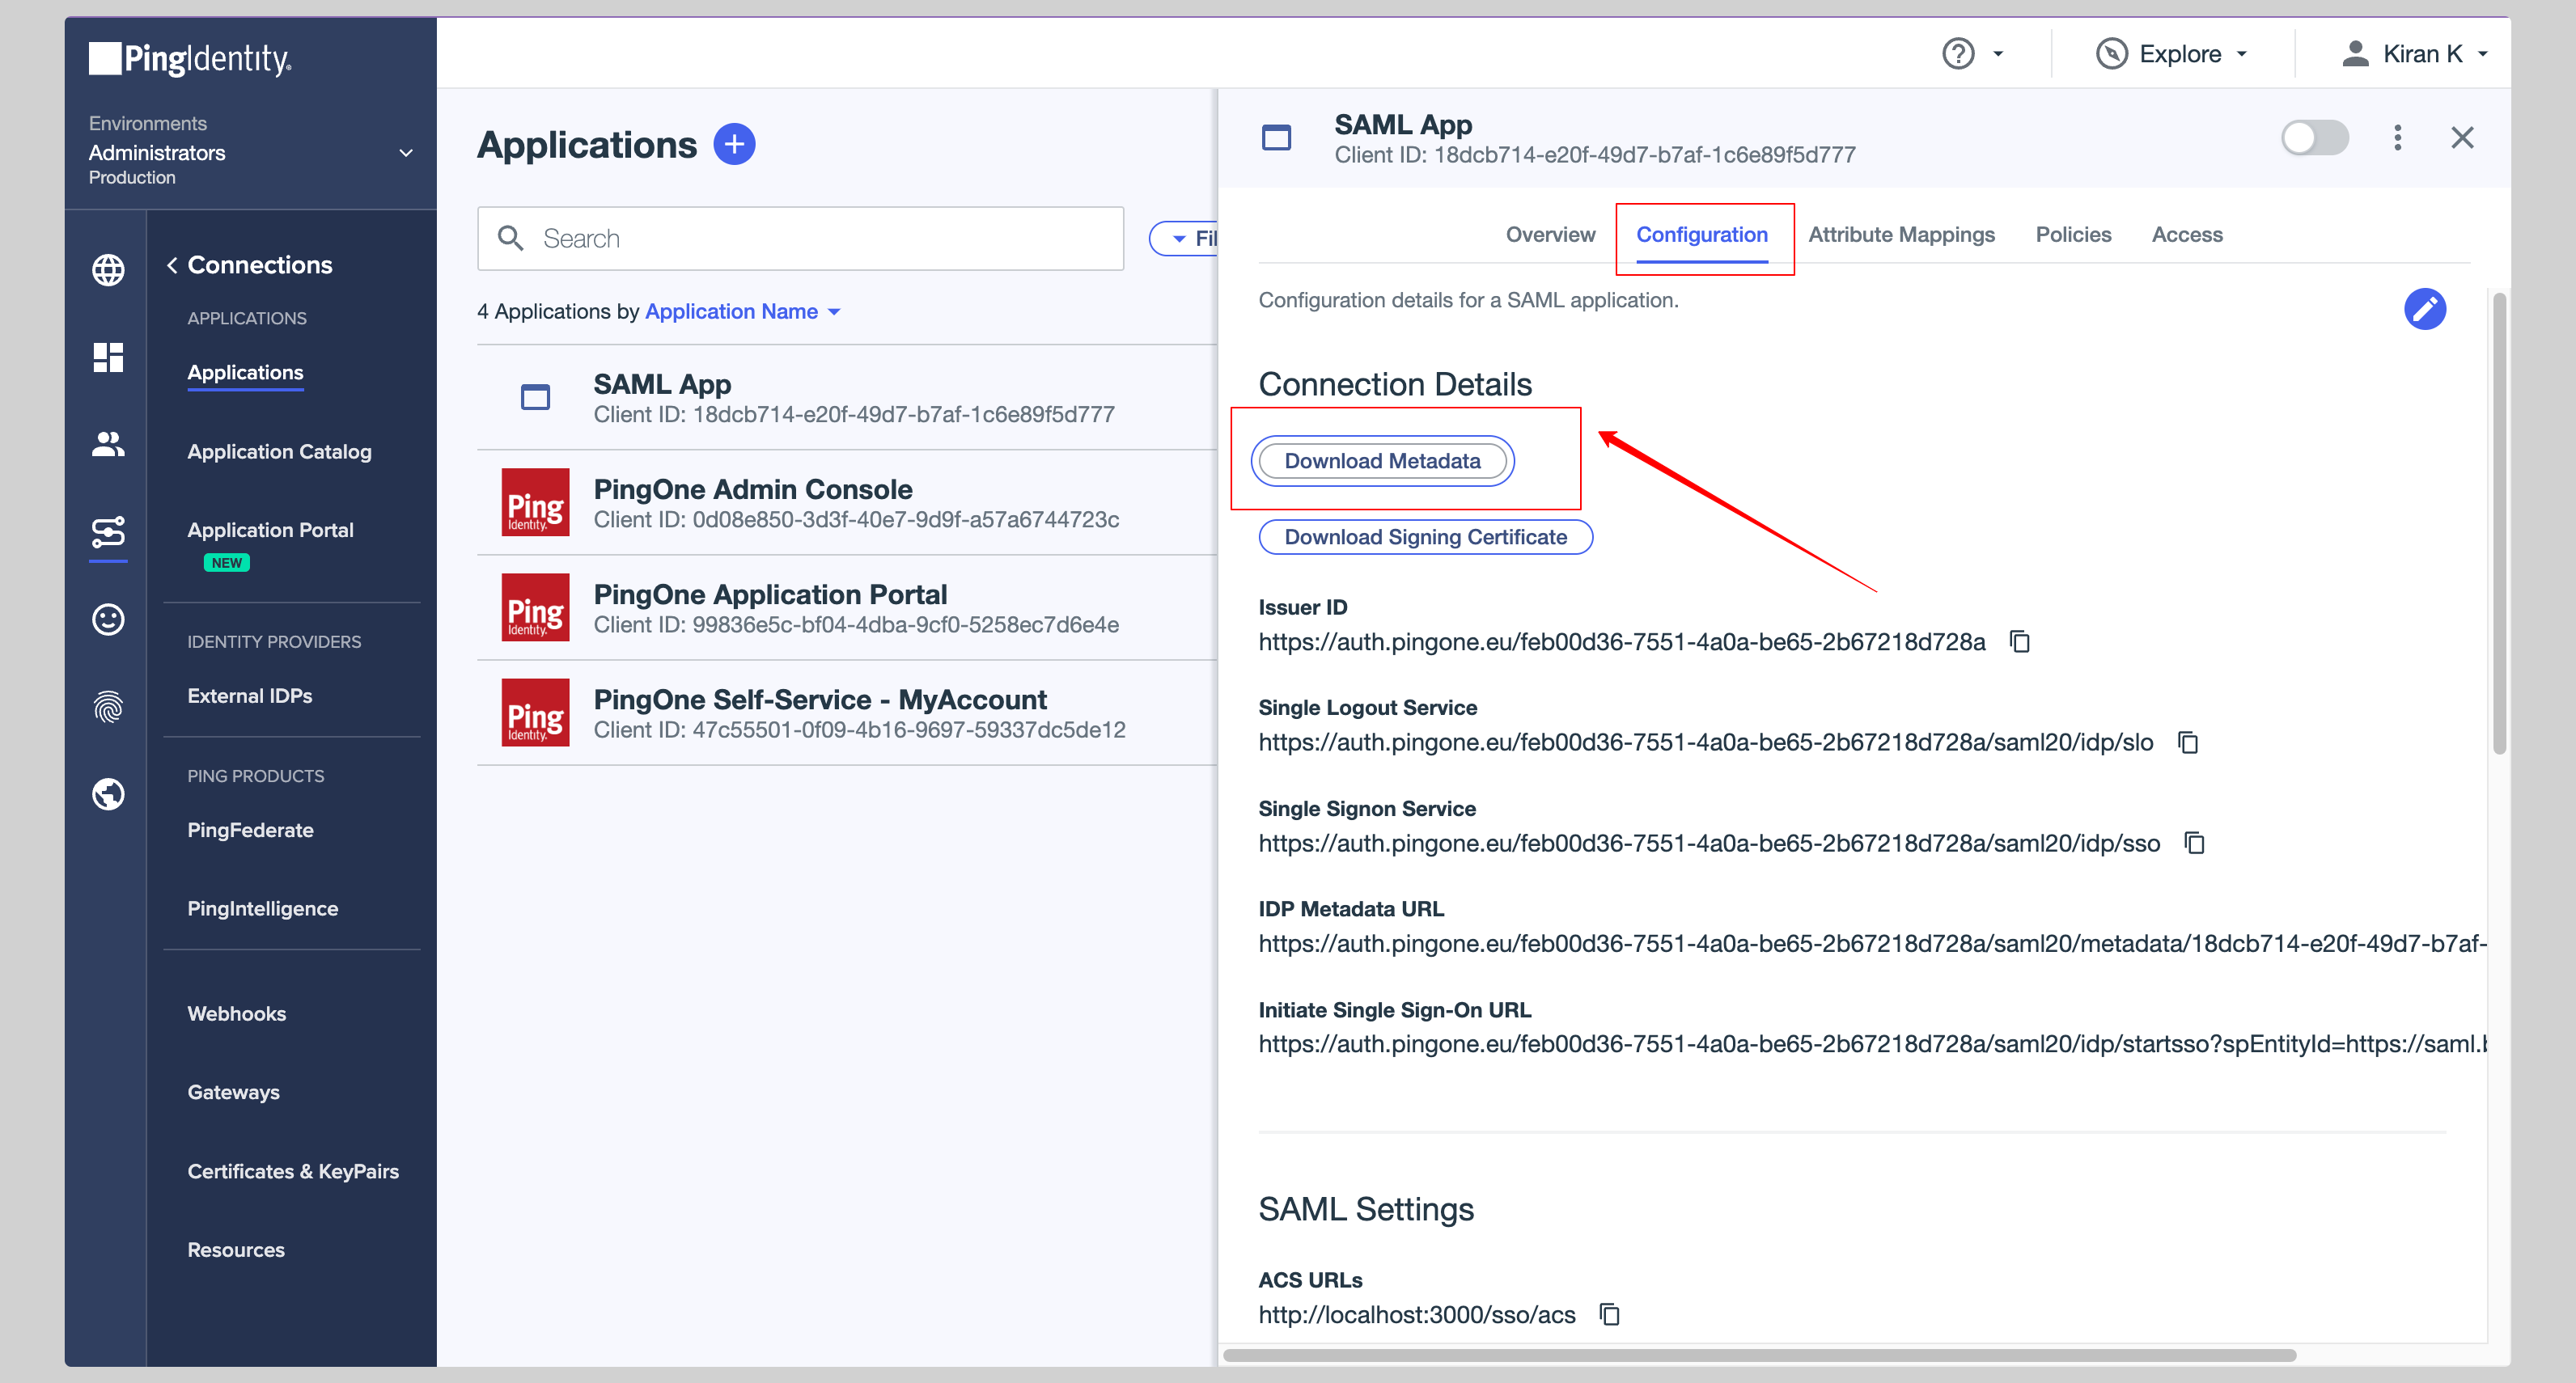
Click the Configuration tab from the top and click Download Metadata to download the metadata XML file.
Attribute Mapping
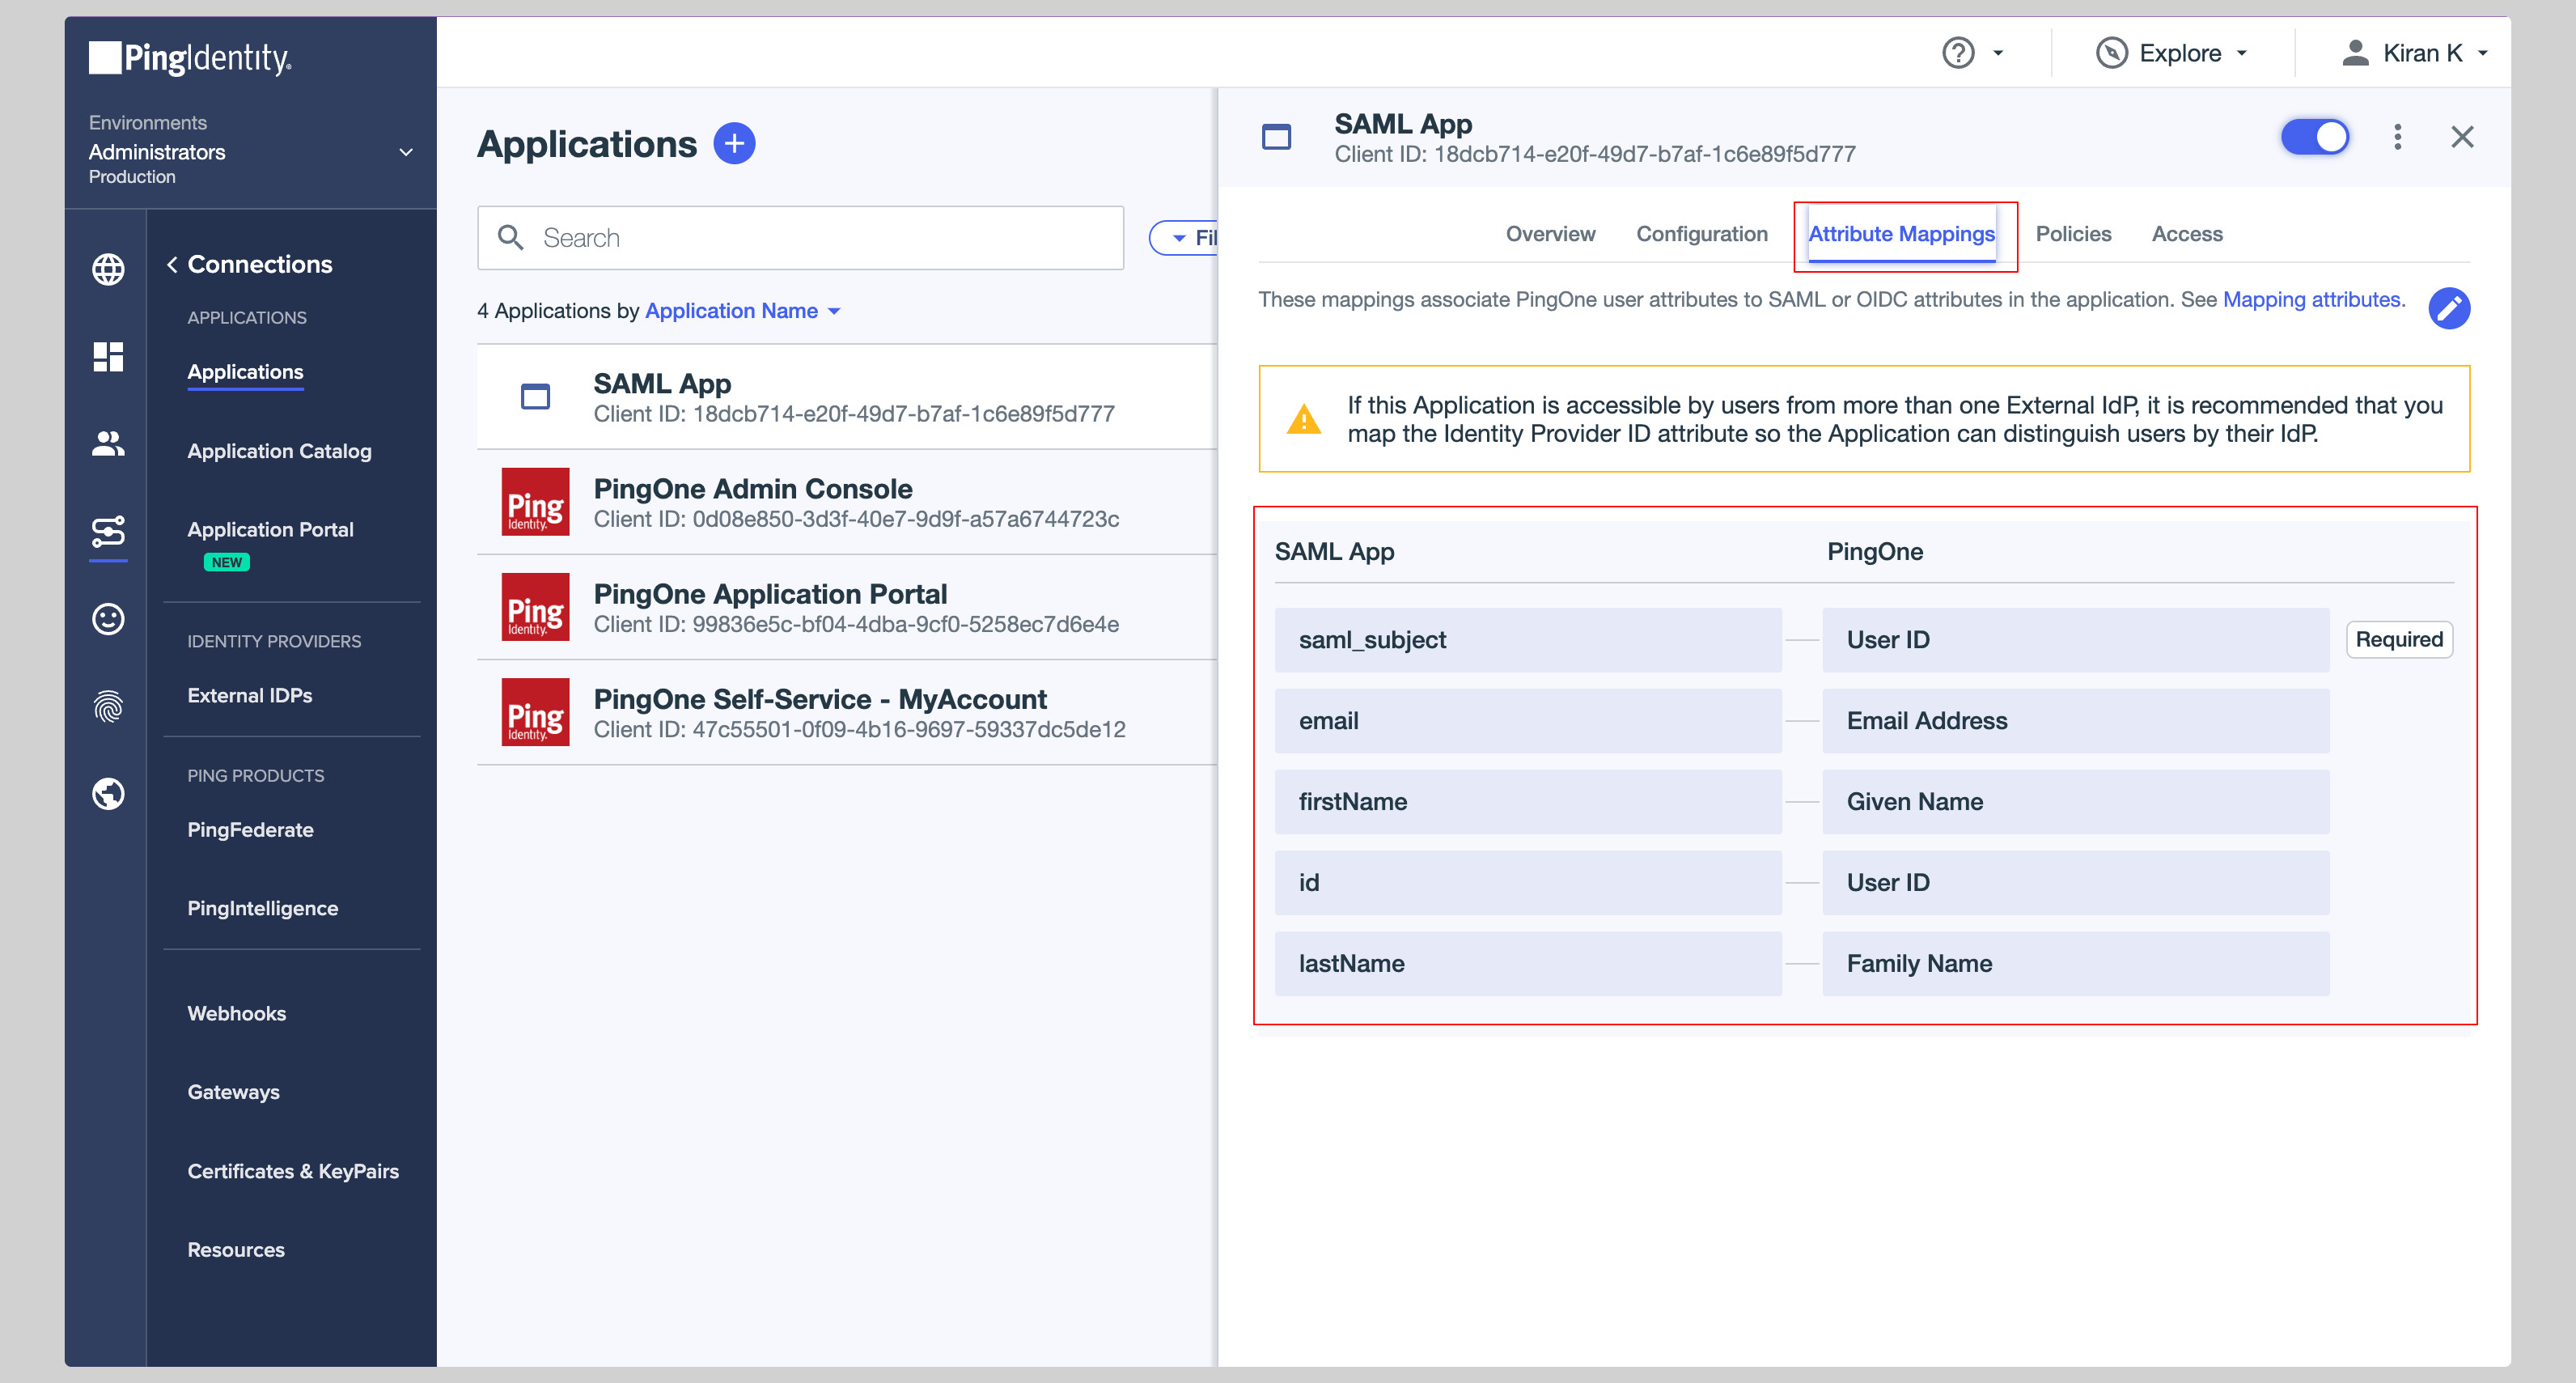
Click the Attribute Mappings tab from the top and you have to configure the following attributes:
| SAML App | PingOne |
|---|---|
| id | User ID |
| Email Address | |
| firstName | Given Name |
| lastName | Family Name |
See the screenshot below.
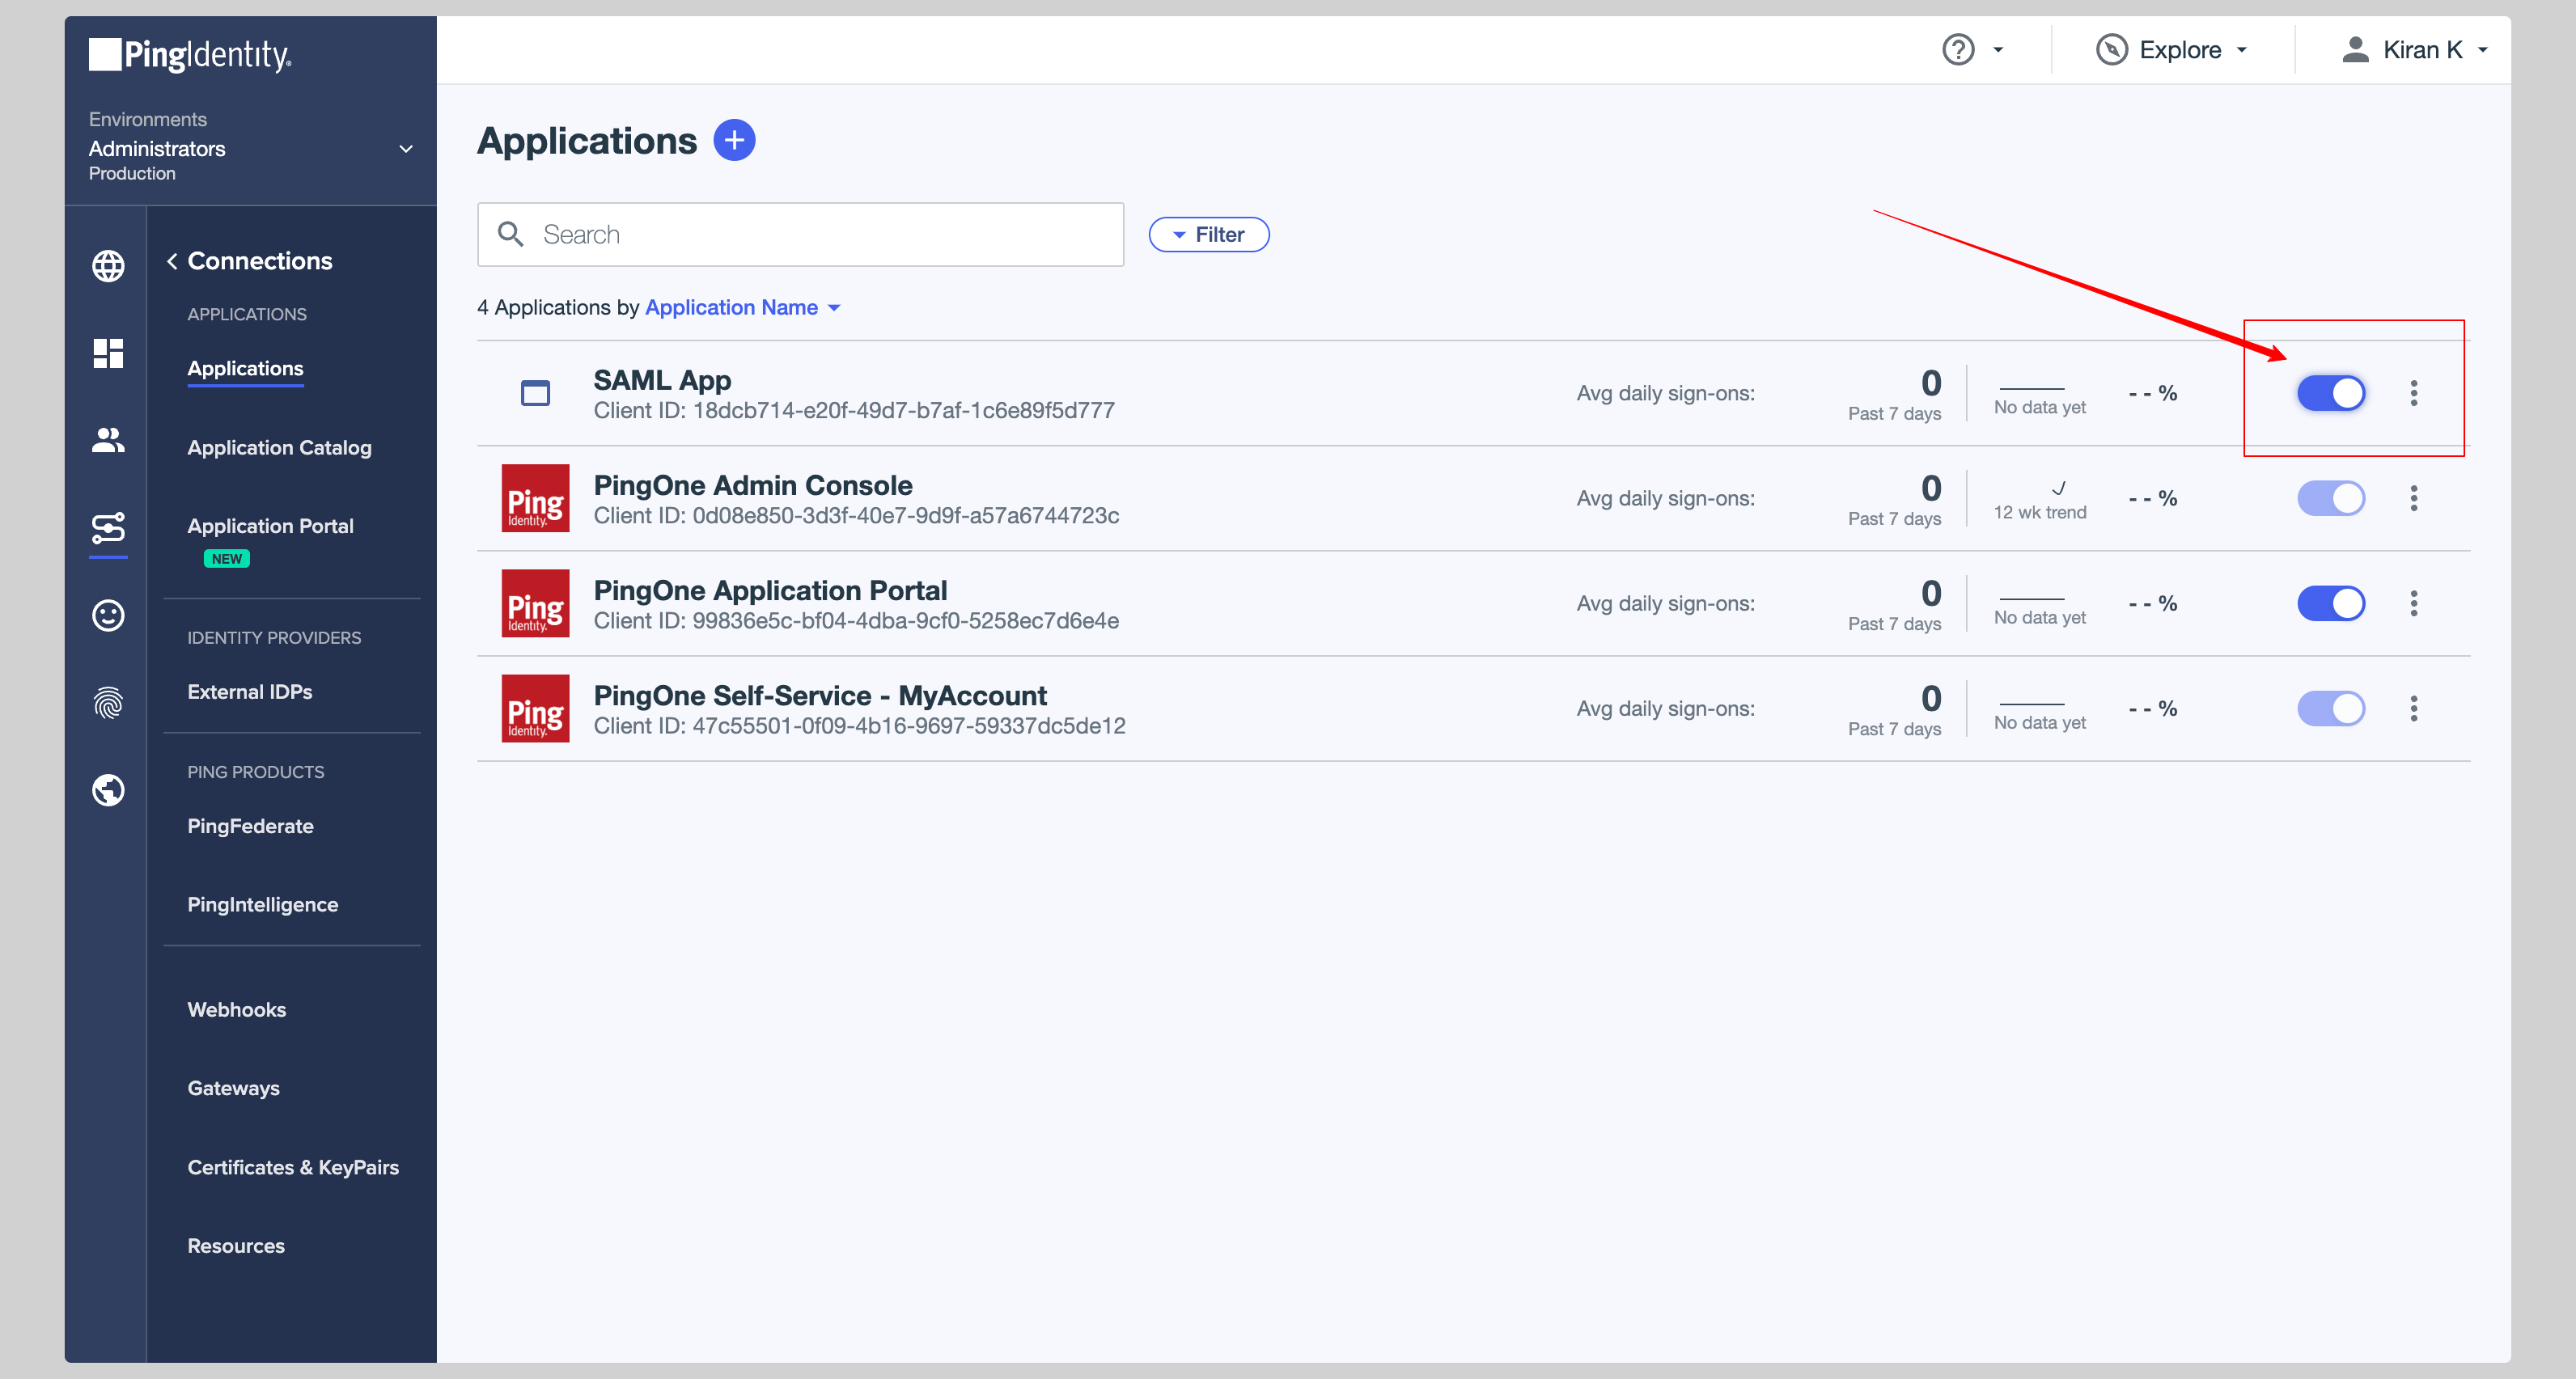
Make sure you have enabled your app so that it can be used by the users. You can do this by clicking the Toggle button next to your app.
Next steps
You've successfully configured your custom SAML application for PingOne SAML. At this stage, you can assign users to your application and start using it.
Resources
Got a question? Ask here